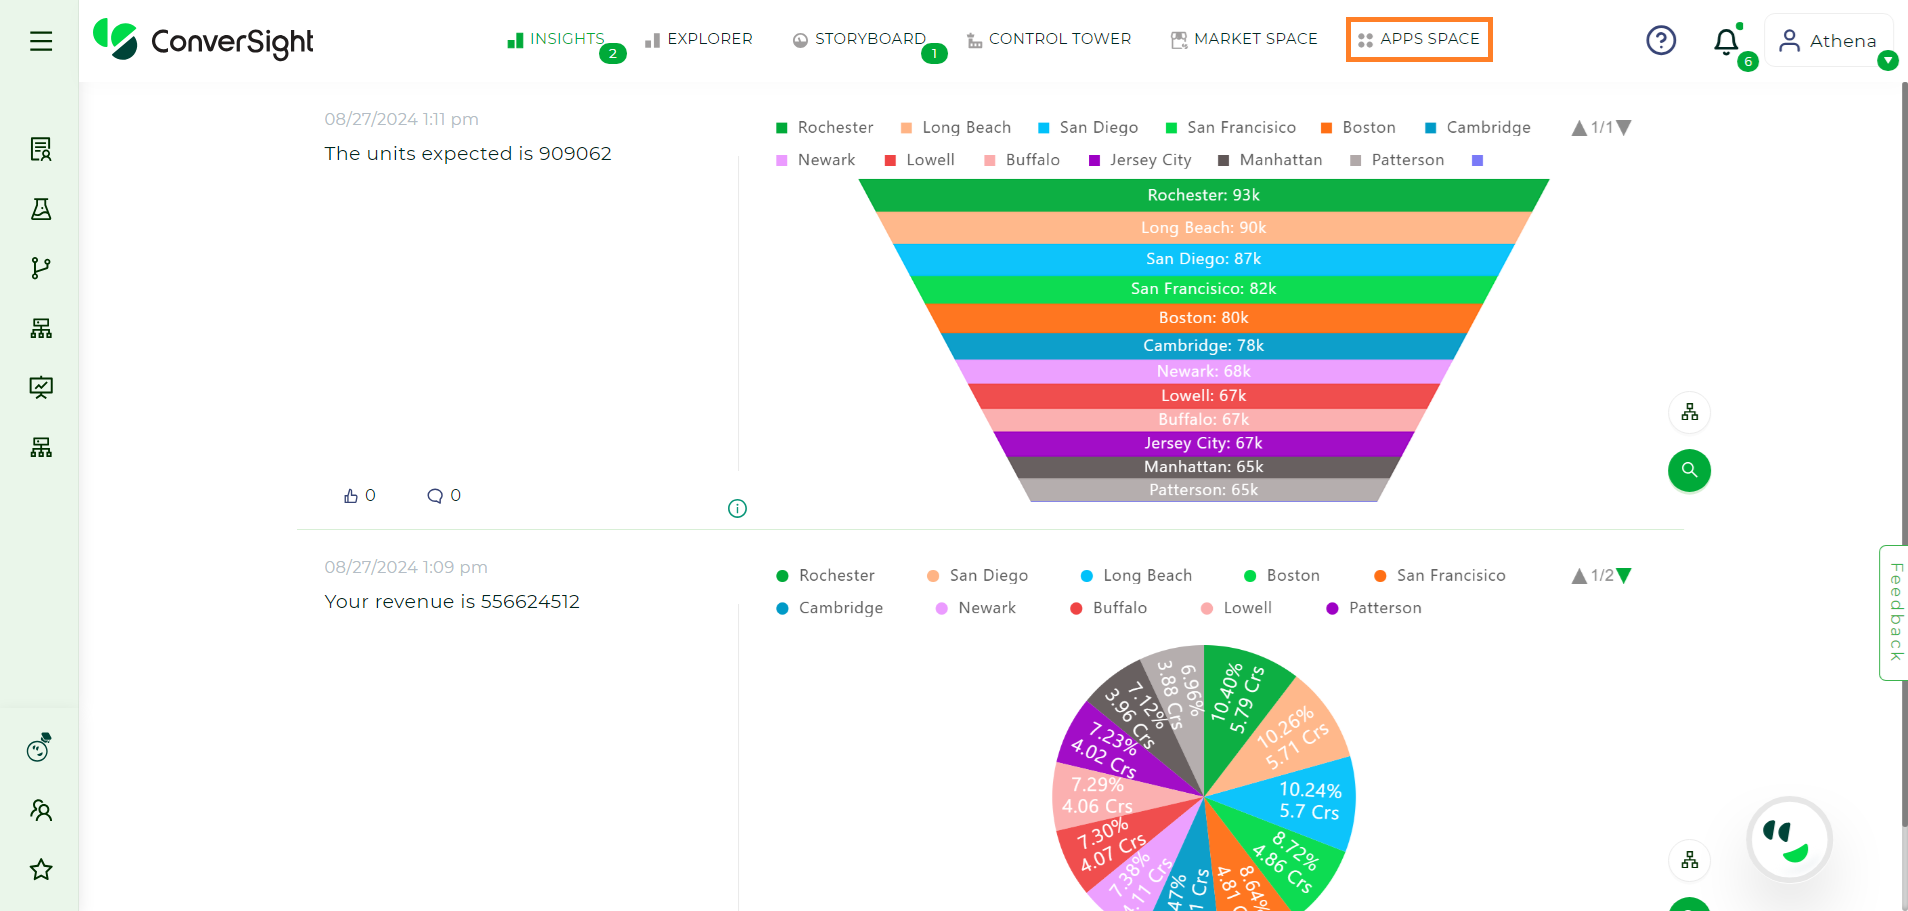
Apps Space#
The Apps Space in ConverSight is a central area from which users can access all subscribed-to resources. It provides a centralized location for launching the diverse tools, apps and resources required to do various tasks. The Apps Space serves as a dashboard from which users may access the required resources without having to wade through multiple menus and submenus. It provides a simple and intuitive interface that enables users to quickly and efficiently access the required resources. Apps Space resources may include analytical apps, data visualization tools and business intelligence dashboards in addition to process automation tools and collaboration platforms. The Apps Space is intended to give users with an effective means of accessing the resources they require to complete their task, thereby streamlining the process and enhancing productivity.
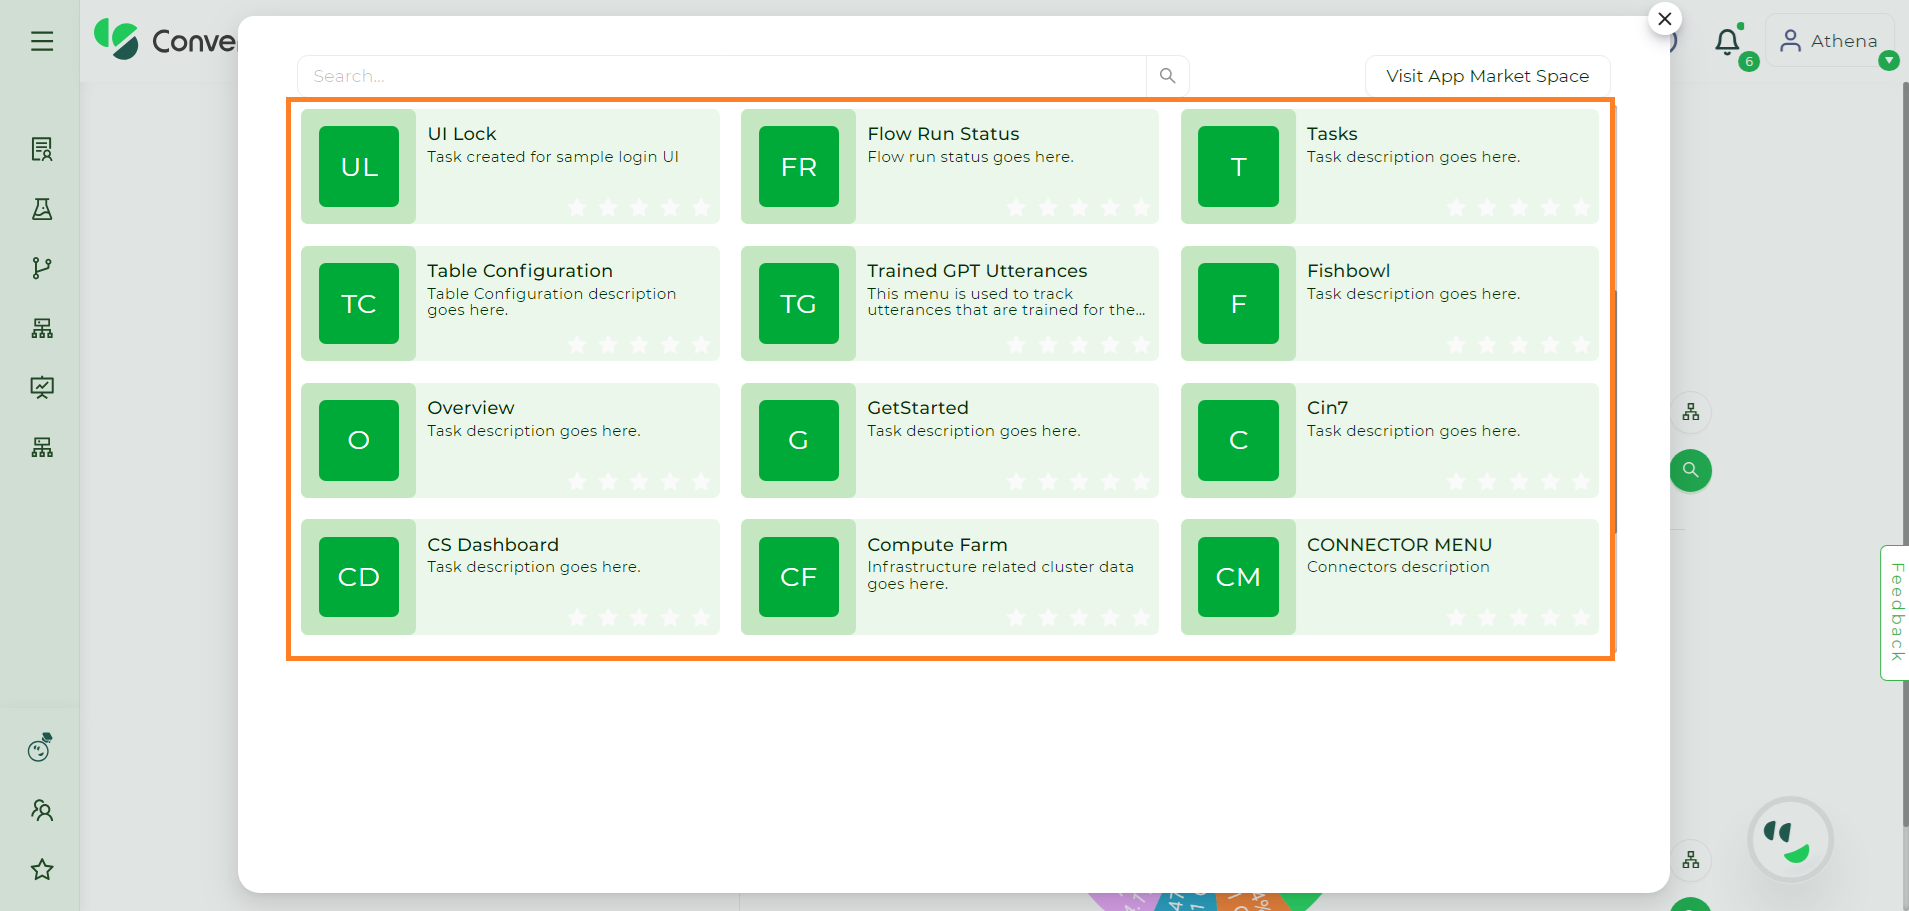
Apps Space is where you can access multiple components such as Tasks, Flows, Compute Farm (clusters), Flow Run Status, CS Storyboard and Forms. Components to which you have access only will be displayed under Apps Space. You can also pin required items to your configuration menu on the left side of home page.
Apps Space#
Apps Space is similar to an app store in where you can view market space and add the necessary app to it at extra cost.
Apps Space#
Trained GPT Utterances#
Trained GPT Utterances is a tool that enables users to monitor all the expressions learned by the GPT model. By tracking these trained utterances, users gain insights into the model’s comprehension, enhance performance through targeted adjustments and ensure a more refined and contextually accurate language generation. This tool provides a valuable resource for optimizing the model’s language capabilities and improving its overall functionality.
Accessing Trained GPT Utterances#
Here is a comprehensive step by step guide for effectively utilizing the Trained GPT Utterances tool:
Step 1: Access the subscribed tools by clicking on the Apps Space.
Apps Space#
Step 2: Select the Trained GPT Utterances tool from the Apps Space.
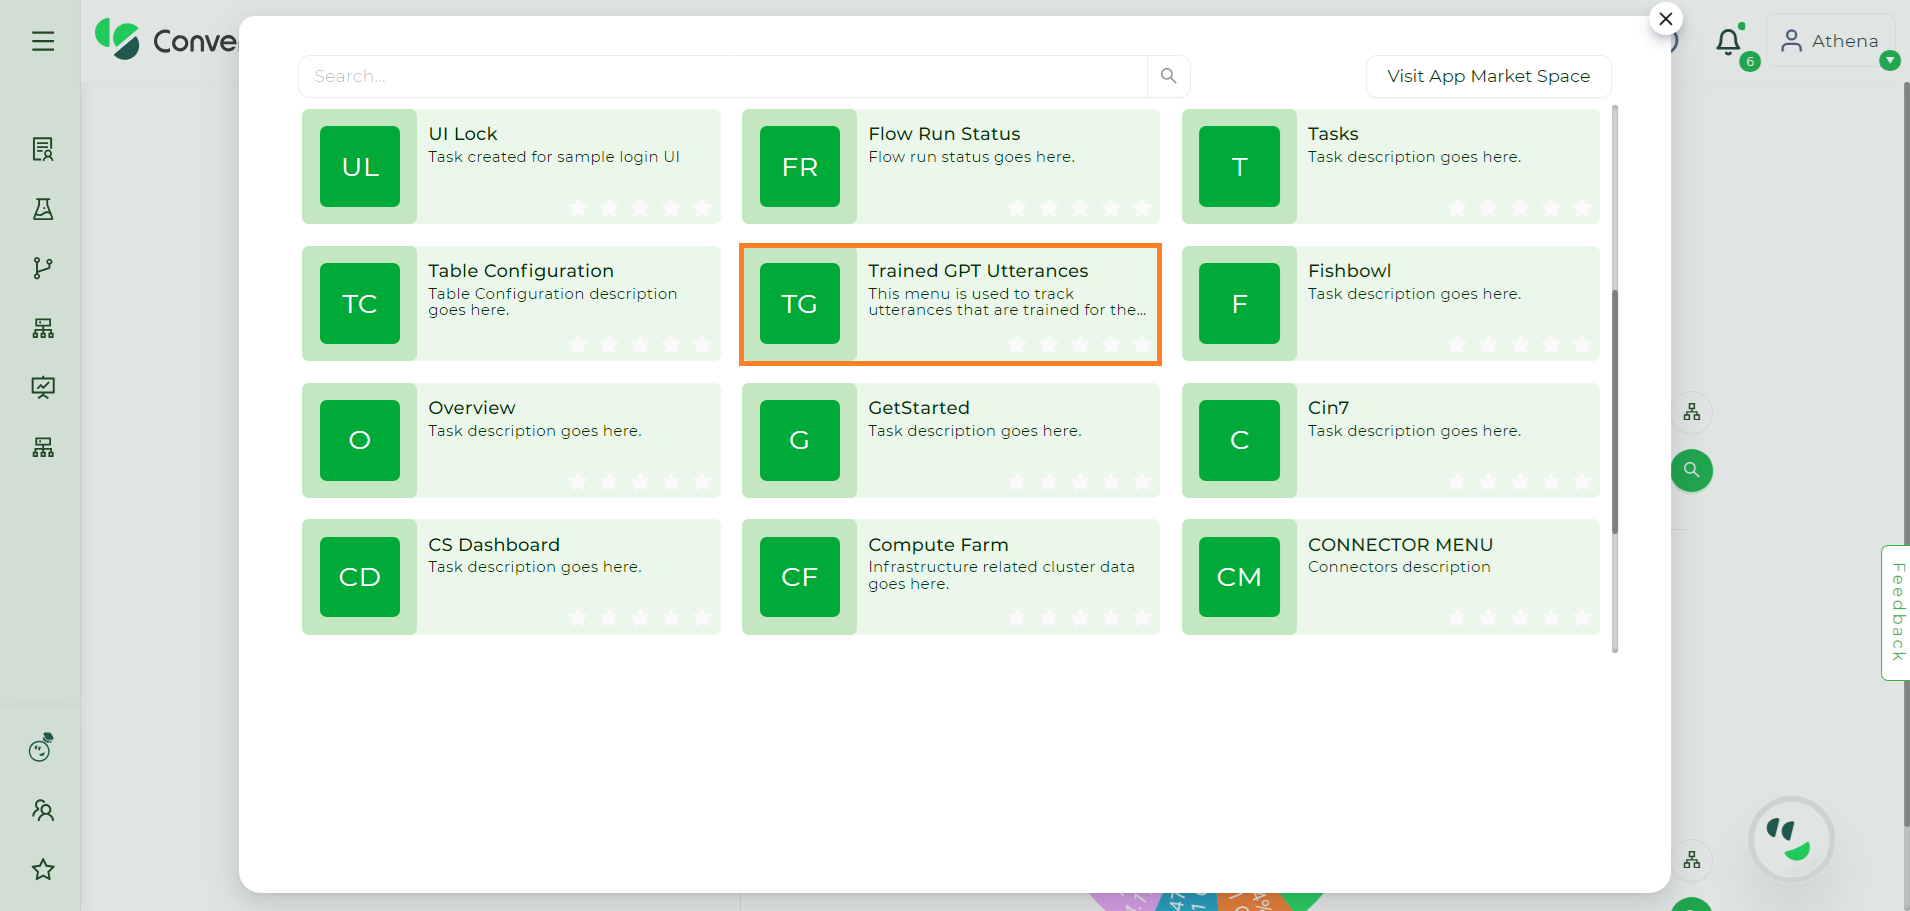
Trained GPT Utterances#
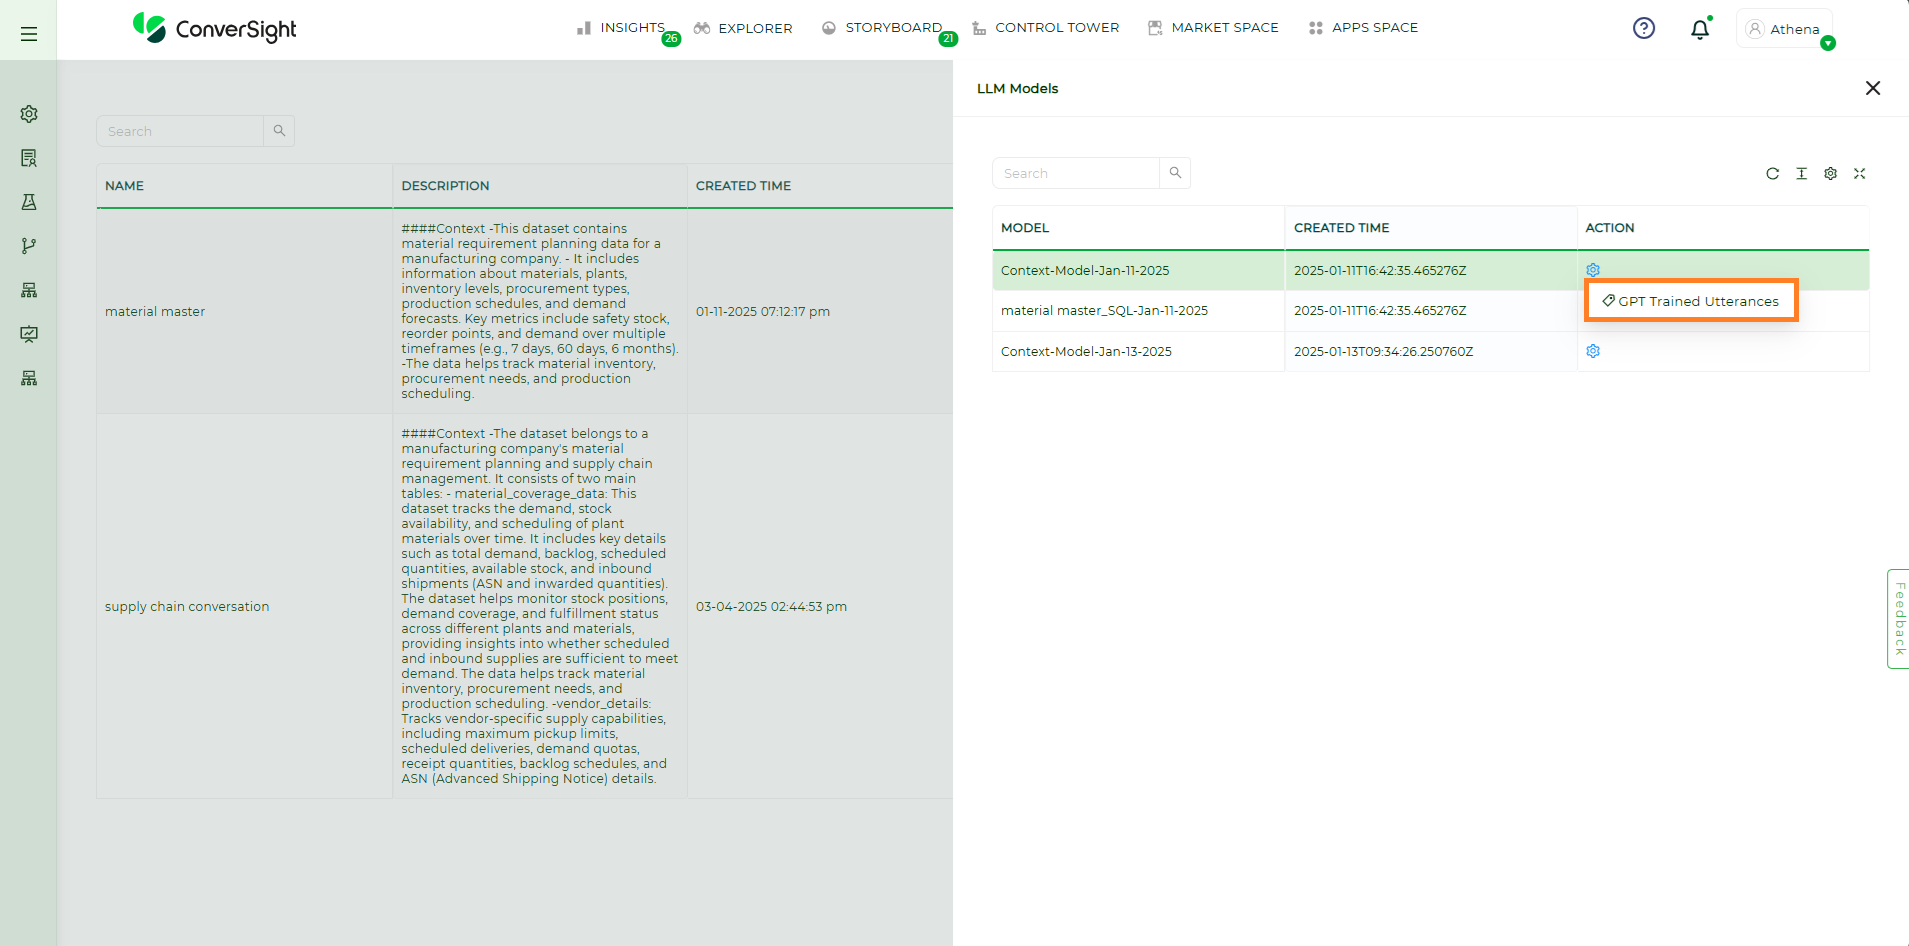
Step 3: Go to the Settings Icon of the dataset and select LLM Models to view the models trained on that particular dataset. It is important to note that the dataset will be listed only if the custom dataset model is activated.
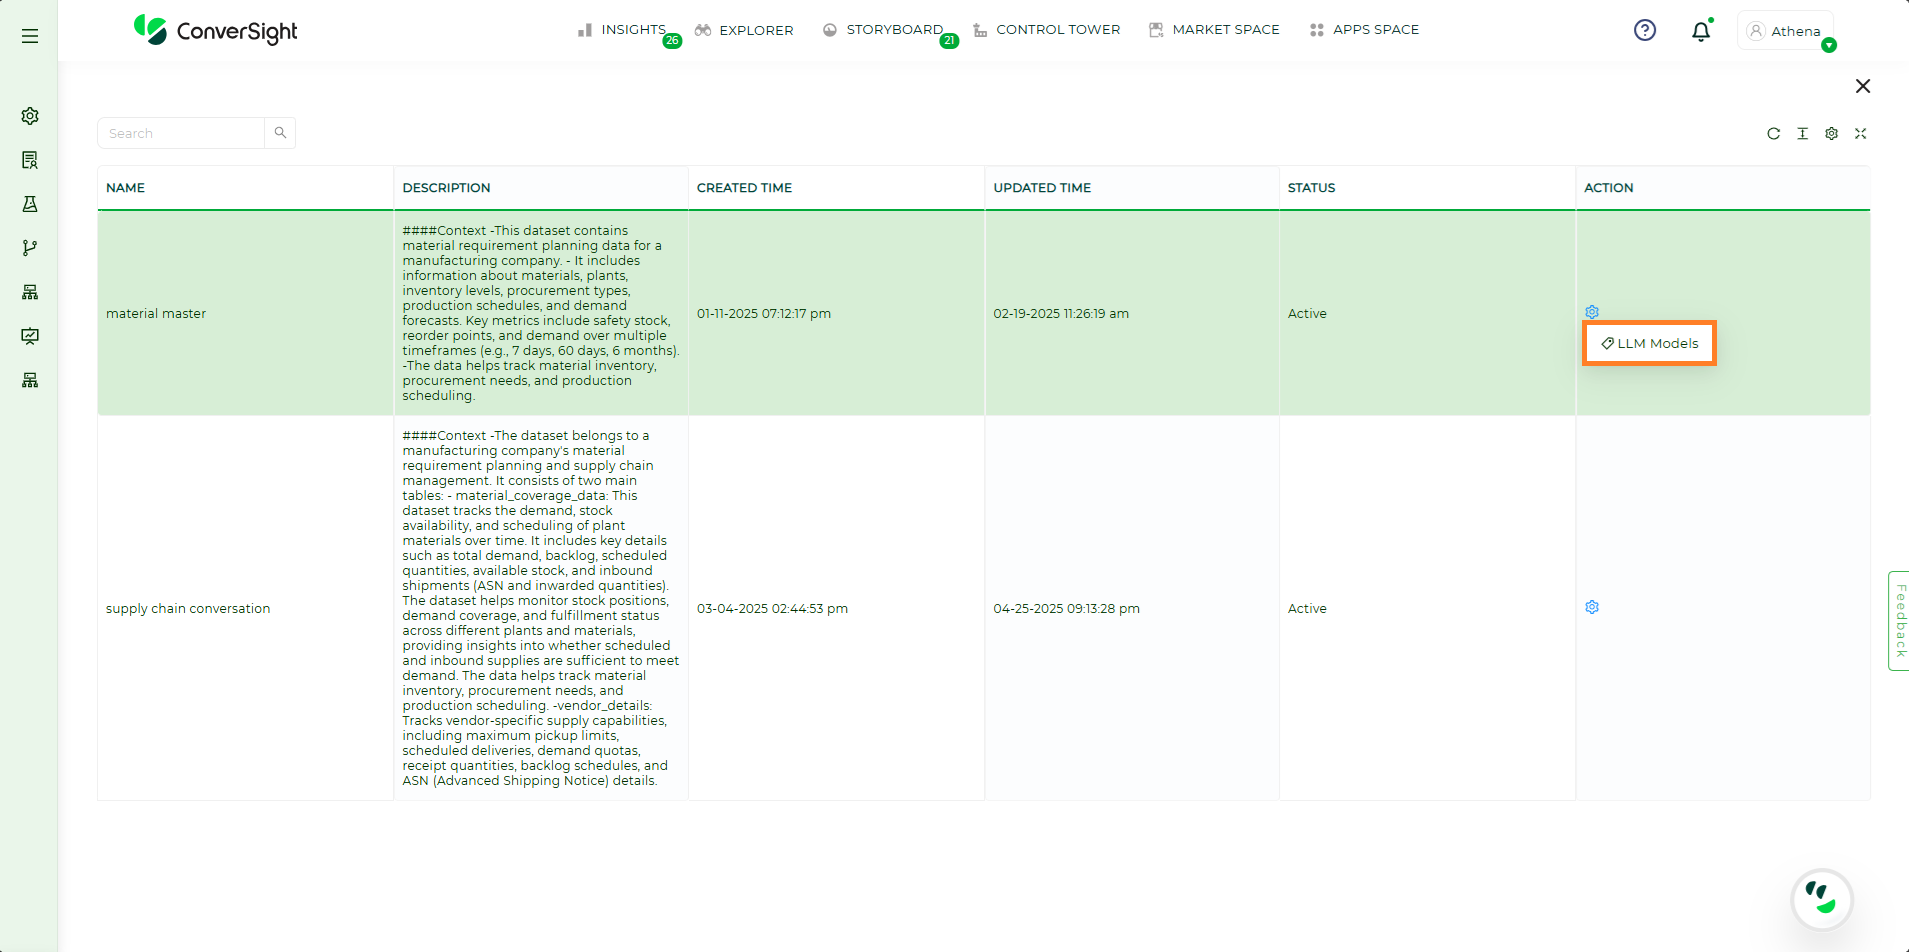
LLM Models#
Step 4: To view or update the trained utterances of the model, click on the Settings Icon and choose GPT Trained Utterances of that specific model.
GPT Trained Utterances#
Step 5: Users have the option to eliminate an utterance by switching its status from Trained to Un-Train.
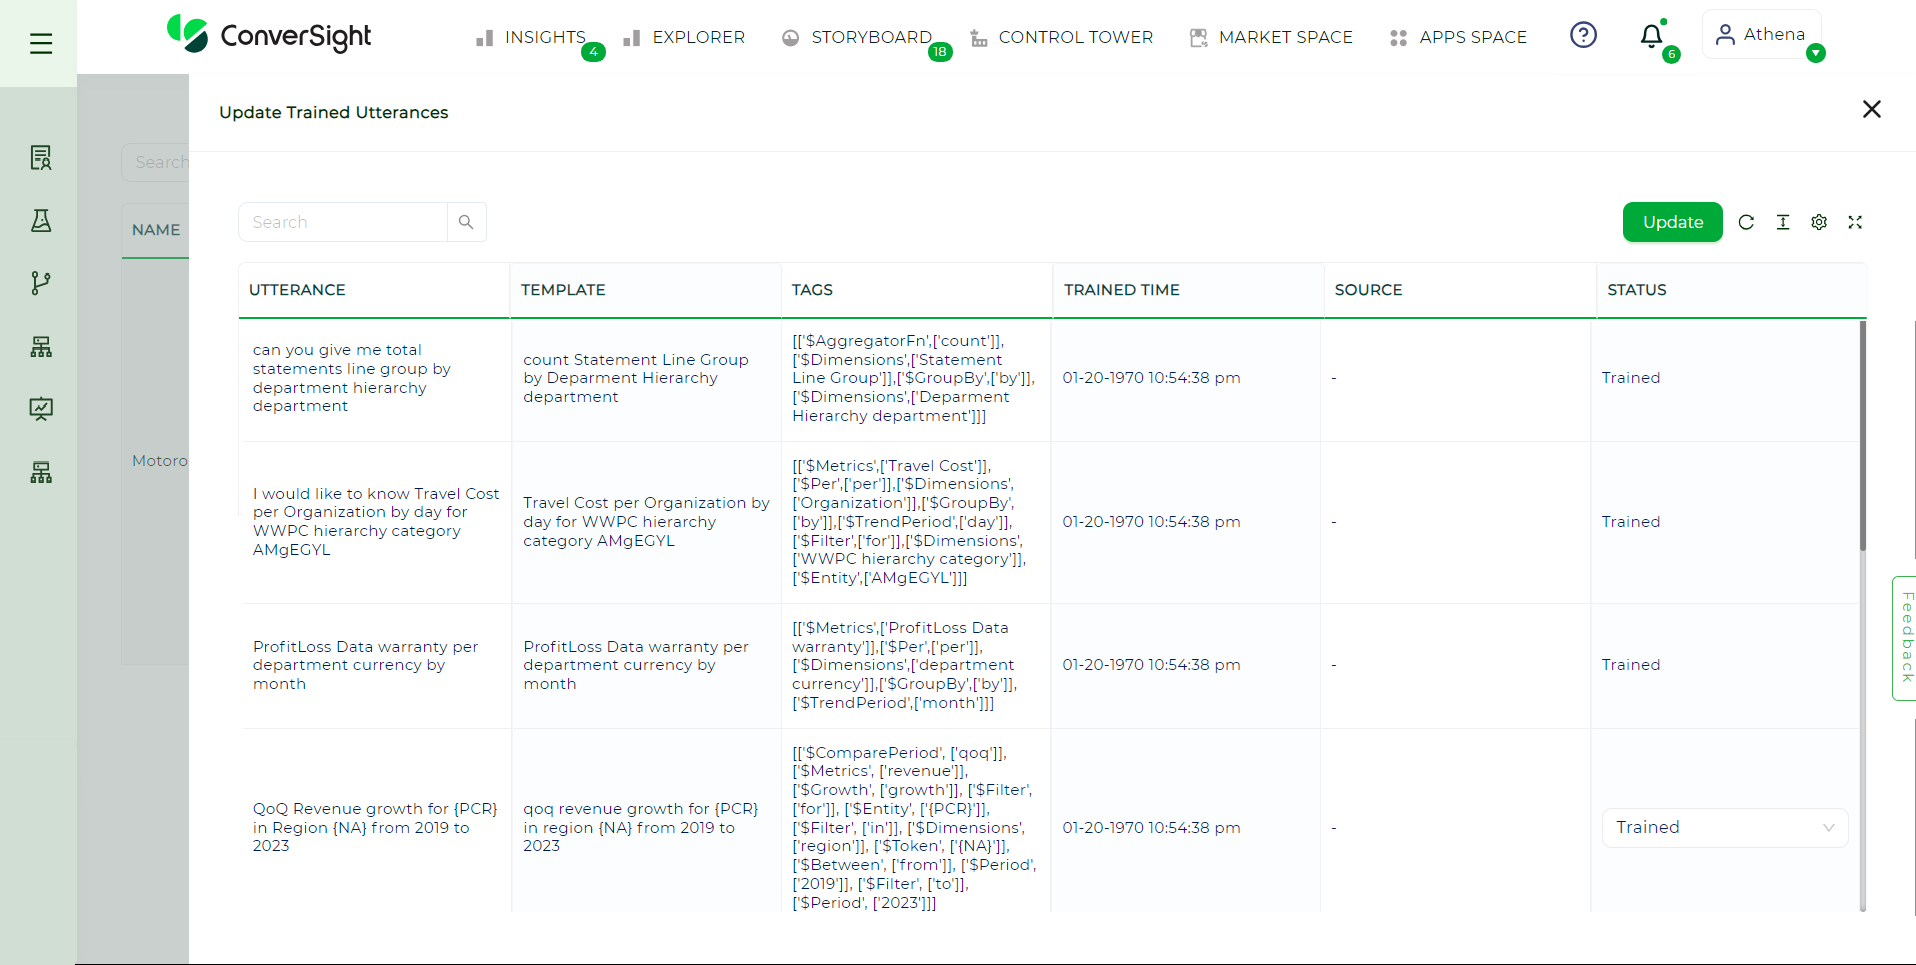
Status#
Email Insights#
Email Insights is a powerful feature within the ConverSight platform that allows users to effectively manage and analyze their scheduled email insights. Users can utilize the Email Insights feature to swiftly share updated insights in just seconds. This feature is integrated with existing roles and groups, enhancing data security.
To watch the video, click on Email Insights.
Accessing Email Insights#
Email Insights can be accessed from the Apps Space in the ConverSight platform.
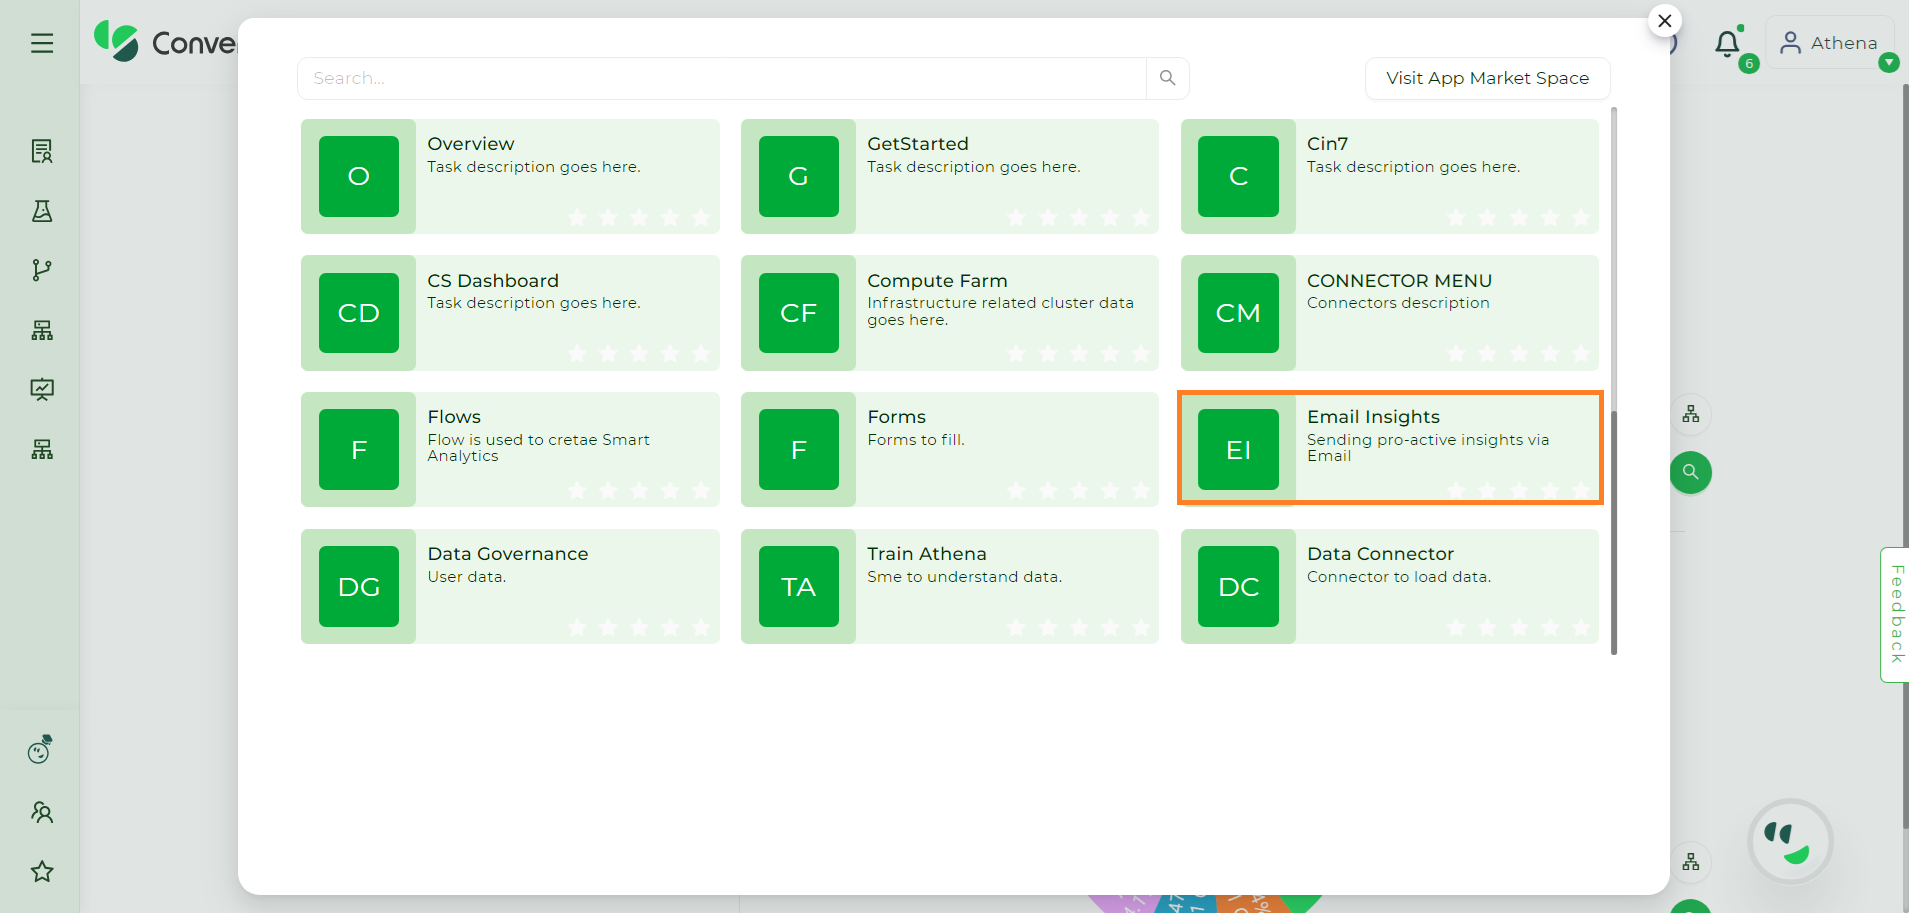
Email Insights#
Email Insights#
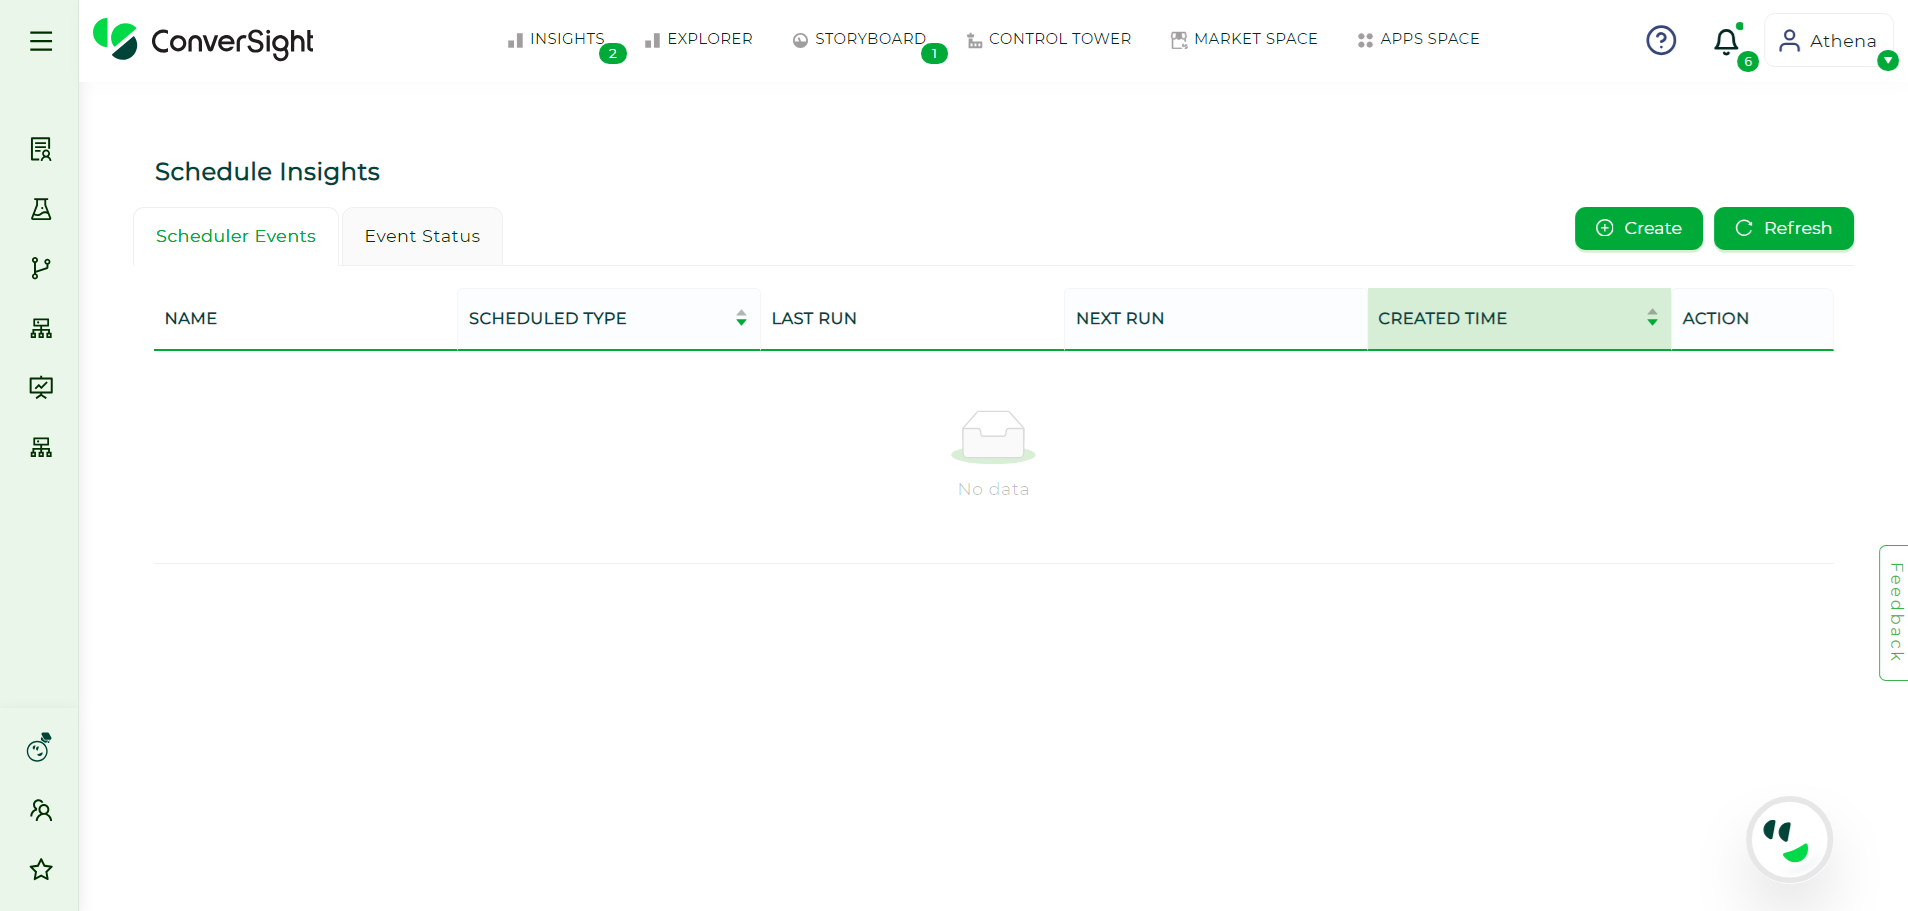
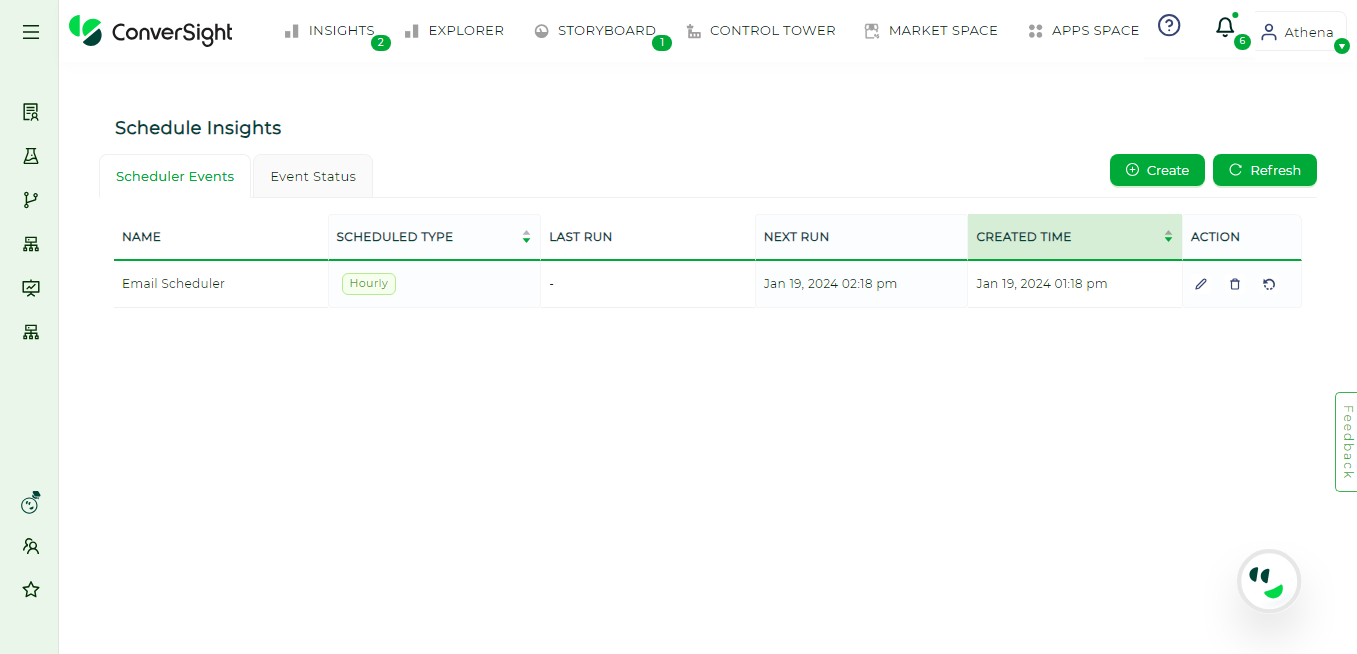
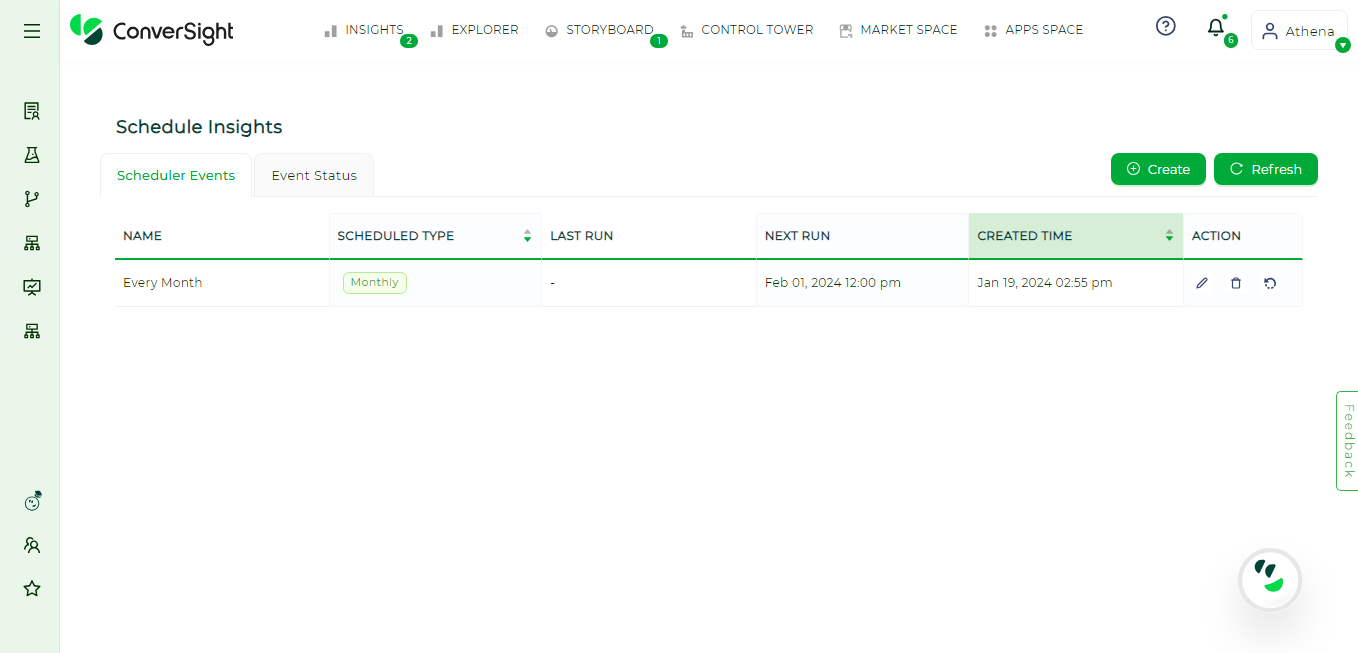
Scheduler Events#
The Scheduler Events page provides a detailed overview of all your created scheduled insights in a well-organized tabular format. Users can conveniently edit, delete or manually run email insights with ease. The Scheduler Events page consists of the following fields.
Argument |
Description |
|---|---|
Name |
Displays the name of the created scheduled insights. |
Scheduled Type |
Specifies whether Hourly, Daily, Weekly or Monthly. |
Last Run |
Represents the previous run time of the scheduled insights. |
Next Run |
Represents the next run time of the scheduled insights. |
Created Time |
Represents the created time of the scheduled insights. |
Action |
Allows users to edit, delete and manually run the schedule. |
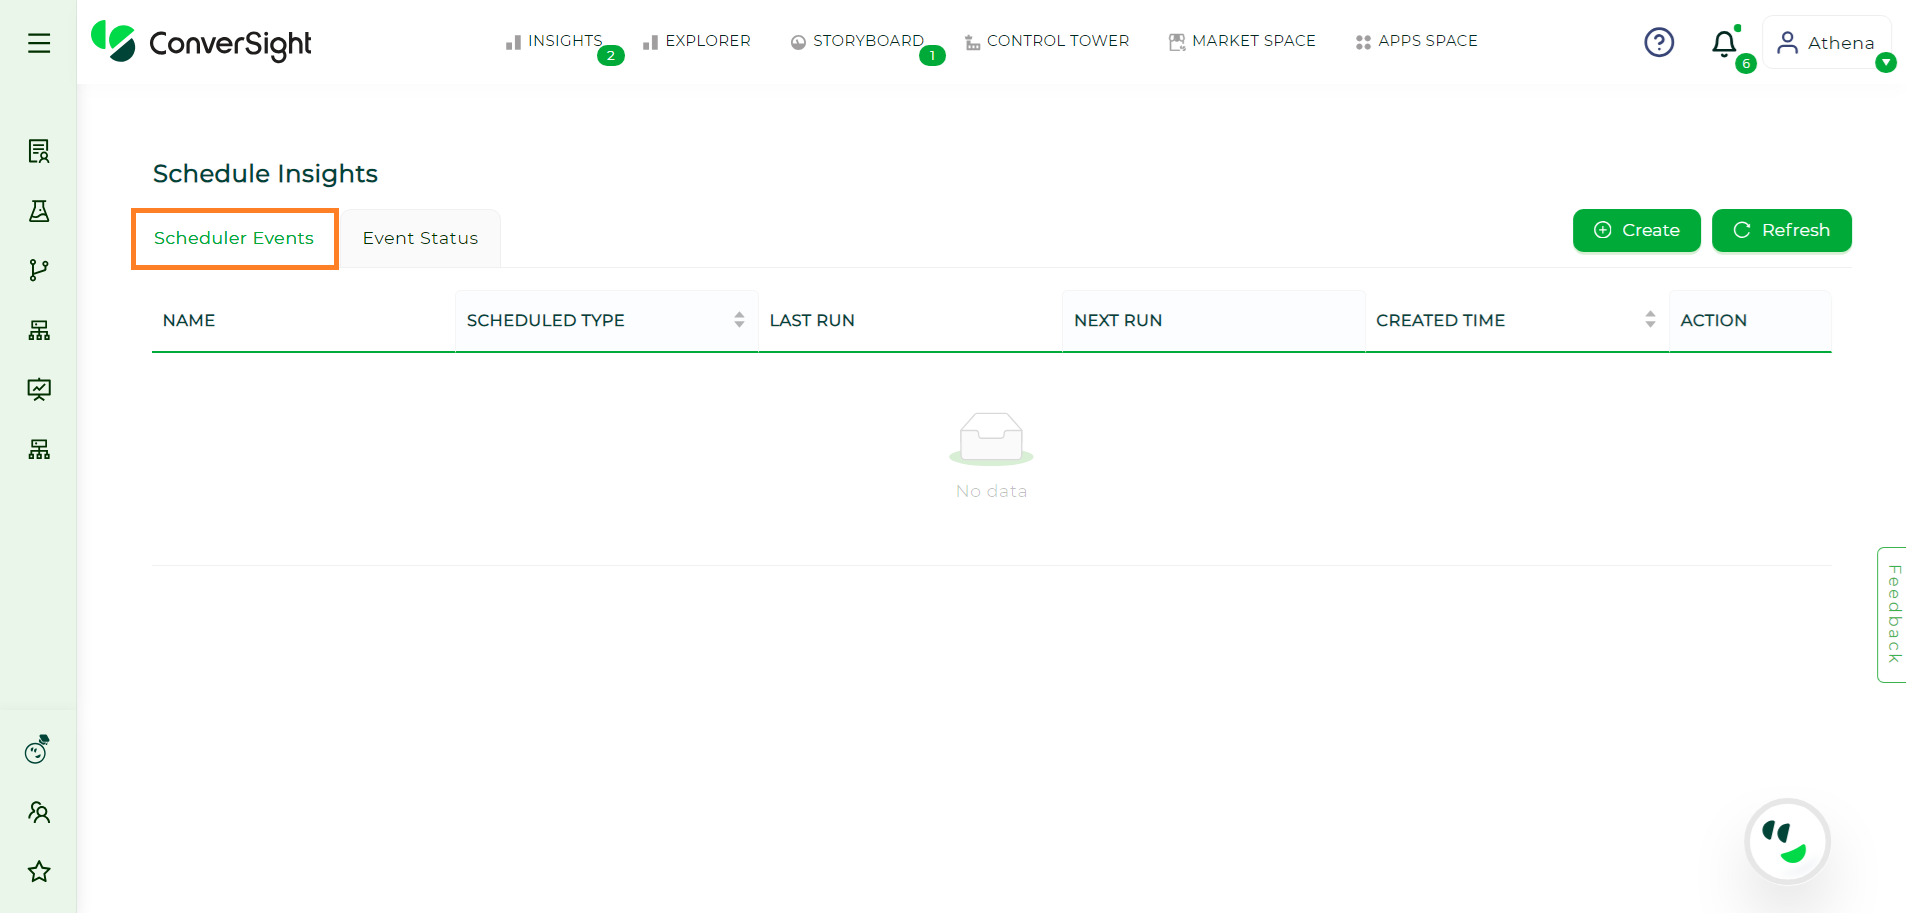
Scheduler Events Page#
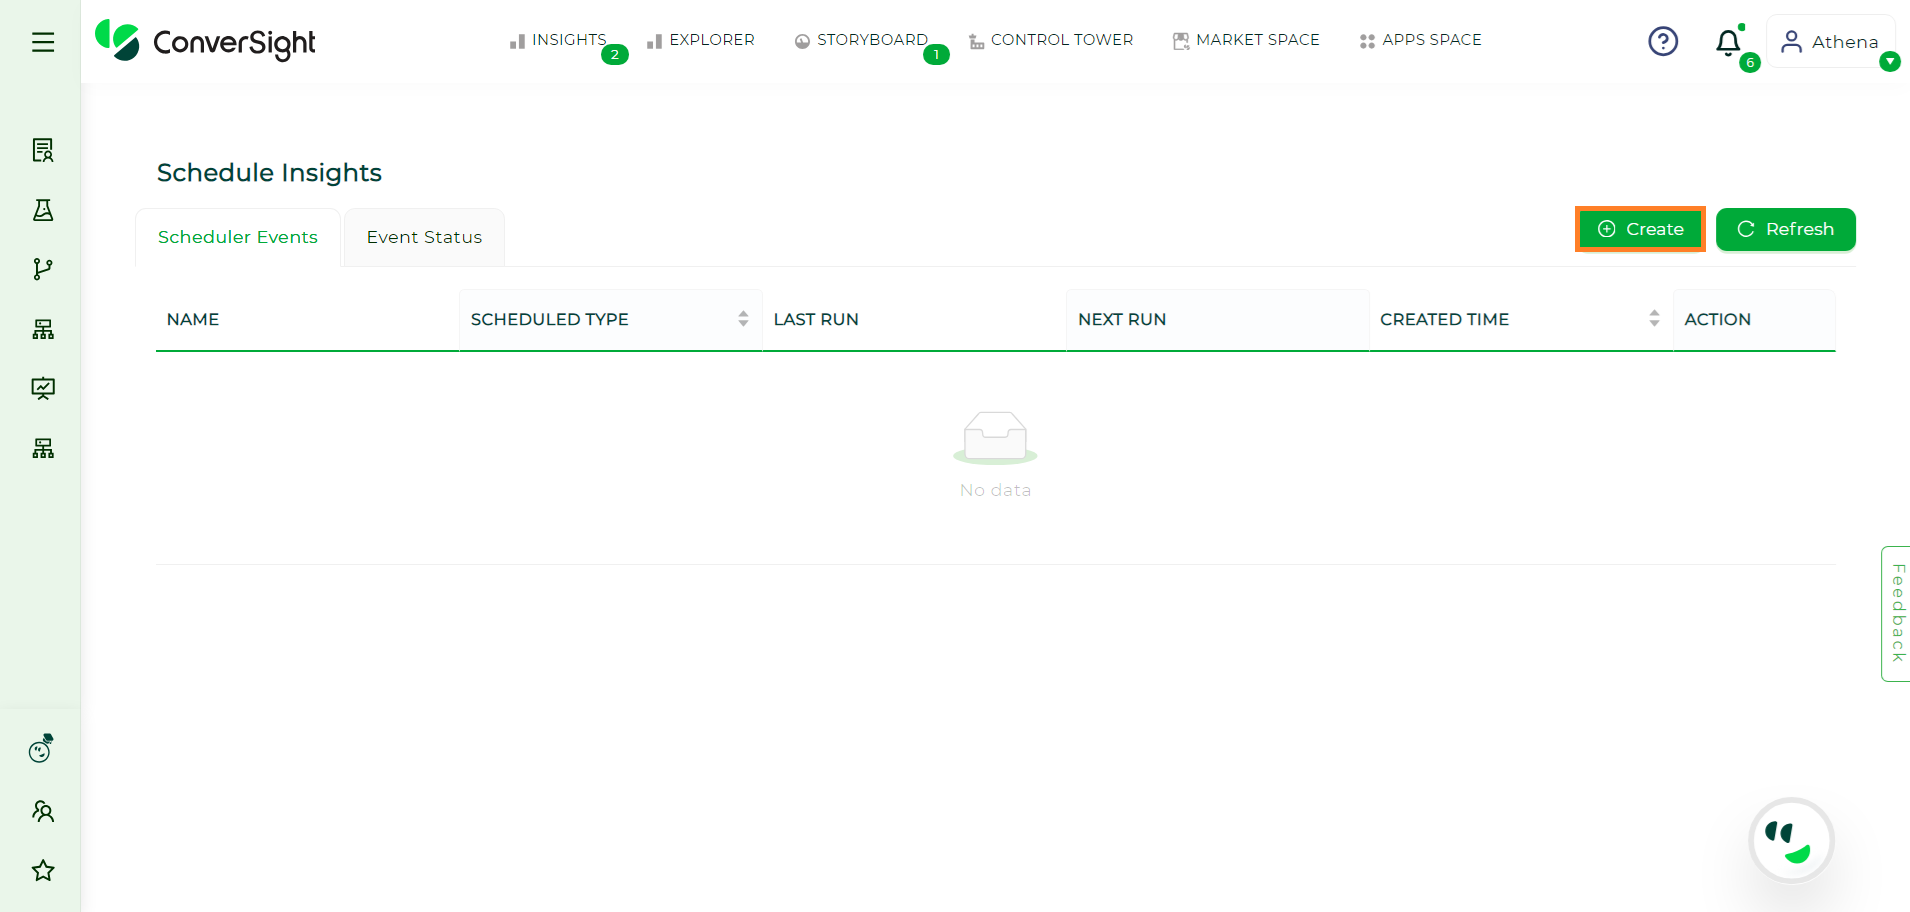
Creating Scheduled Email Insights#
To create schedules for insights, click the Create button on the Schedule Insights page.
Creating Email Insights#
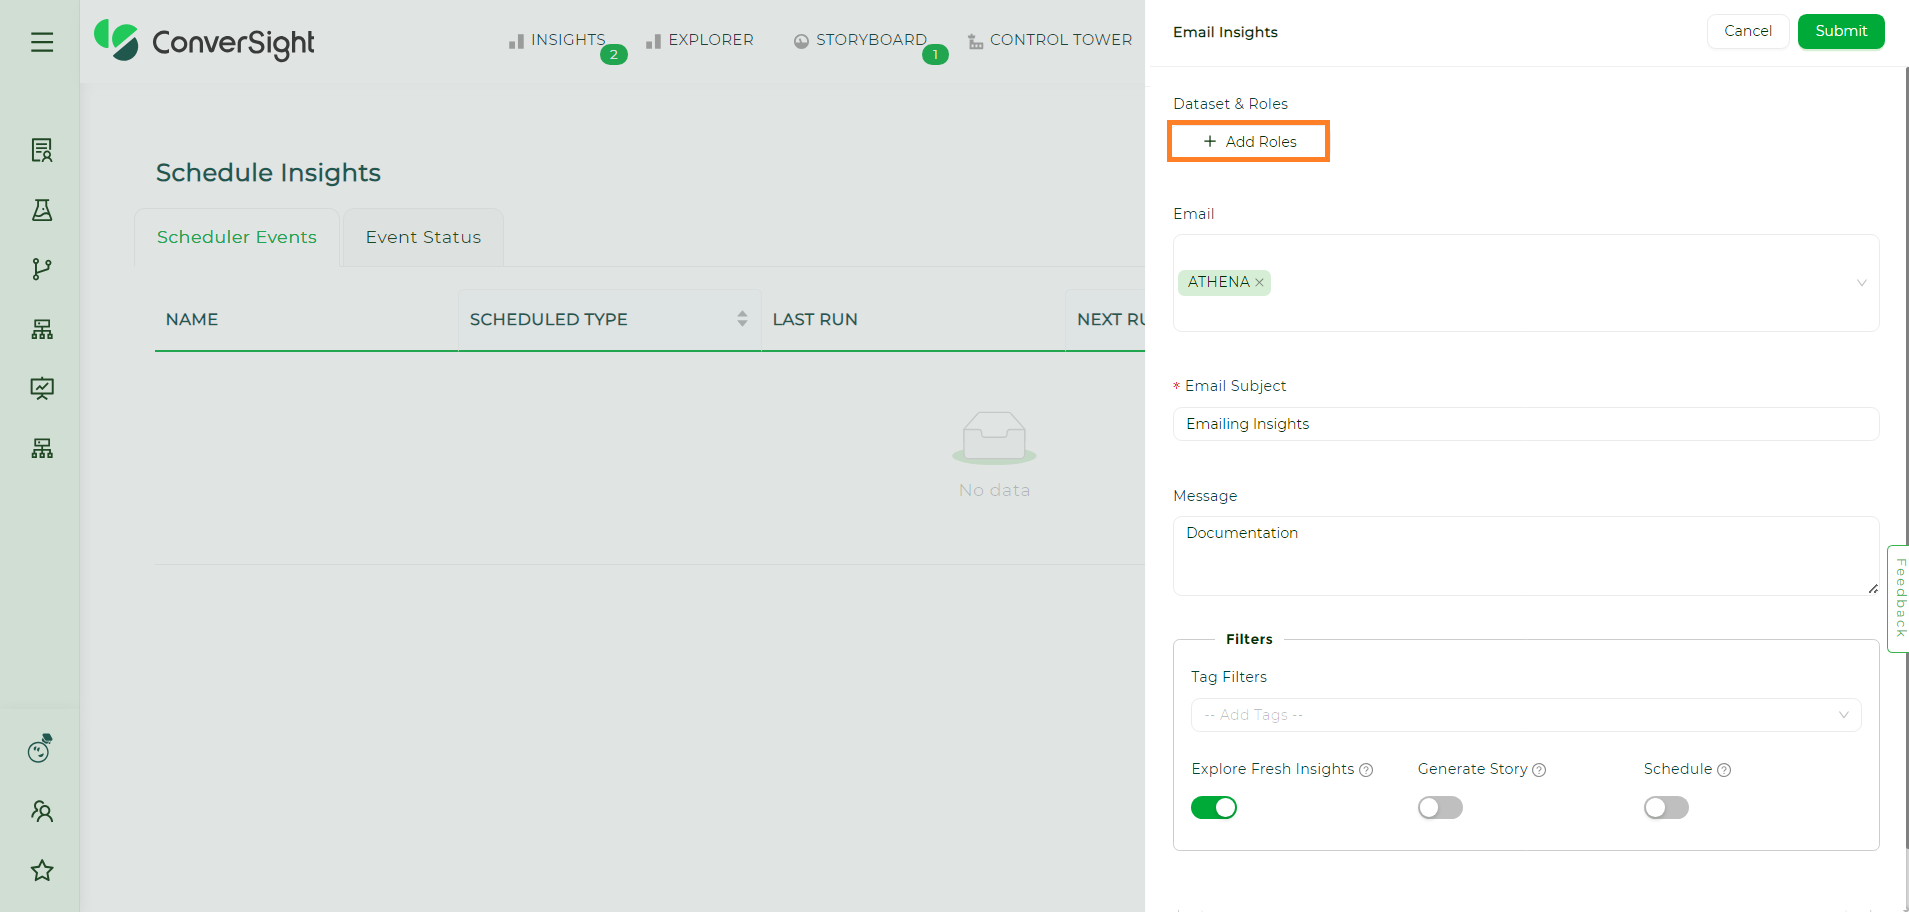
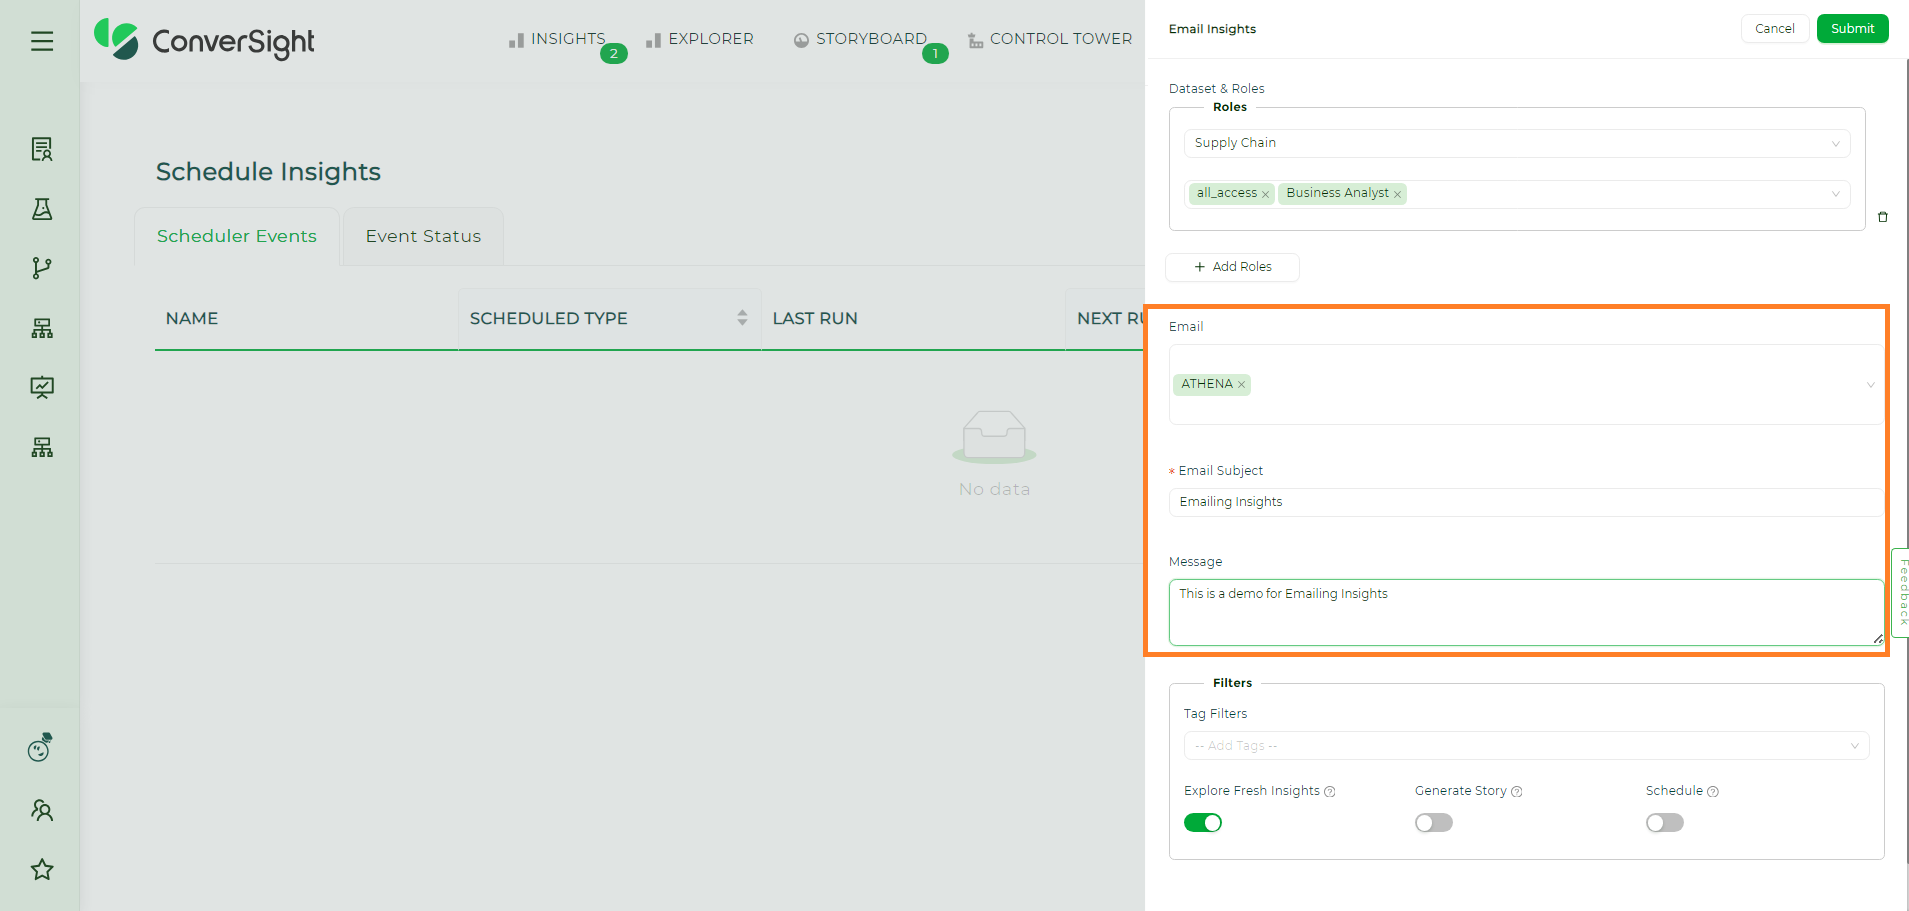
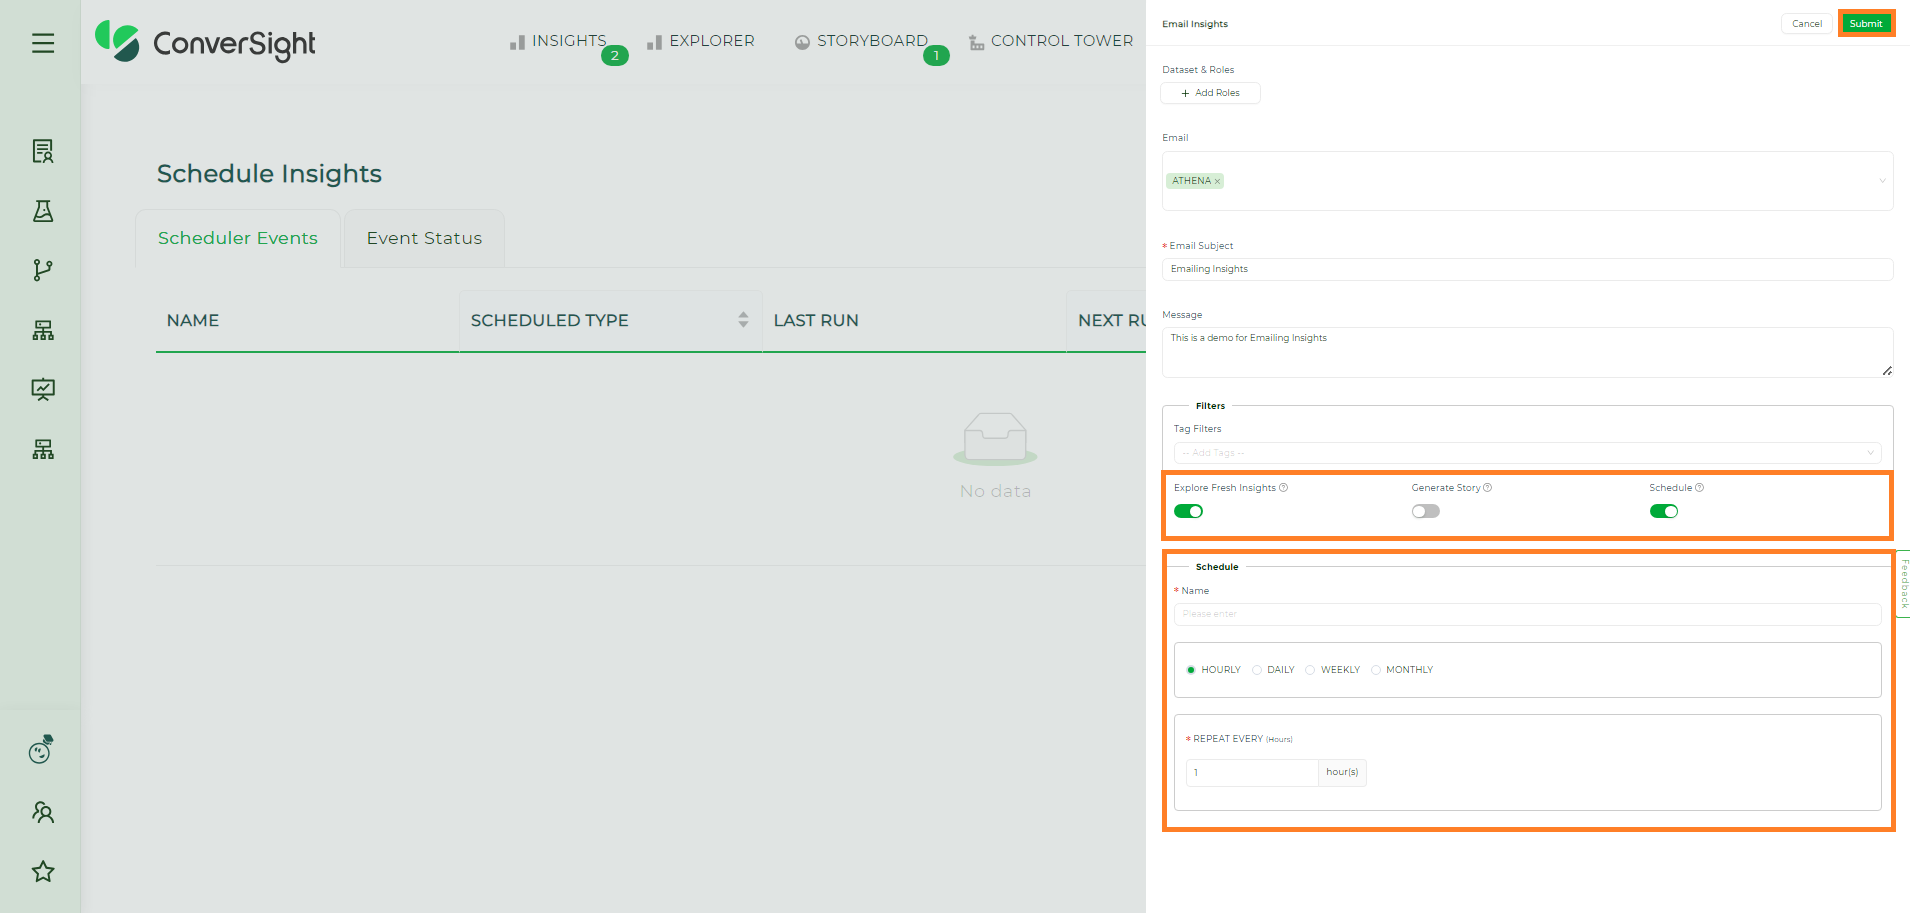
Dataset & Roles#
When sending email insights to a particular user or group, it is important to select the appropriate dataset and roles. If users wish to add dataset and roles, they can do so by clicking the ‘+ Add Roles’ button to choose the preferred dataset and roles from the dropdown menu. The roles for that dataset will only be shown after selecting the dataset.
Dataset and Roles#

Dataset and Roles#
Users can add more than one role if required using the Add Roles button. Using the Delete icon users can delete the dataset and roles that are applied.
NOTE
Adding Datasets and Roles are optional while creating email insights.
Email Section#
Email – Users must provide the email address of the recipient in the Email space provided.
Email Subject - The email subject is a mandatory field that helps recipients quickly understand the purpose of the message. By default, ‘Insights for you’ is the email subject.
Message - Adding a detailed explanation about the insights in the message is optional but can be included if needed.
Email Section#
NOTE
Users can only schedule email insights for individuals within their organization.
Users can include datasets and roles when aiming to send email insights to a group with restricted permissions within the organization. Alternatively, if users prefer to email insights directly to specific individuals, regardless of dataset permissions and roles, they can do so by adding the email address of the recipient directly.
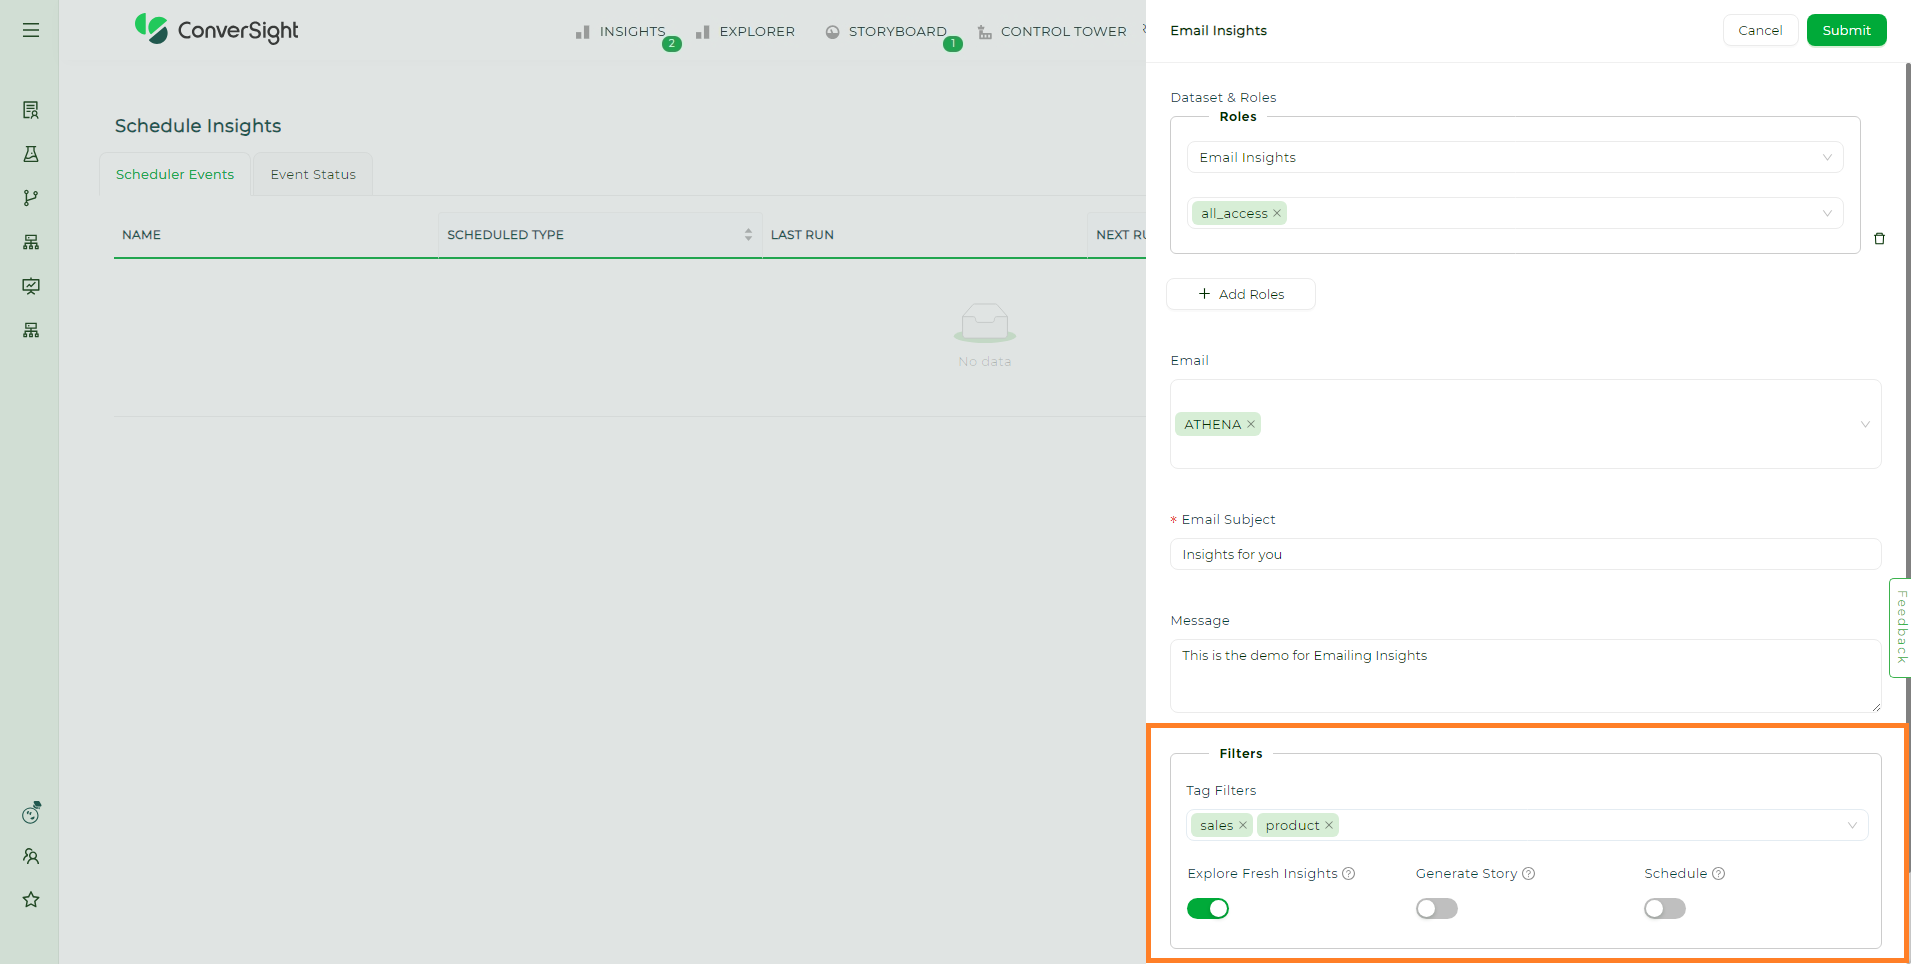
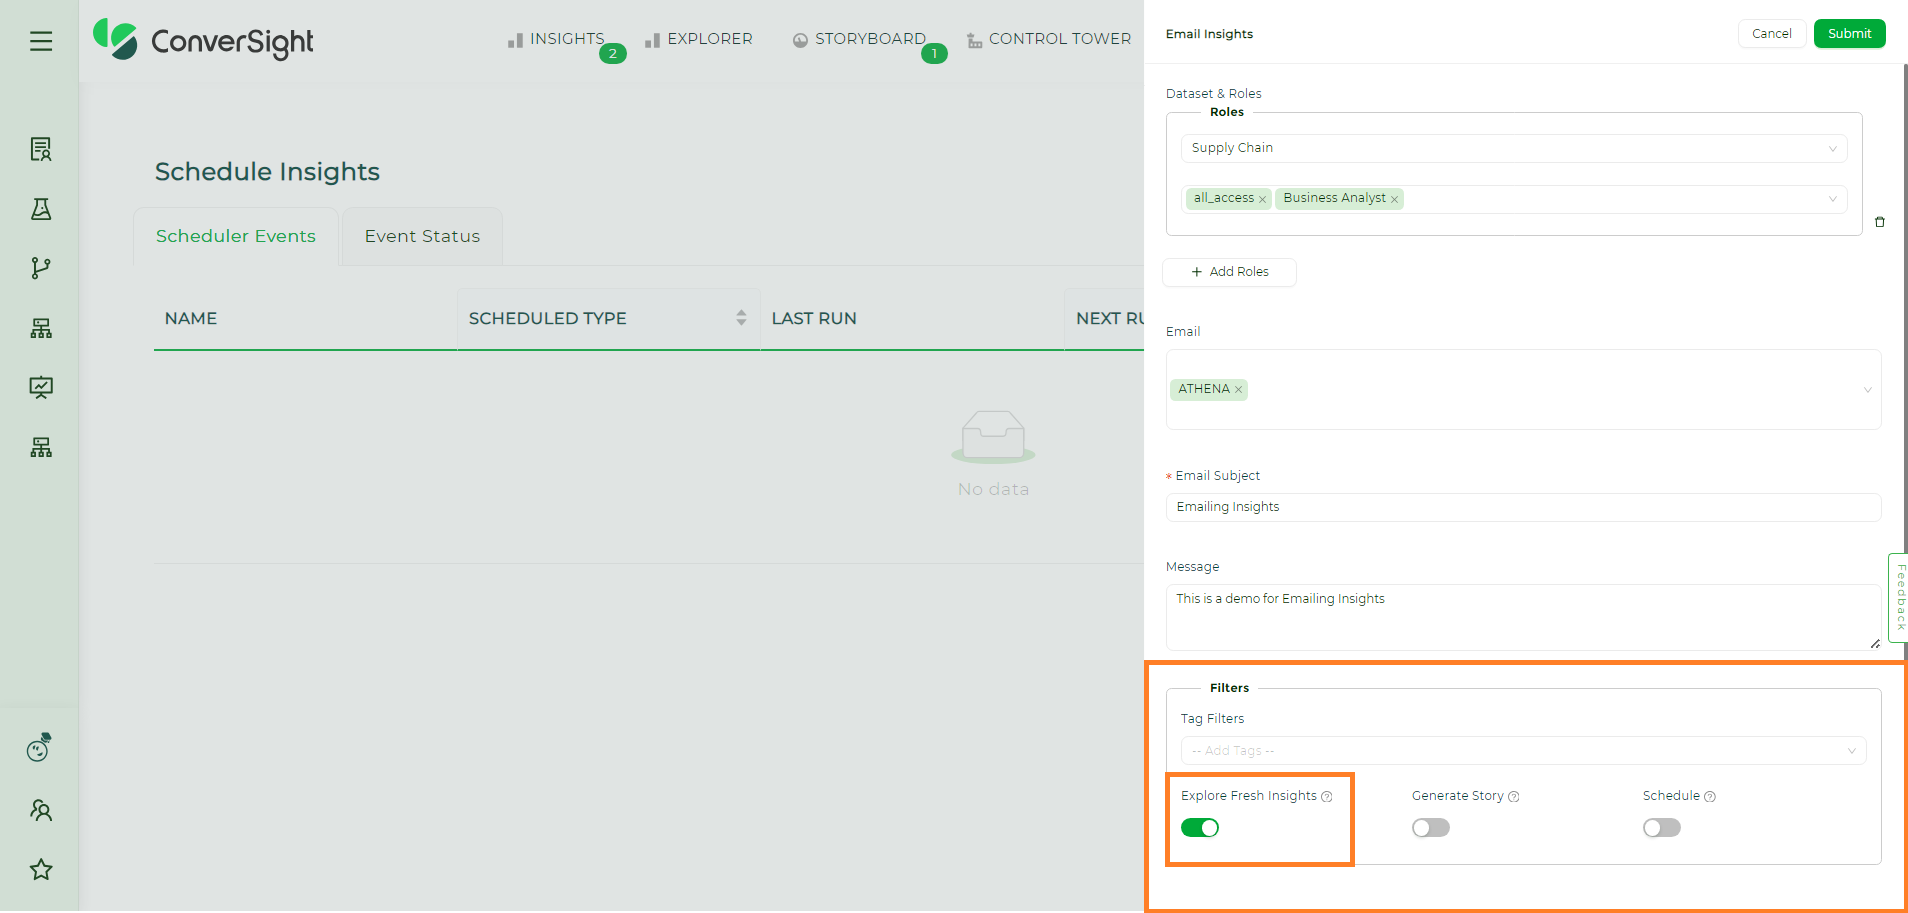
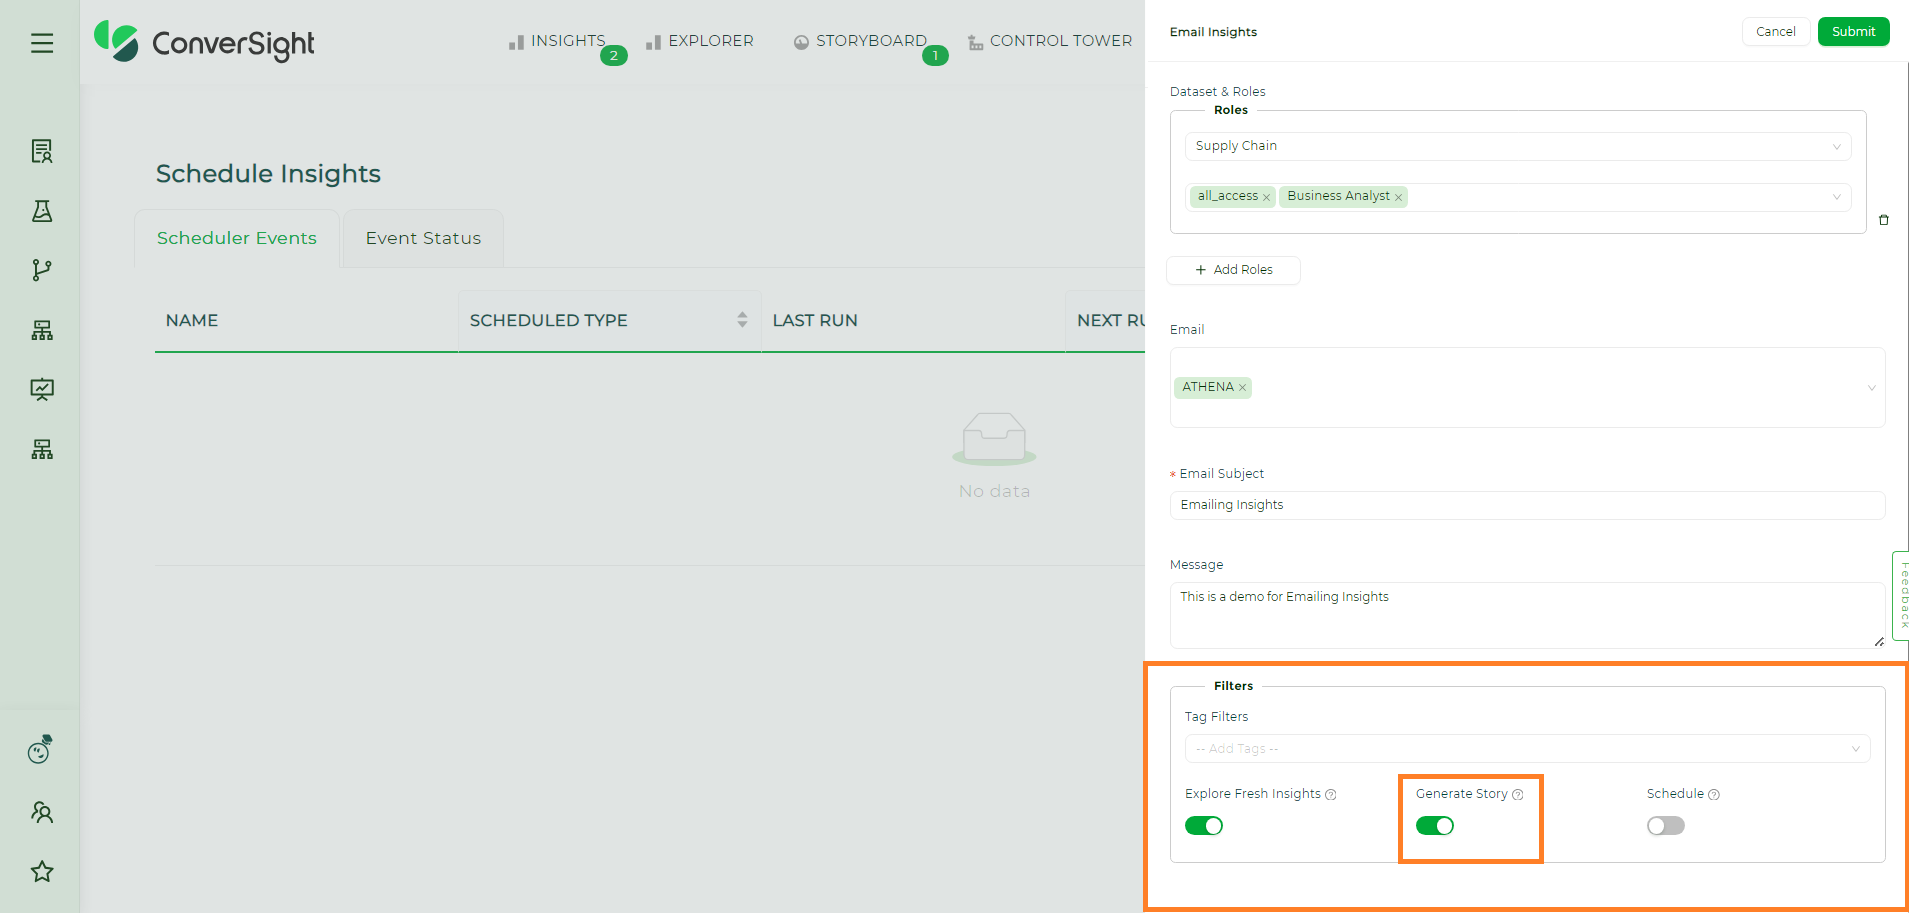
Filters#
Tag Filters - Tags are employed to classify insights and determine their appropriate category or business area to display. Utilizing tag filters refines the presented or analyzed information by applying specific tags for the insights.
Filters#
Explore Fresh Insights - Enabling this toggle will send the email containing the latest created insights after the recent SME publish. Deactivating the Fresh Insights toggle will reveal the Insight From option allowing users to schedule insights from the desired date and time.
Explore Fresh Insights#
When Email Insights are created without enabling the Schedule toggle, they will exclusively appear on the Event Status page.
Fresh Insights Created#
Generate Story - Enabling the Generate Story toggle will provide a descriptive narrative for the scheduled insights.
NOTE
The story generation will be enabled only when the scheduled insights count is more than three.
Generate Story#
Schedule#
Enabling this toggle will allow users to determine when the email insights must be triggered. There are two categories of scheduling email insights: Scheduling with Fresh Insights and Scheduling with Insights From.
Schedule with Fresh Insights Enabling both the Fresh Insights and Schedule toggles ensures that users will exclusively receive the most recent insights created within the scheduled time interval via email. The scheduling options allow users to set the frequency to hourly, daily, weekly or monthly, depending on their preferred schedule type.
Upon activating the Schedule toggle, users must assign a name to the schedule, select the desired schedule type and then click Submit to save these changes.
If no new insights are created during the scheduled period, no email will be dispatched. This feature guarantees that the communication only includes pertinent and recently obtained information.
Email Insights Schedule#
Email Insights Schedule Created#
Schedule with Insights From When users turn off the Fresh Insights toggle, the Insights From option becomes visible.
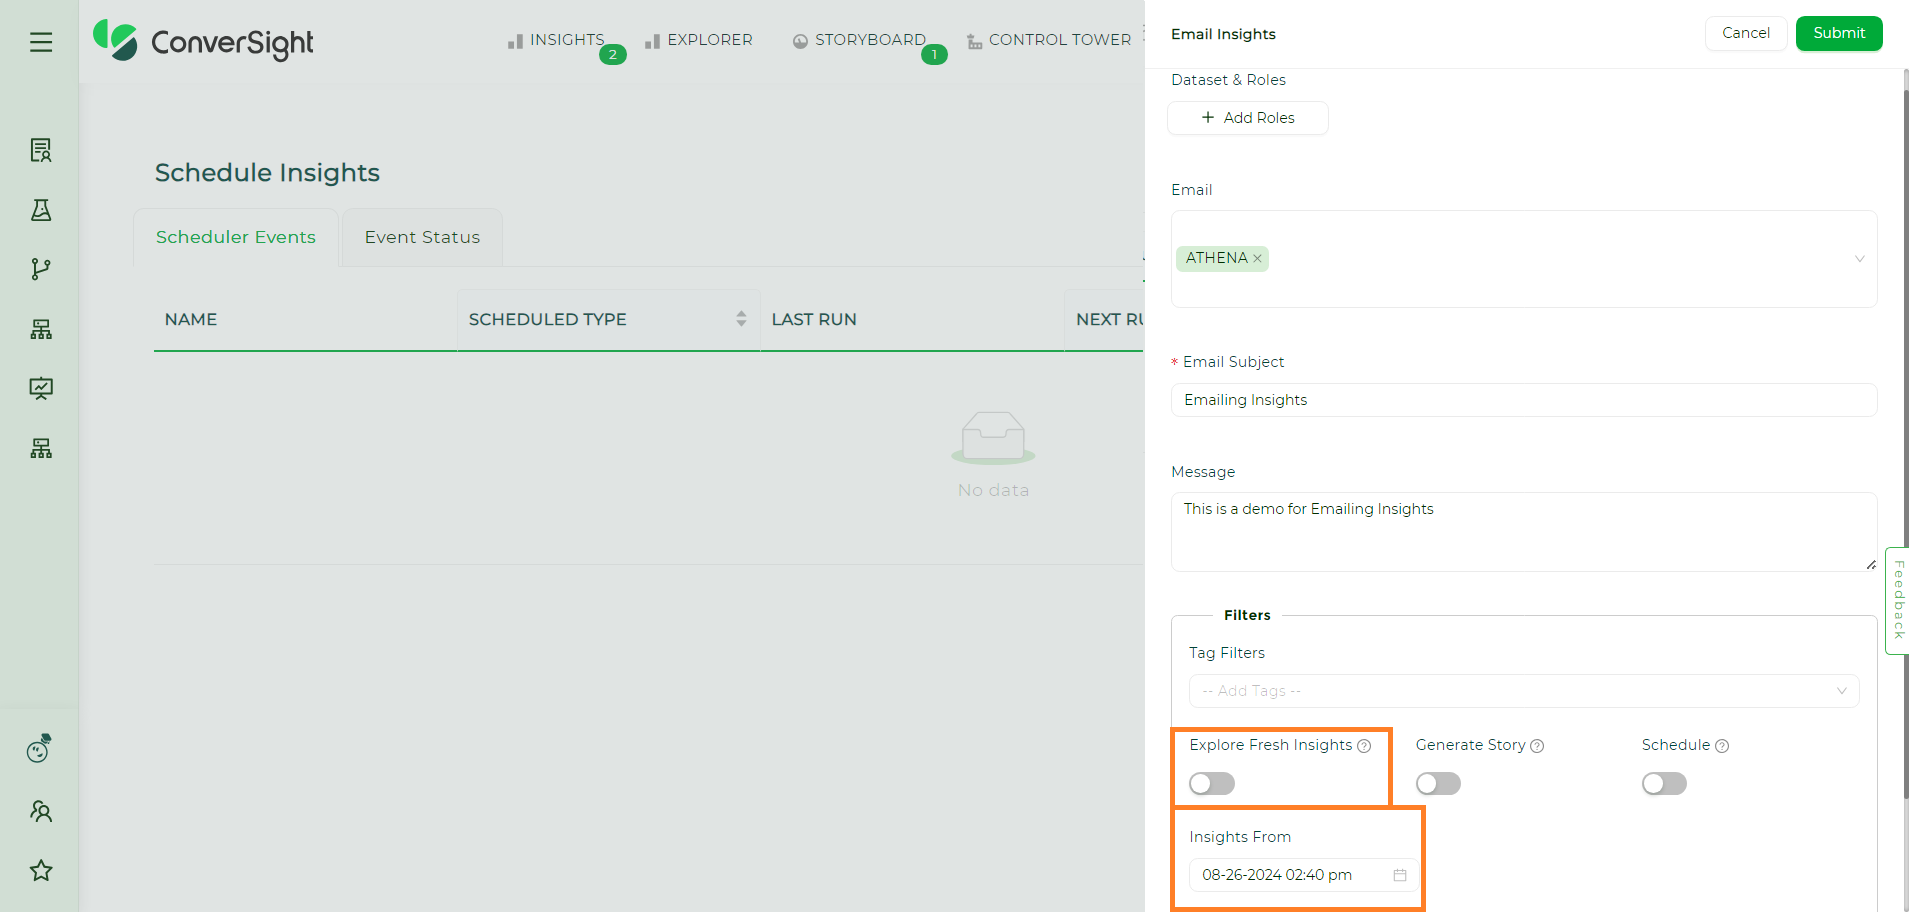
Email Insights Schedule with Insights From#
Clicking the Calendar icon near the Insights From field will allow users to choose the date and time from which the insights should be scheduled.
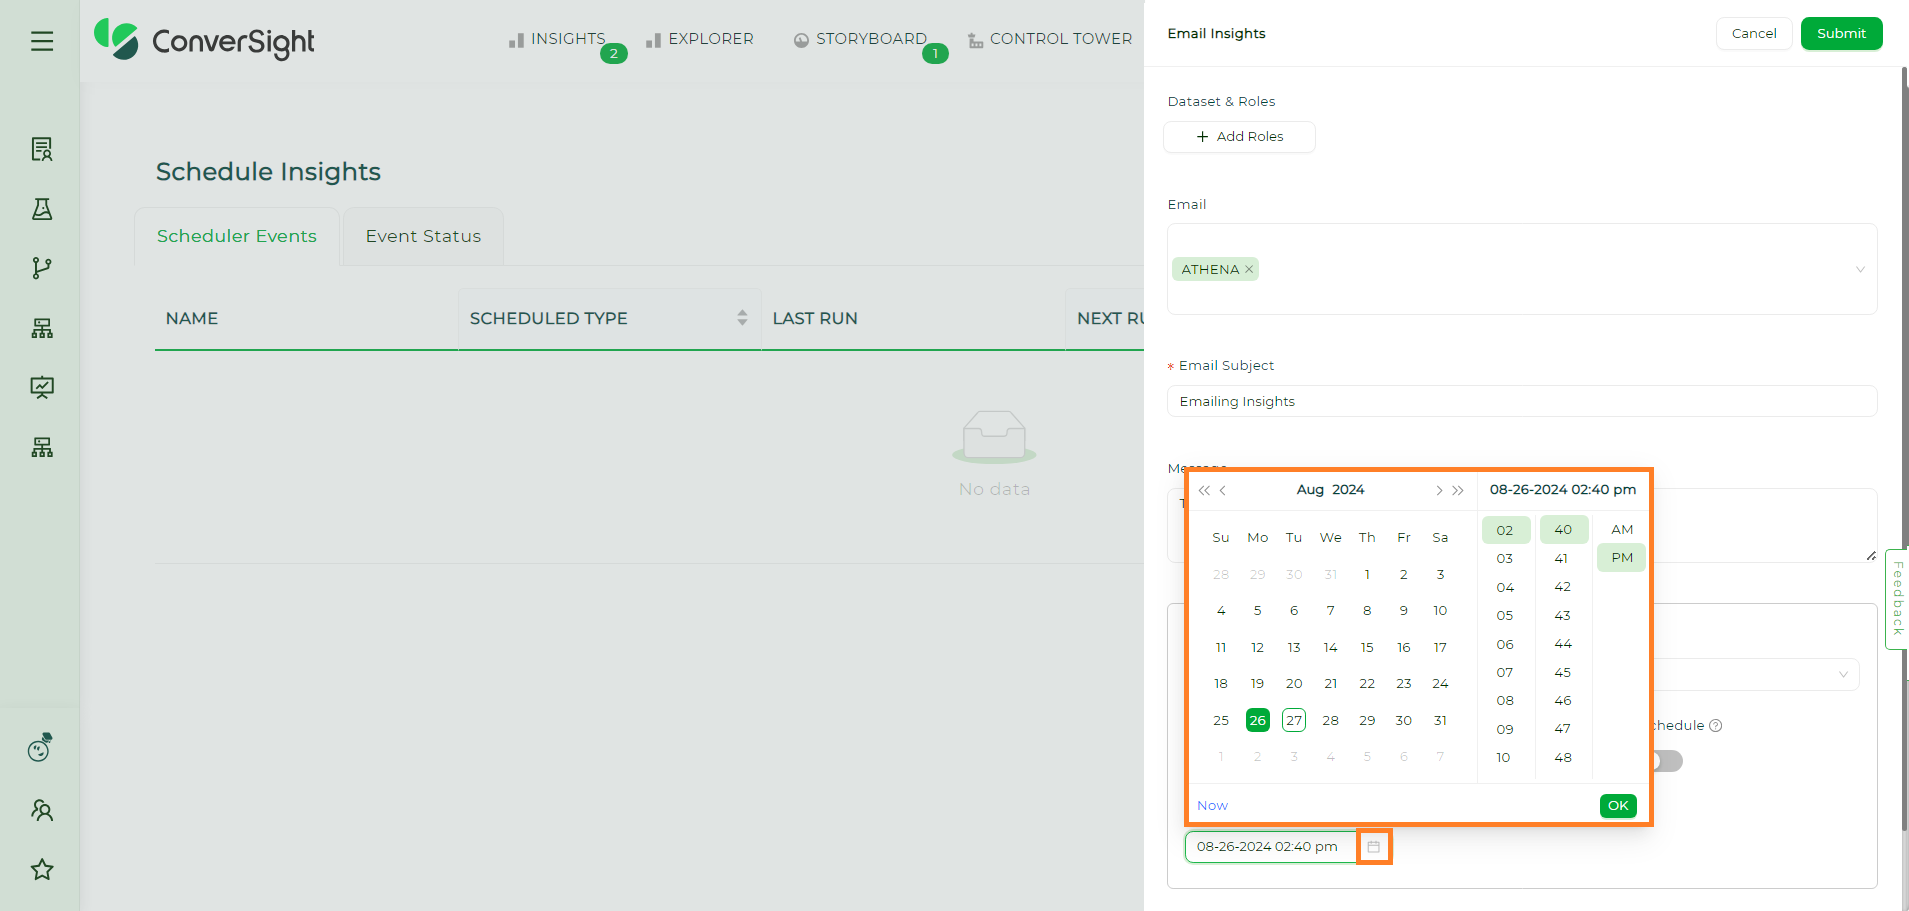
Email Insights Schedule with Insights From#
The Schedule with Insights From feature allows users to schedule insights starting from a particular date and time. This feature guarantees that the sent email contains both previously existing and newly generated insights.
Editing Email Insights#
Users can modify all input parameters of the scheduled insight. To edit the scheduled email insights, click on the Edit icon associated with the schedule name.
Editing Email Insights#
After completing all modifications, click Submit to save the changes.
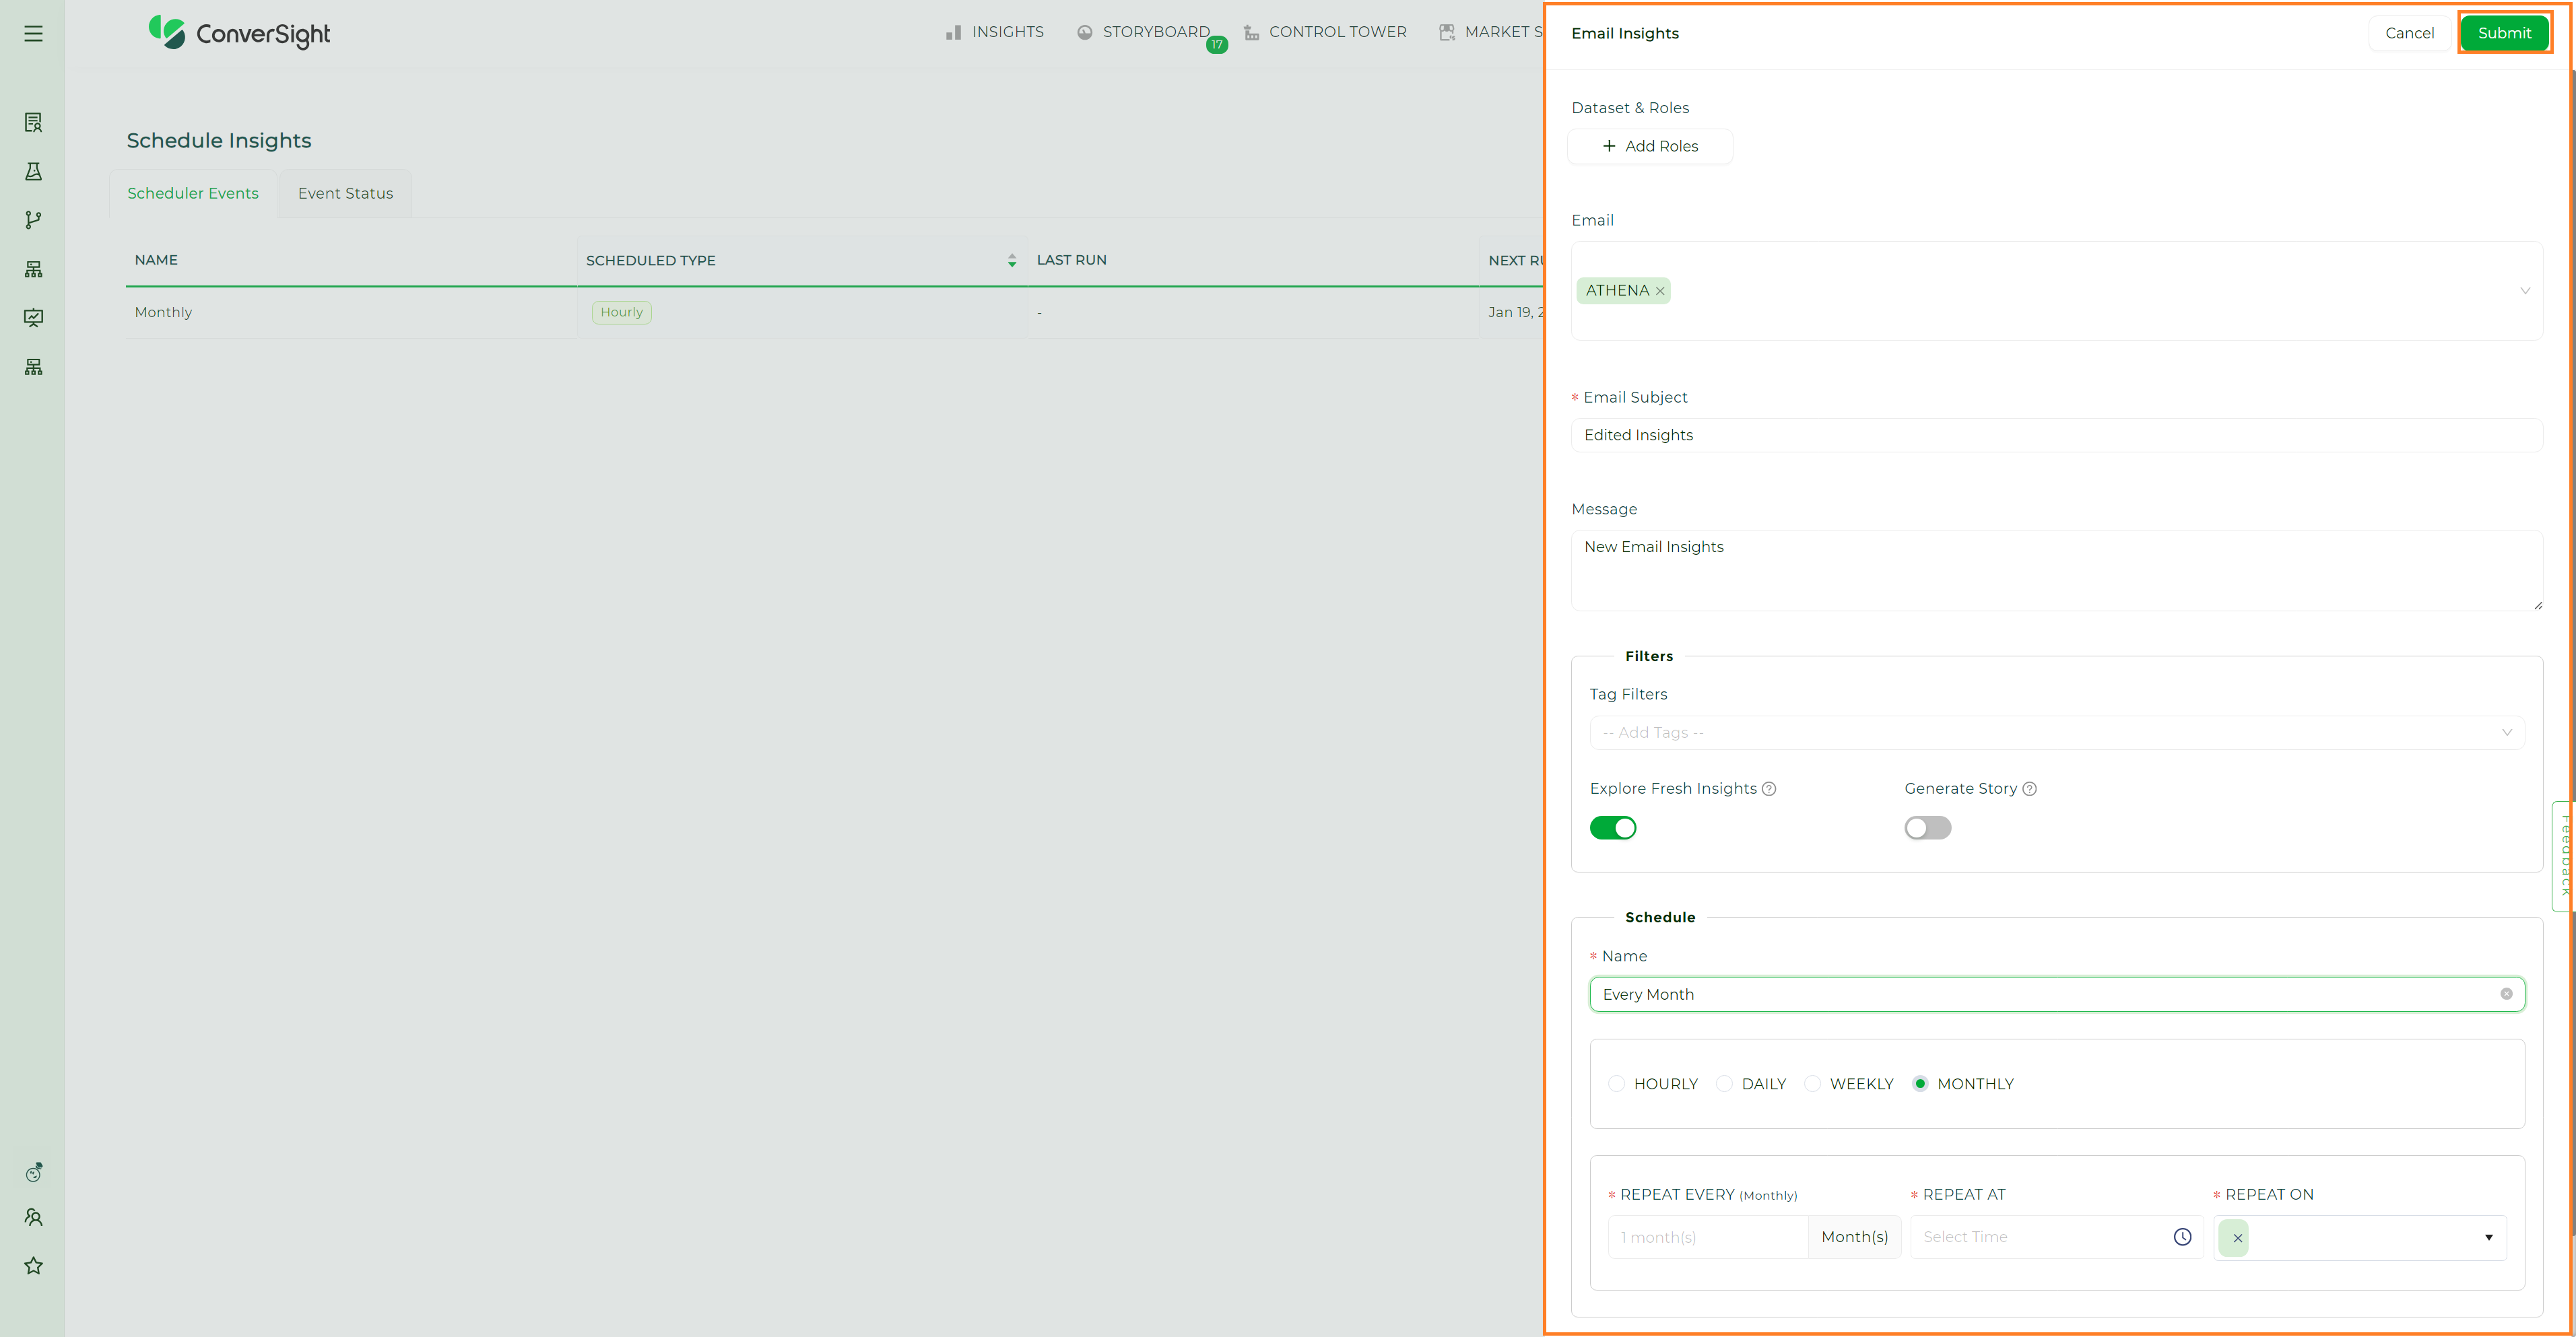
Editing Email Insights#
Edited Email Insights#
Deleting Email Insights#
Users can delete the created scheduled email insights by using the Delete icon associated with the respective schedule.
Deleting Email Insights#
Run Email Insights#
Users can initiate the scheduled email insights manually by utilizing the Run icon associated with the schedule.
Running Email Insights#
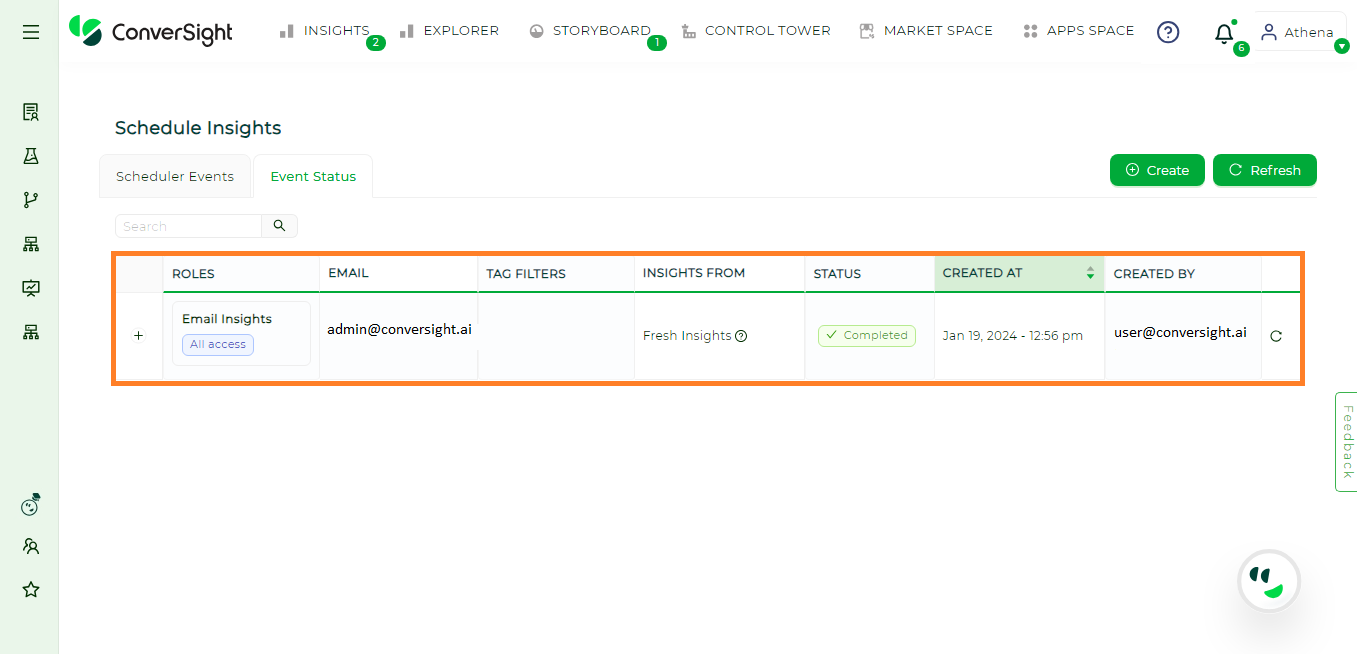
Event Status#
The Event Status page offers a concise overview of the state and description of scheduled insights in a well-organized tabular format, facilitating easy access to detailed information for users.
The Event Status page consists of the following fields.
Argument |
Description |
|---|---|
Roles |
Displays the data access permissions of a user. |
Displays the email address of the sender. |
|
Tag Filters |
Displays the tags used to filter or easily identify insights. |
Insights From |
There are two categories of scheduled insights: |
Status |
Indicates the execution status of the scheduled insights. |
Created at |
Denotes the date and timestamp of creation. |
Created by |
Displays the email address of the schedule creator. |
Delivered |
Displays whether the email insights are delivered to the recipient. |
Reason |
Provides information on whether the email was delivered or not, along with the reason for non-delivery if applicable. |
Event Status Page#
Users can obtain a more detailed overview about the email insights event status by clicking on the + icon associated with the respective event.
Event Status Page#
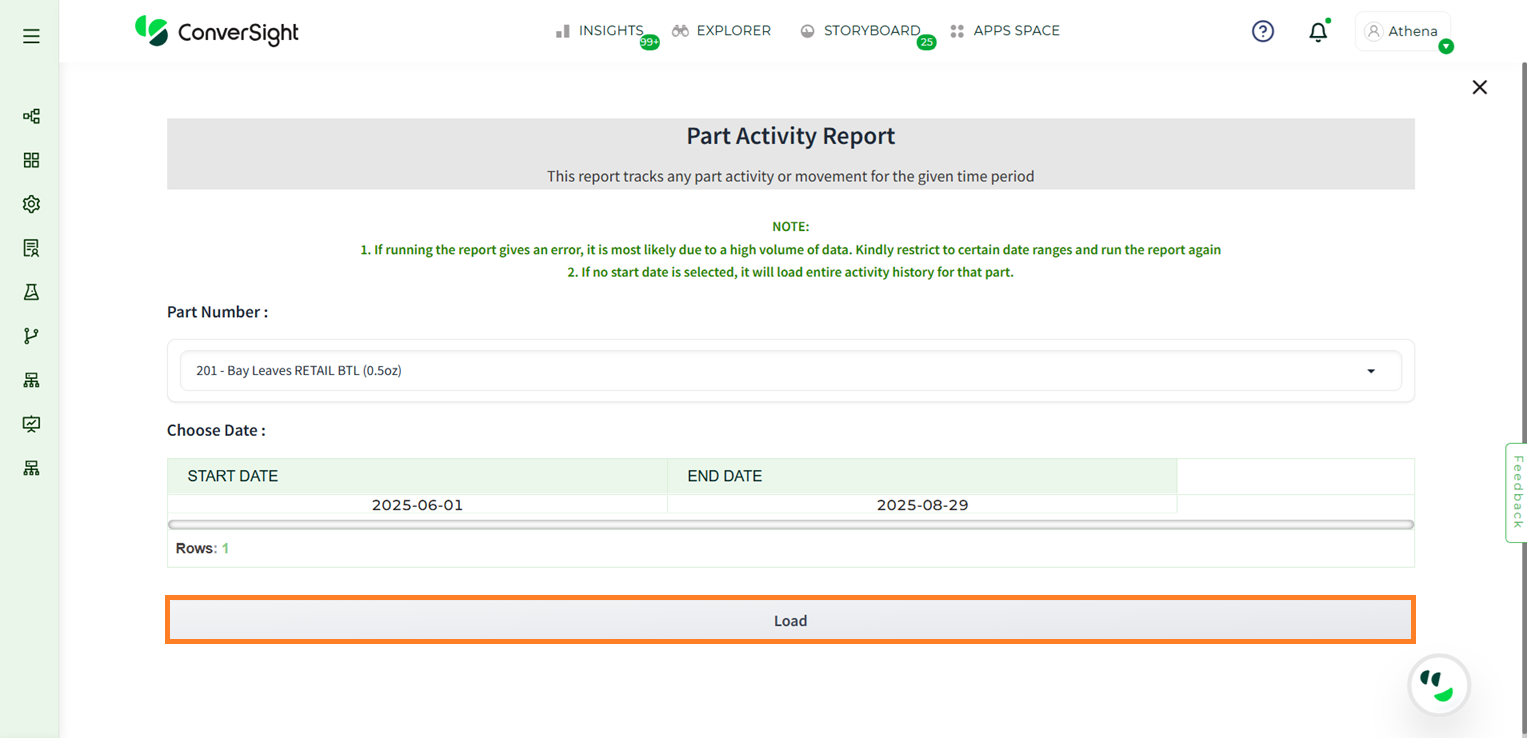
Part Activity Report#
The Part Activity Reporting App is a streamlined solution designed to simplify the way organizations monitor, track, and report on part-related activities. By centralizing data and automating reporting processes, the app eliminates manual tracking, reduces errors, and ensures accurate visibility into the lifecycle of parts. It empowers users to log activities in real time, generate comprehensive reports, and analyze trends for improved decision-making. With an intuitive interface and customizable features, the app enhances operational efficiency, compliance, and accountability—making it an essential tool for businesses that rely on precise part management and activity tracking.
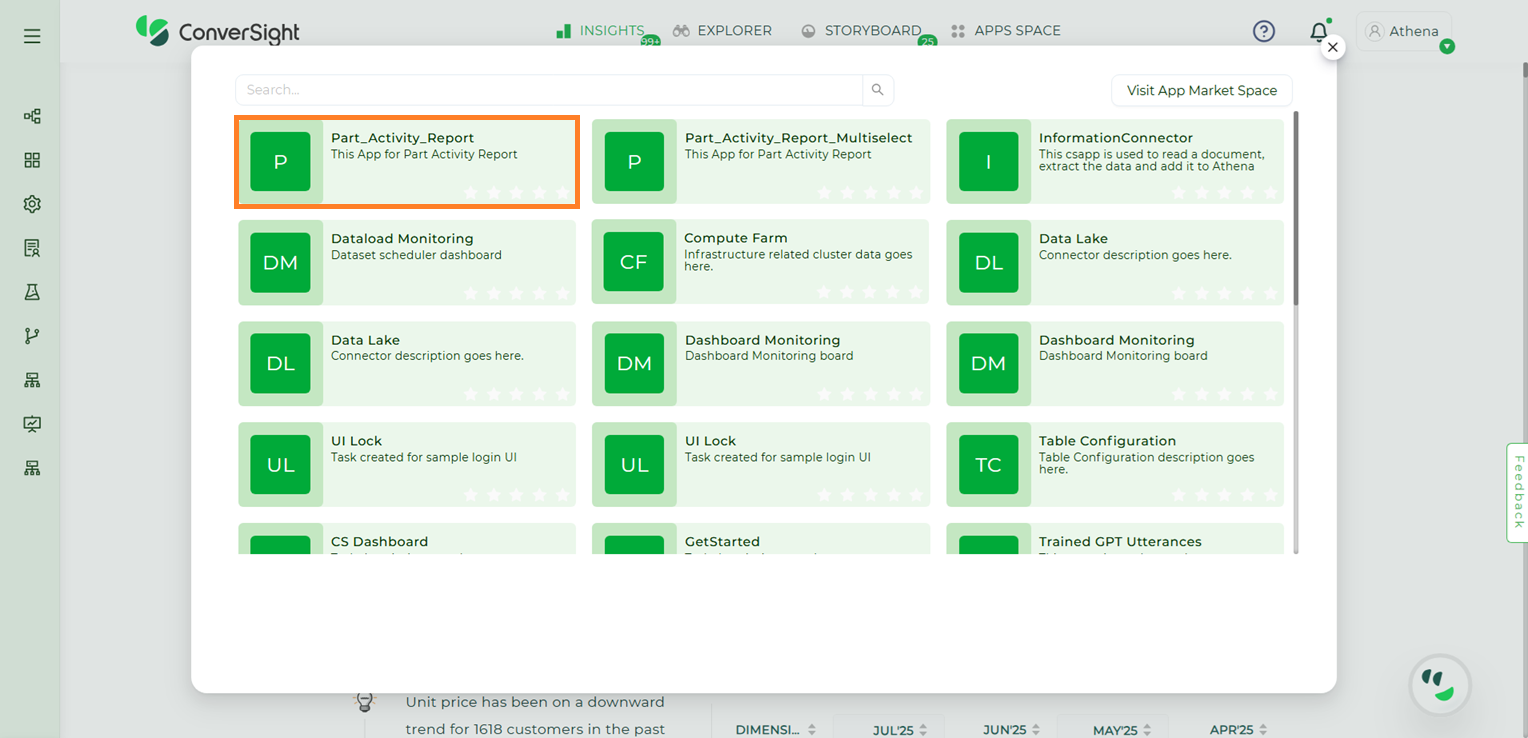
Accessing Part Activity Report App#
To access the Part Activity Report app, go to the App Space and select Part Activity Report from the list of available applications.
Apps Space#
Part Activity Report App#
When you open the app, you need to load the most recent data. To do this, click the Load Data button.
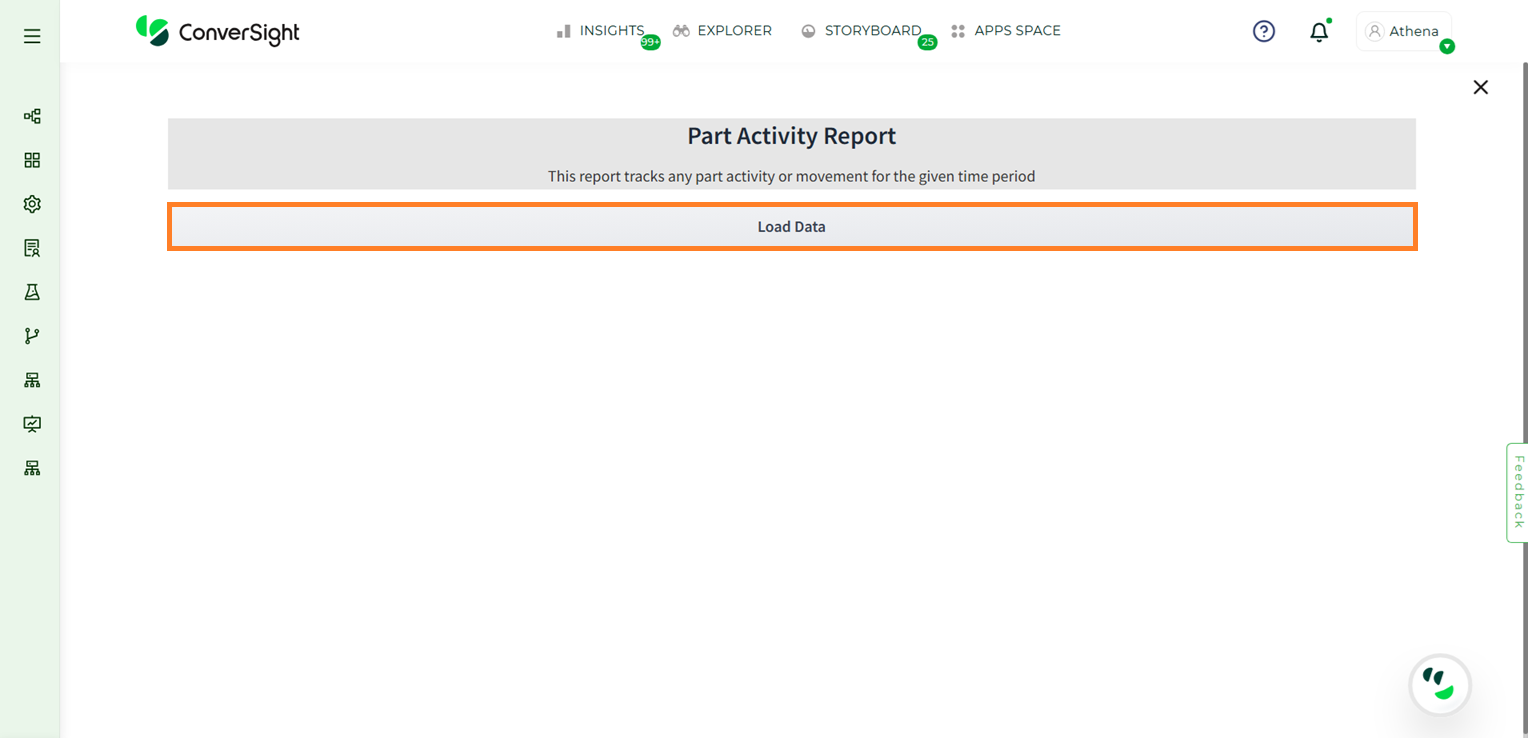
Load Data#
After the data is loaded, you can proceed with further operations. The Part Activity Report page displays the following:
Field |
Description |
|---|---|
Part Number |
Select the part number of the specific part for which you want to view the report from the dropdown menu. |
Start Date |
Select the start date from which you want to view the activity report of the selected part. |
End Date |
Select the date on which you want the activity report to stop. The report will include all activities from the Start Date up to this End Date. |
After entering the required details, click the Load button.
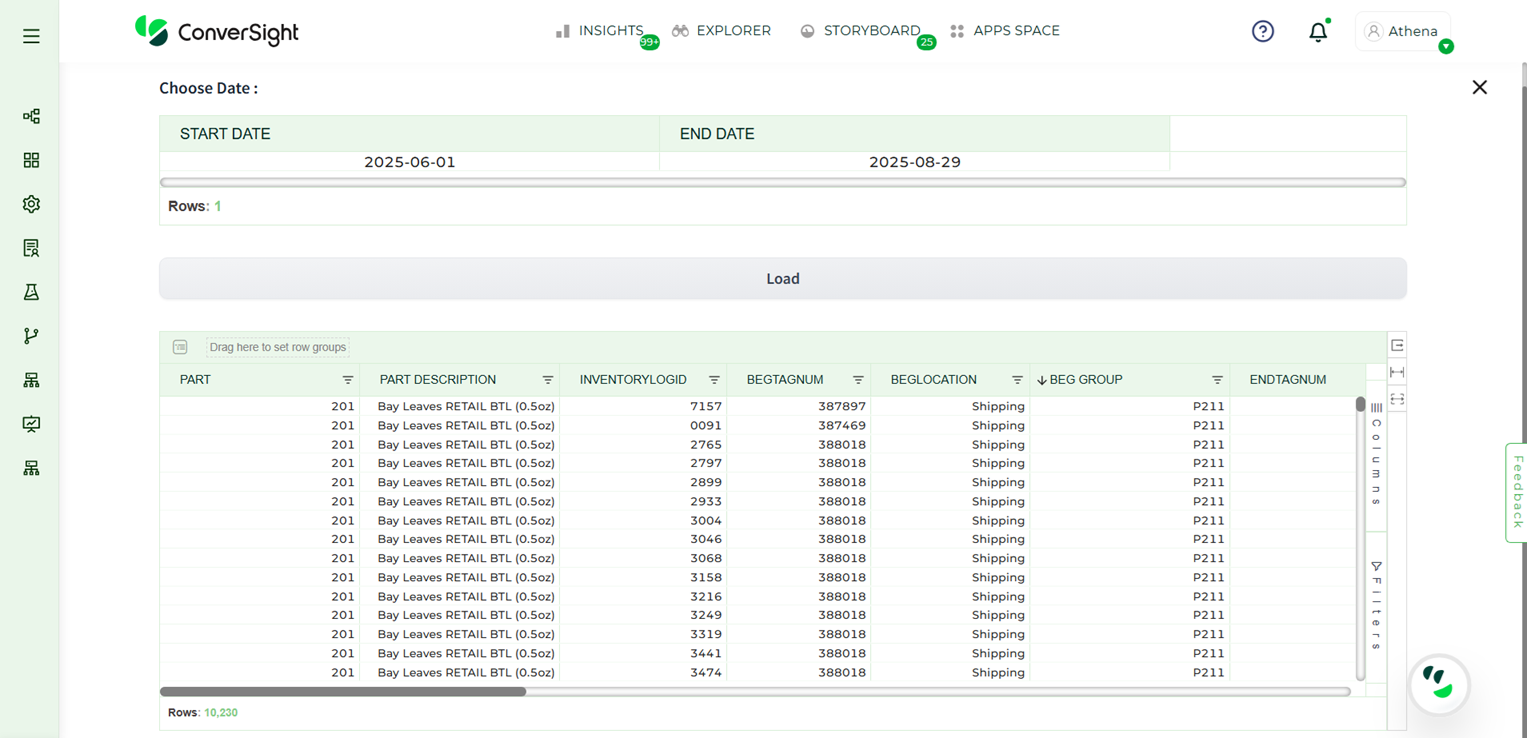
Report#
The report is generated in a tabular format, which includes the following details
Column |
Description |
|---|---|
Part |
The unique identifier or number assigned to the part. |
Part Description |
A brief description of the part to help identify it. |
Inventory Log ID |
The system-generated ID that tracks the inventory transaction record. |
Beginning Tag Number |
The tag number assigned to the part at the start of the activity. |
Beginning Location |
The location where the part is stored before the transaction. |
Beginning Group |
The group or department associated with the part’s initial location (e.g., Production, Warehouse, or Assembly). |
End Tag Number |
The tag number assigned to the part at the end of the activity. |
End Location |
The location where the part is moved after the transaction. |
End Group |
The group or department associated with the part’s new location after the transaction. |
Event Date |
The date when the transaction took place. |
Change Quantity |
The quantity of the part that was added, removed, or adjusted during the transaction. |
Quantity On Hand |
The total quantity of the part available in inventory after the transaction. |
Info |
The type of activity performed on the part. Possible values include Yield, Ship, Receive, Adjust Increase Quantity, and other inventory-related actions. |
Event |
Specifies the type of activity recorded for the part. Common event types include: |
Track Info |
Displays tracking information associated with the part. This may include values such as Lot Number, Serial Number, or other identifiers used to trace and manage the part throughout its lifecycle. |
UOM Code |
The Unit of Measure code (e.g., EA for Each, KG for Kilogram) used for the part. |
Username |
The name of the user who performed the transaction. |
Group Name |
Indicates the name of the location group associated with the part or transaction. |
Location Group ID |
A unique system-generated ID that identifies the location group where the part is stored or where the transaction took place. This ID serves as the backend reference the system uses for tracking and reporting. |
Company |
The name of the company associated with the part or the transaction. |
Part Activity#
The Part Activity Report App provides organizations with a reliable and efficient way to manage part-related activities. By capturing detailed transaction data, tracking inventory movements, and offering clear visibility into part history, the app minimizes manual effort while enhancing accuracy and compliance. Its structured reporting ensures that decision-makers have access to real-time insights, empowering them to optimize inventory usage, reduce operational risks, and maintain accountability across teams. In short, the app is an essential tool for any business seeking better control, transparency, and efficiency in part management.