Data Governance#
Data governance in ConverSight is crucial for managing and safeguarding data effectively. This involves maintaining privacy, ensuring data quality, granting dataset access to users and assigning specific roles and responsibilities. Data Administrators hold the authority to designate roles to users. The specific process of user creation is explained earlier in User Creation.
Setting up Data Governance#
Setting up Data Governance is a crucial step in ensuring that the data stored in your system is accurate, secure and compliant with industry standards. The following steps will guide you through the process of setting up Data Governance in the ConverSight platform:
NOTE
By default, the Data Governance page displays only Active Users.
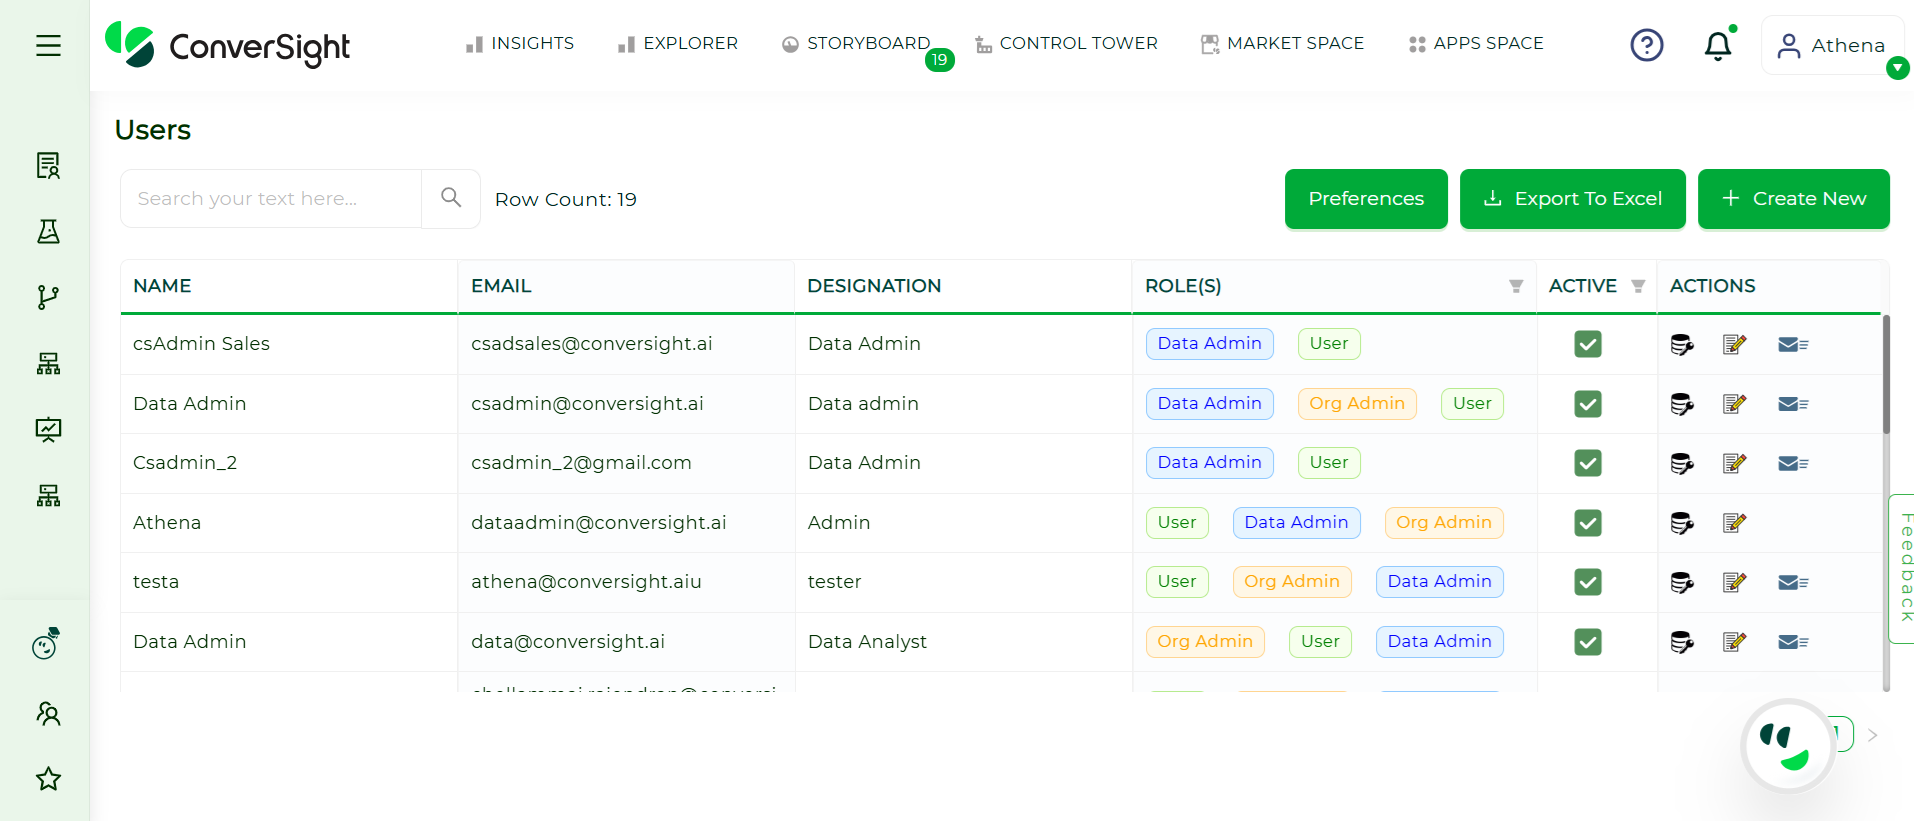
Navigate to the Configuration panel and select the Data Governance option from the Data Workbench menu. In the Data Governance section, you can grant dataset access to specific users. This page displays a list of all users, allowing you to manage and control dataset access effectively.
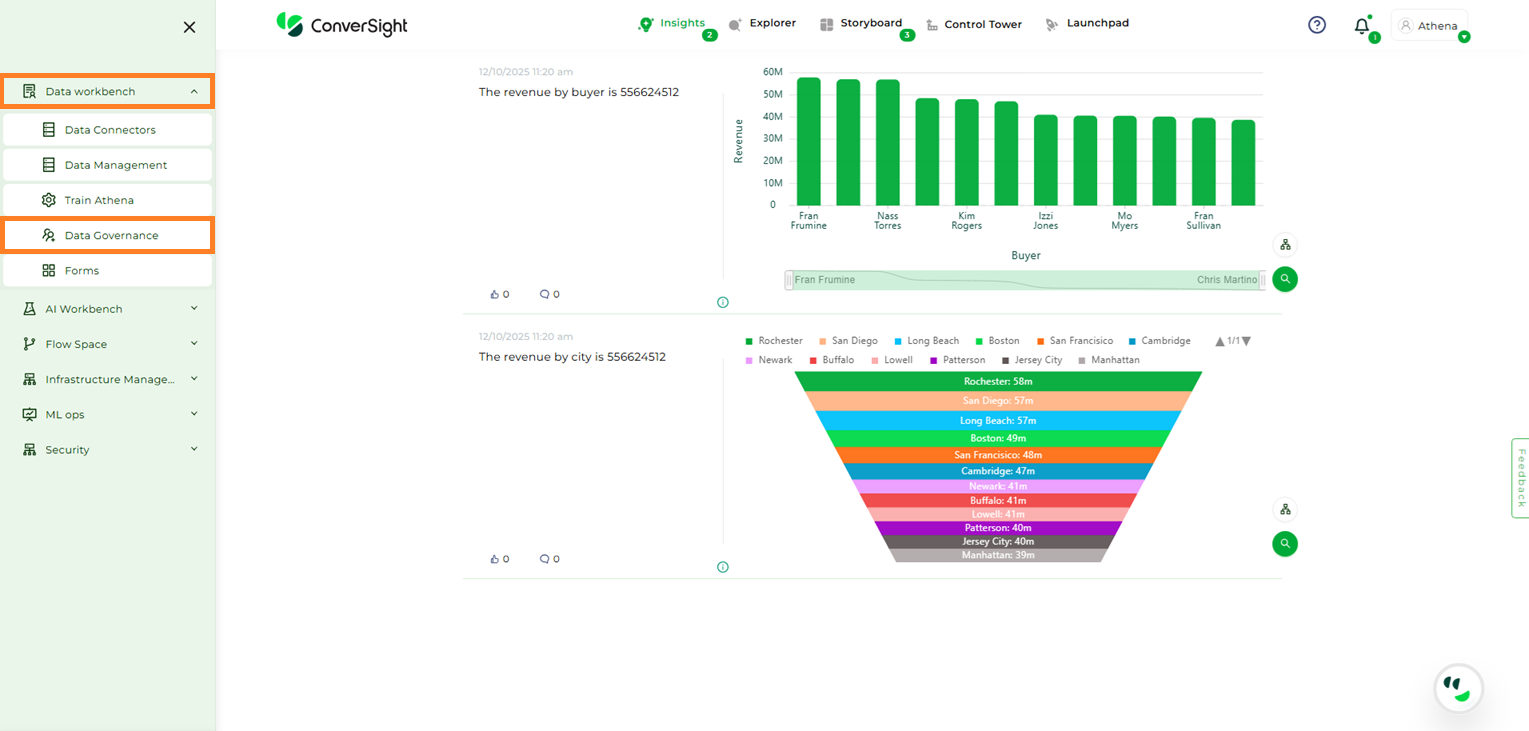
Data Governance Option#
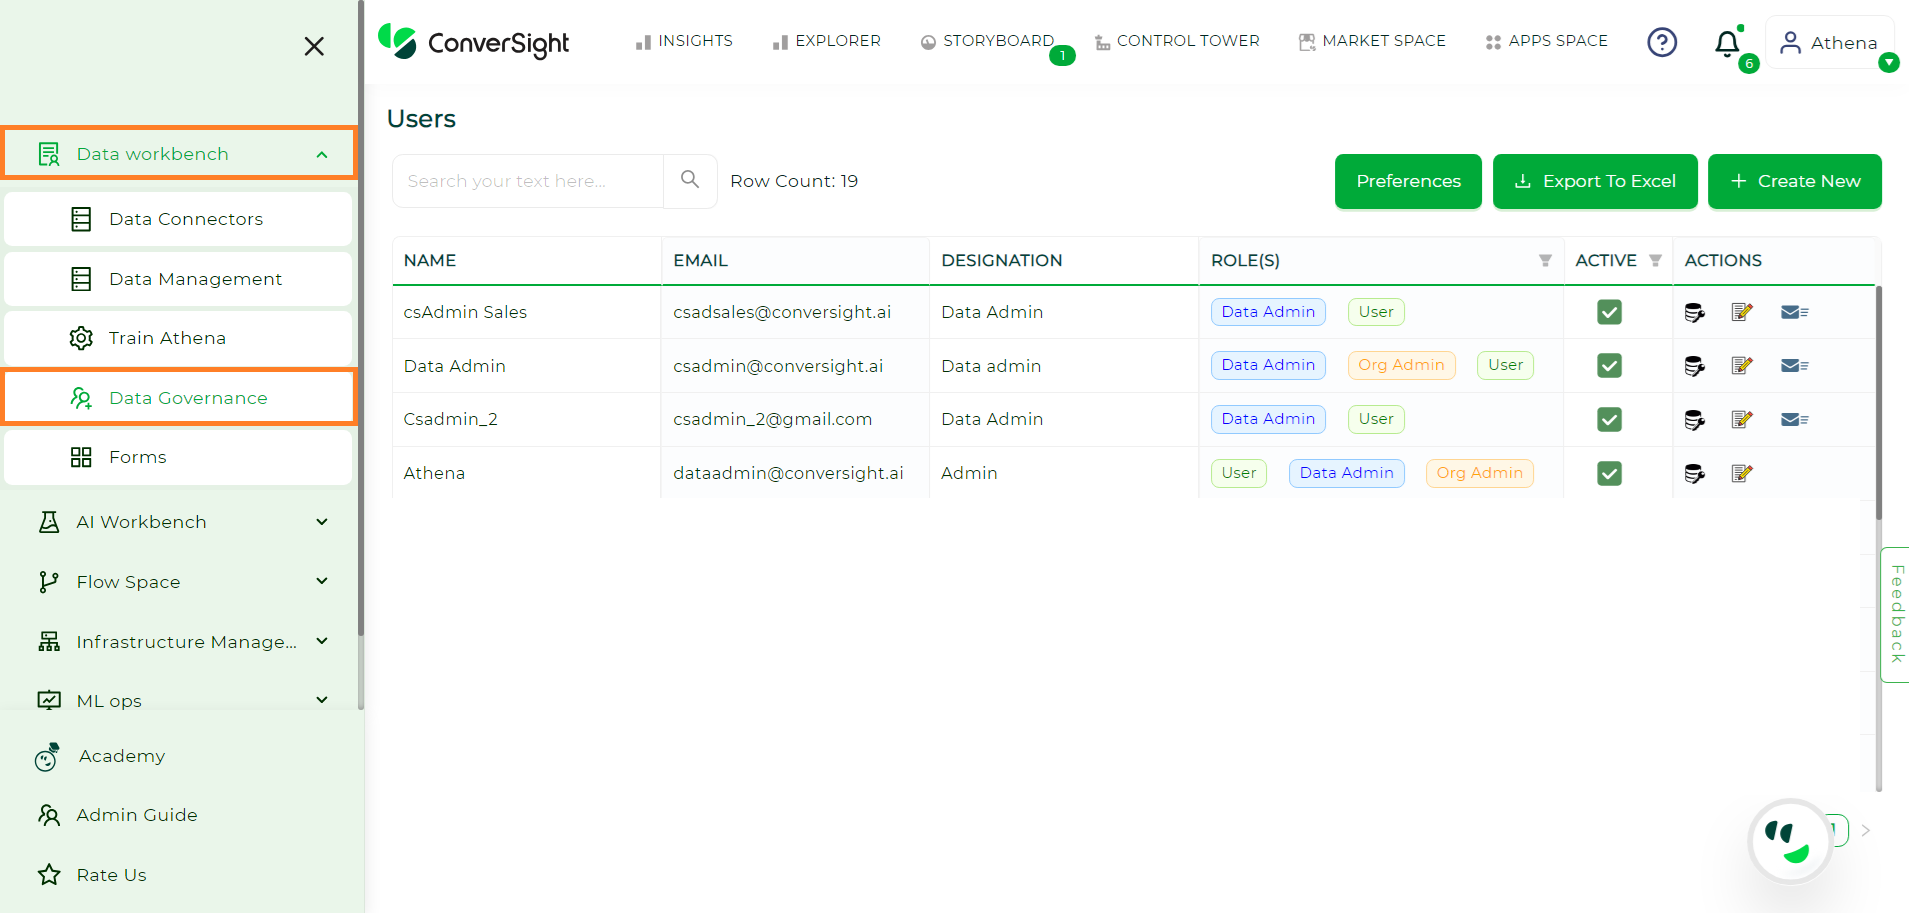
Data Governance Page#
Choose a user from the list and then click on the Dataset Access option located under the Actions column.

Dataset Access Option#
NOTE
A user must be assigned access to a dataset during user creation to ensure proper data access.
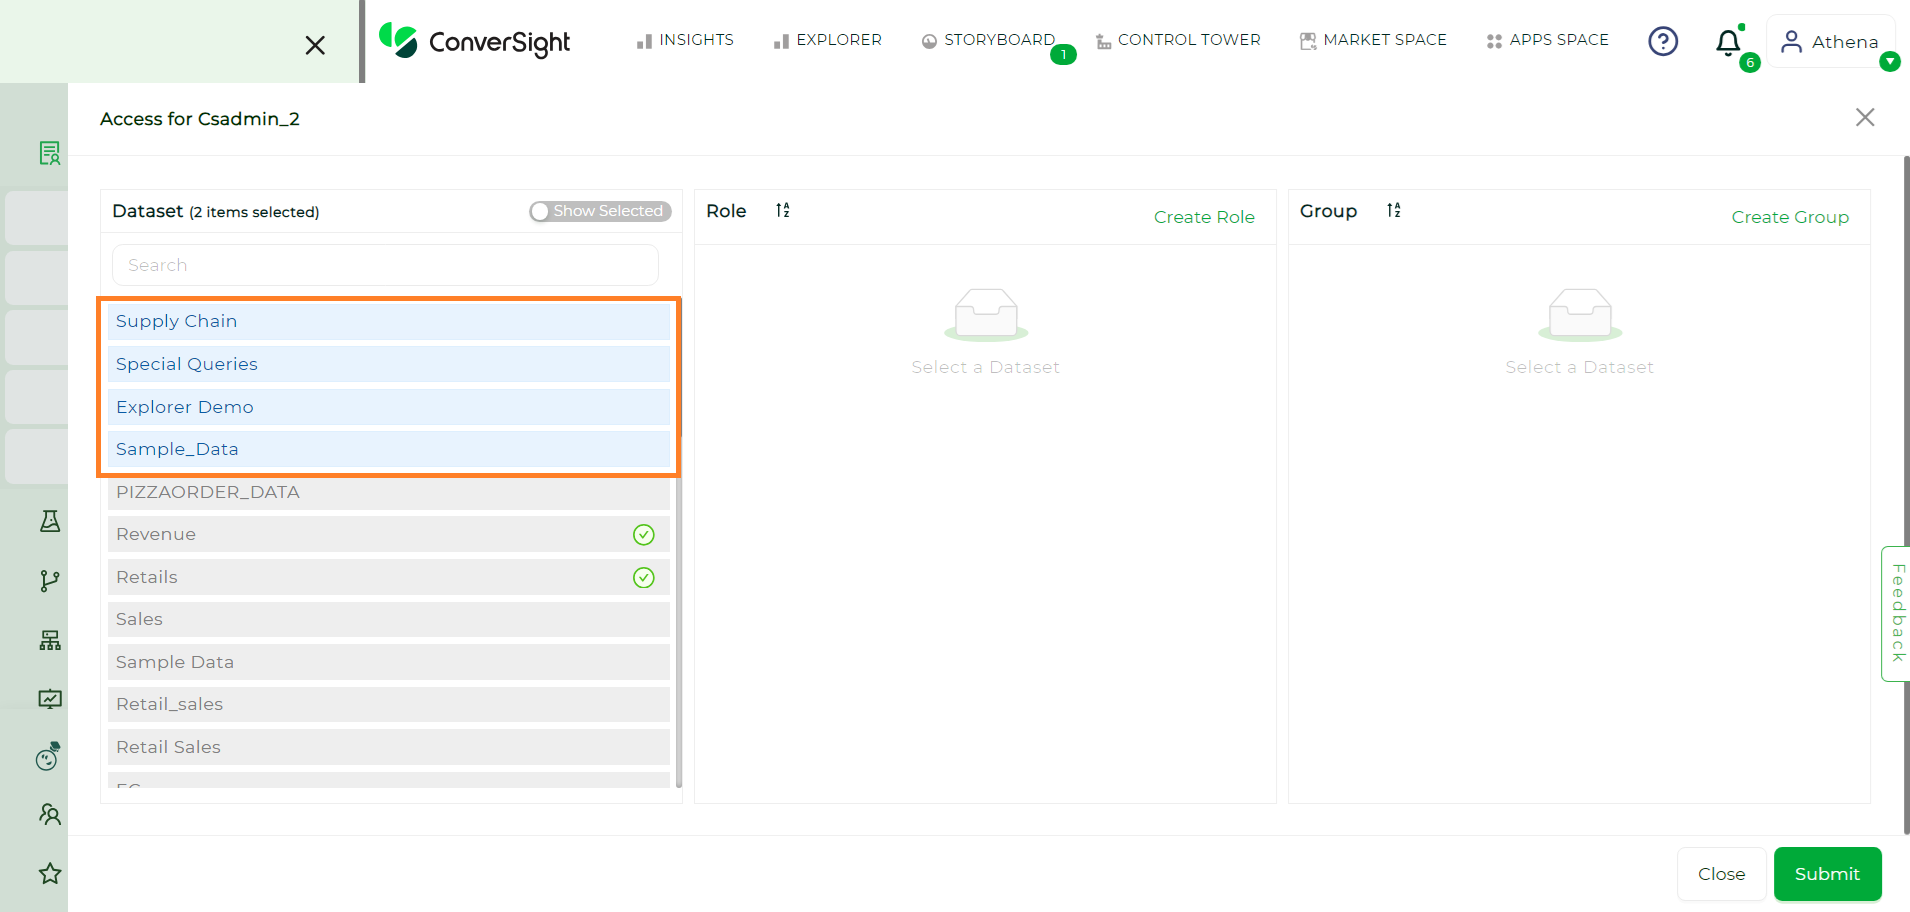
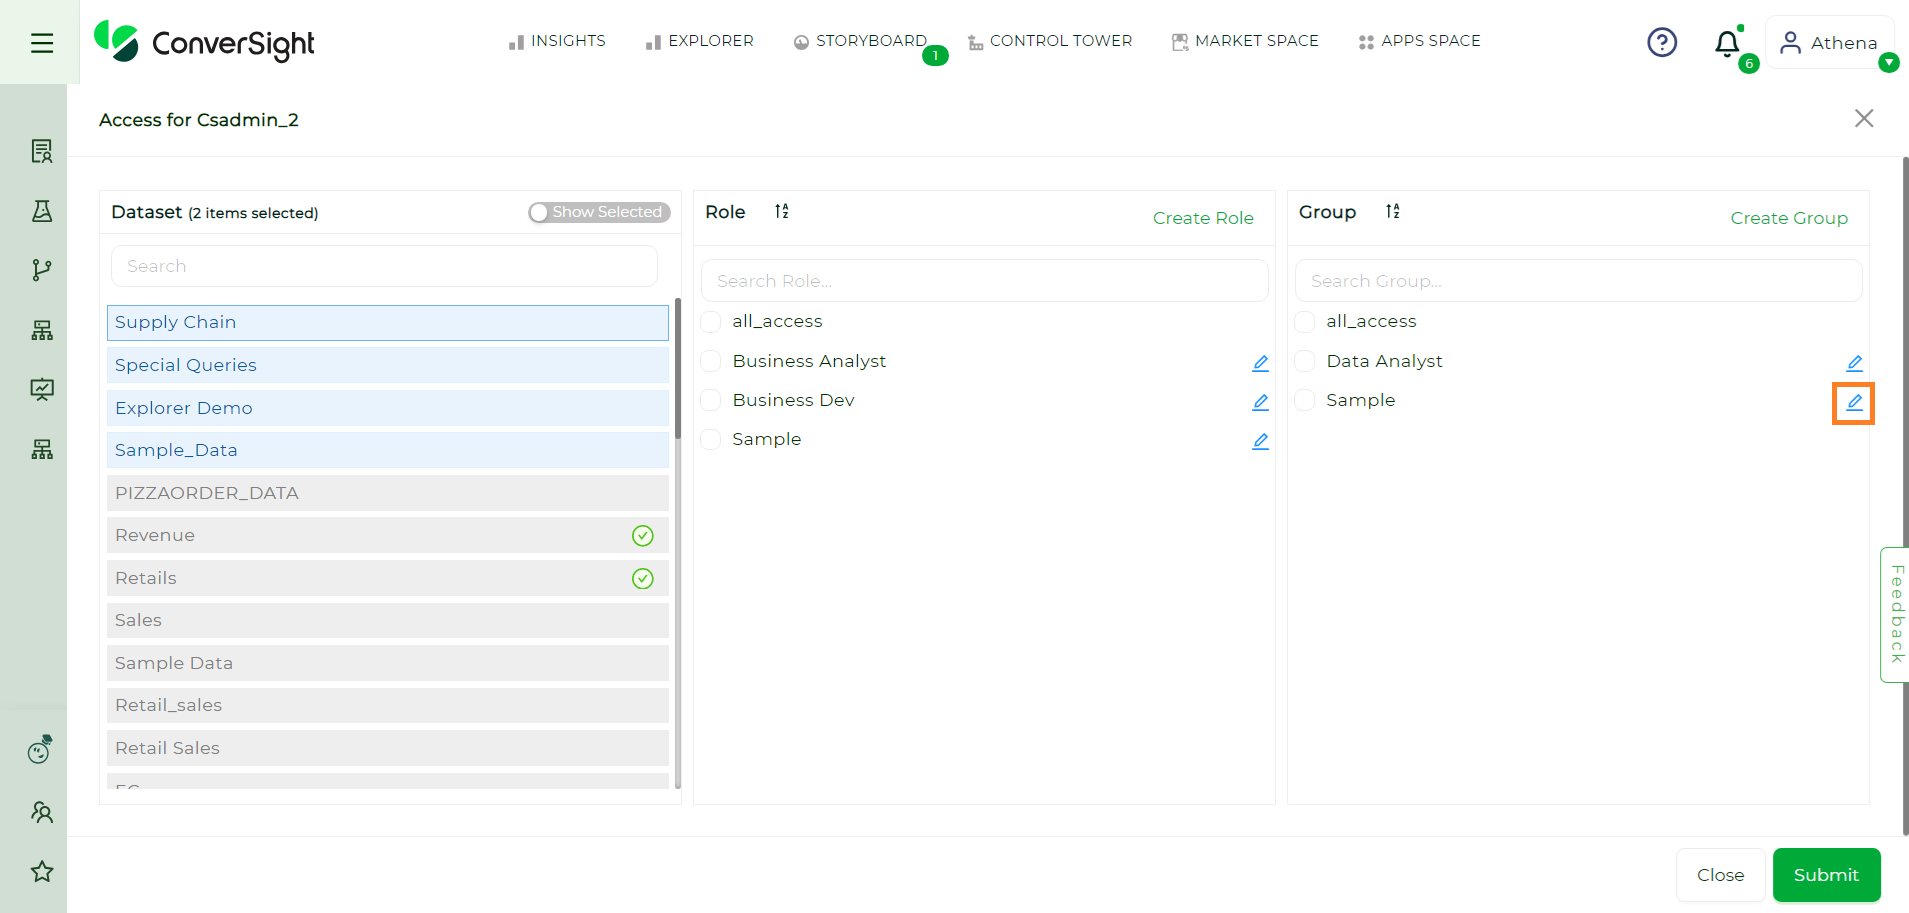
Choose the appropriate dataset from the options provided. By utilizing the Role feature, you can assign specific data access privileges to a user. Meanwhile, the Group feature enables granting of access to multiple columns.
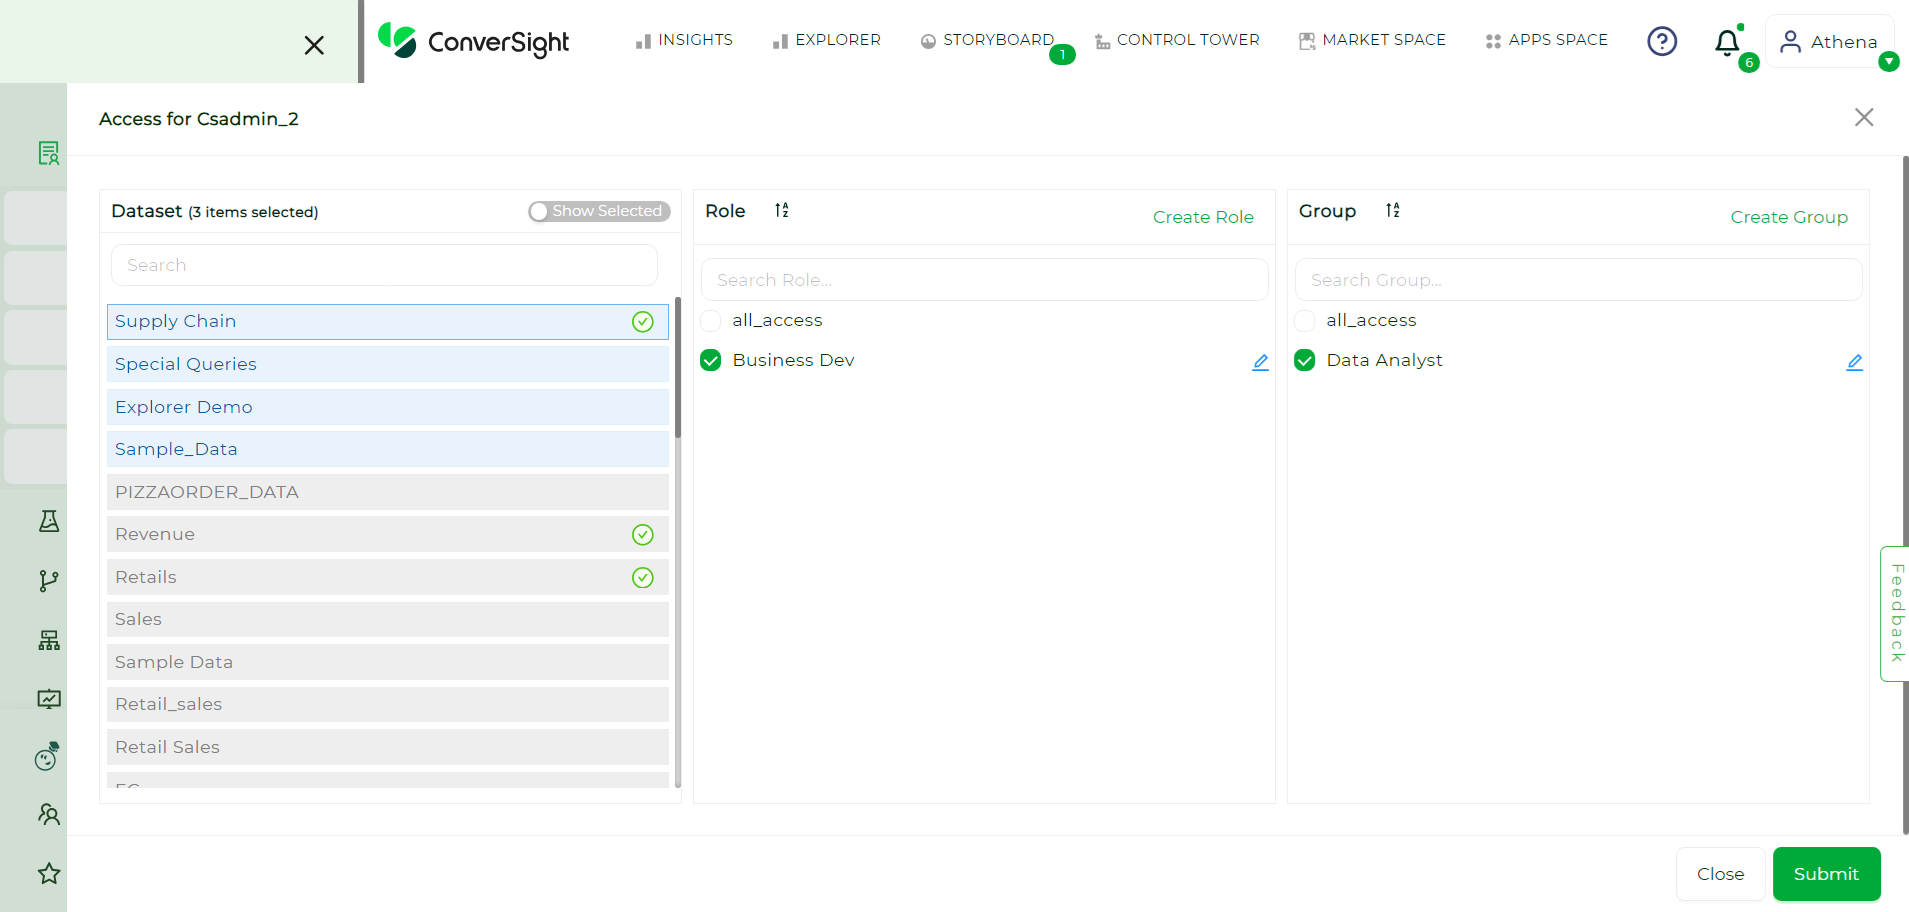
Dataset Selection#
To restrict access to specific data, click on the Create Role option and set the desired parameters. For instance, you can limit access to only data related to only some particular columns. This role only have access to the ID of stores located in Texas region and their revenue and the cost of the products. Once you have set the parameters, click on Create.
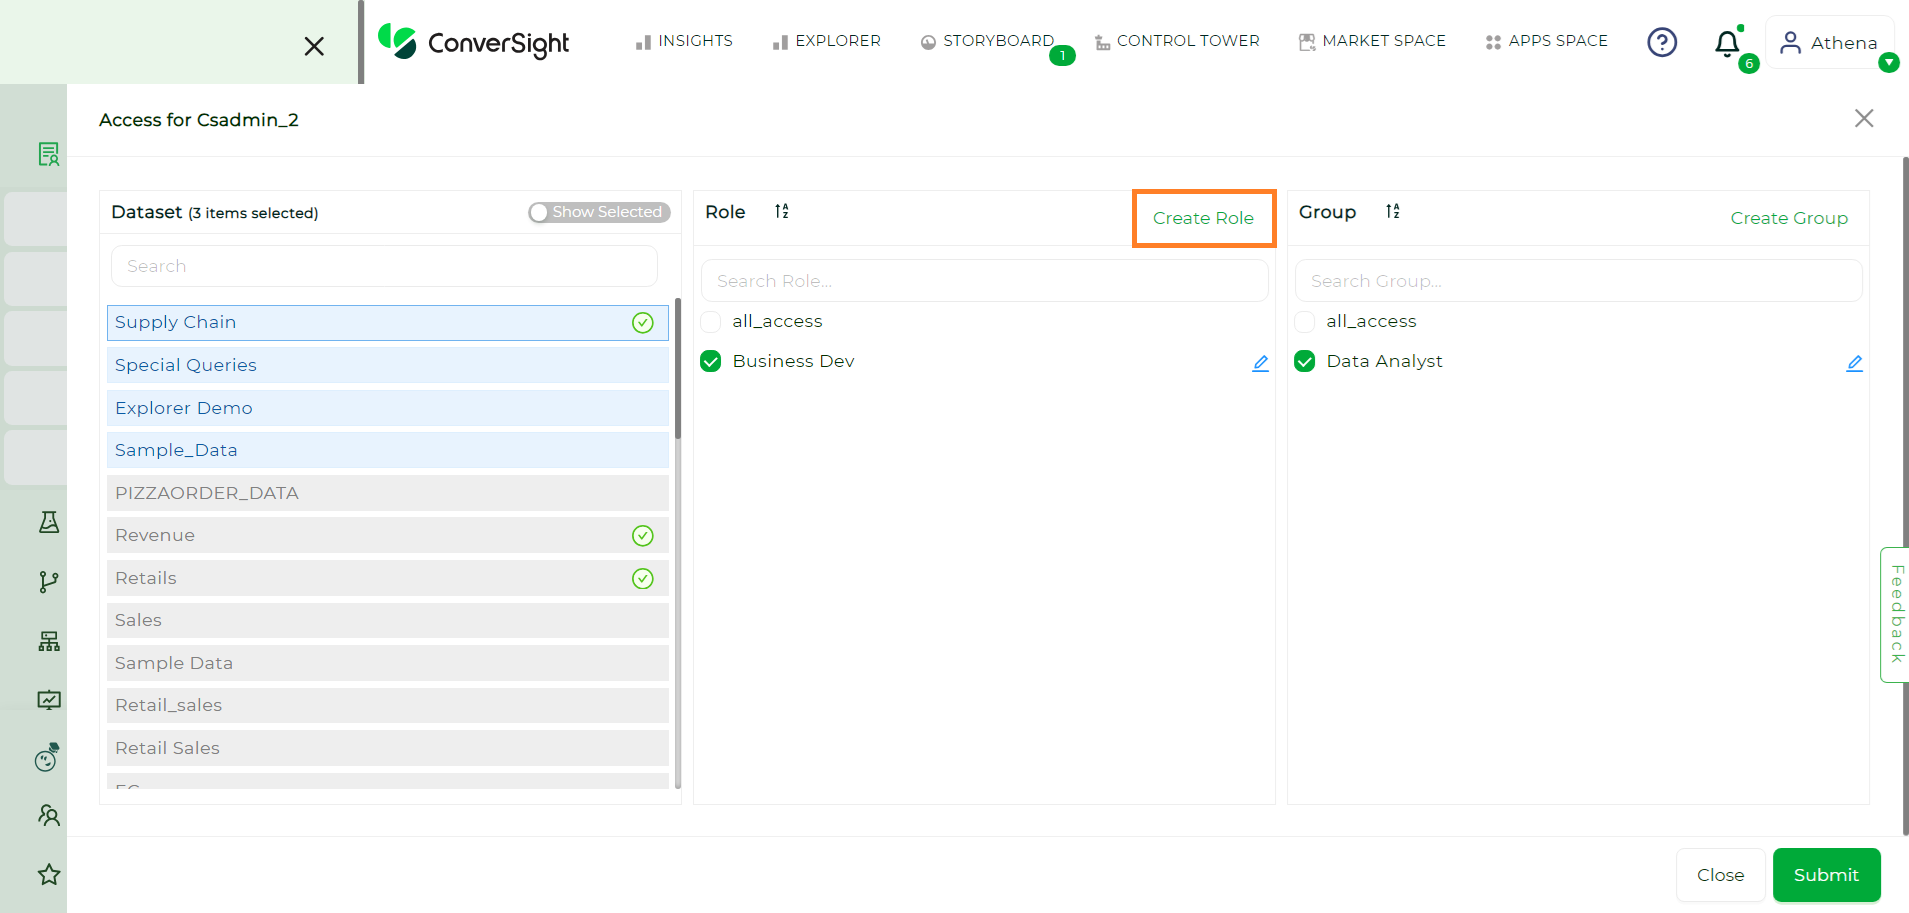
Creating Role#
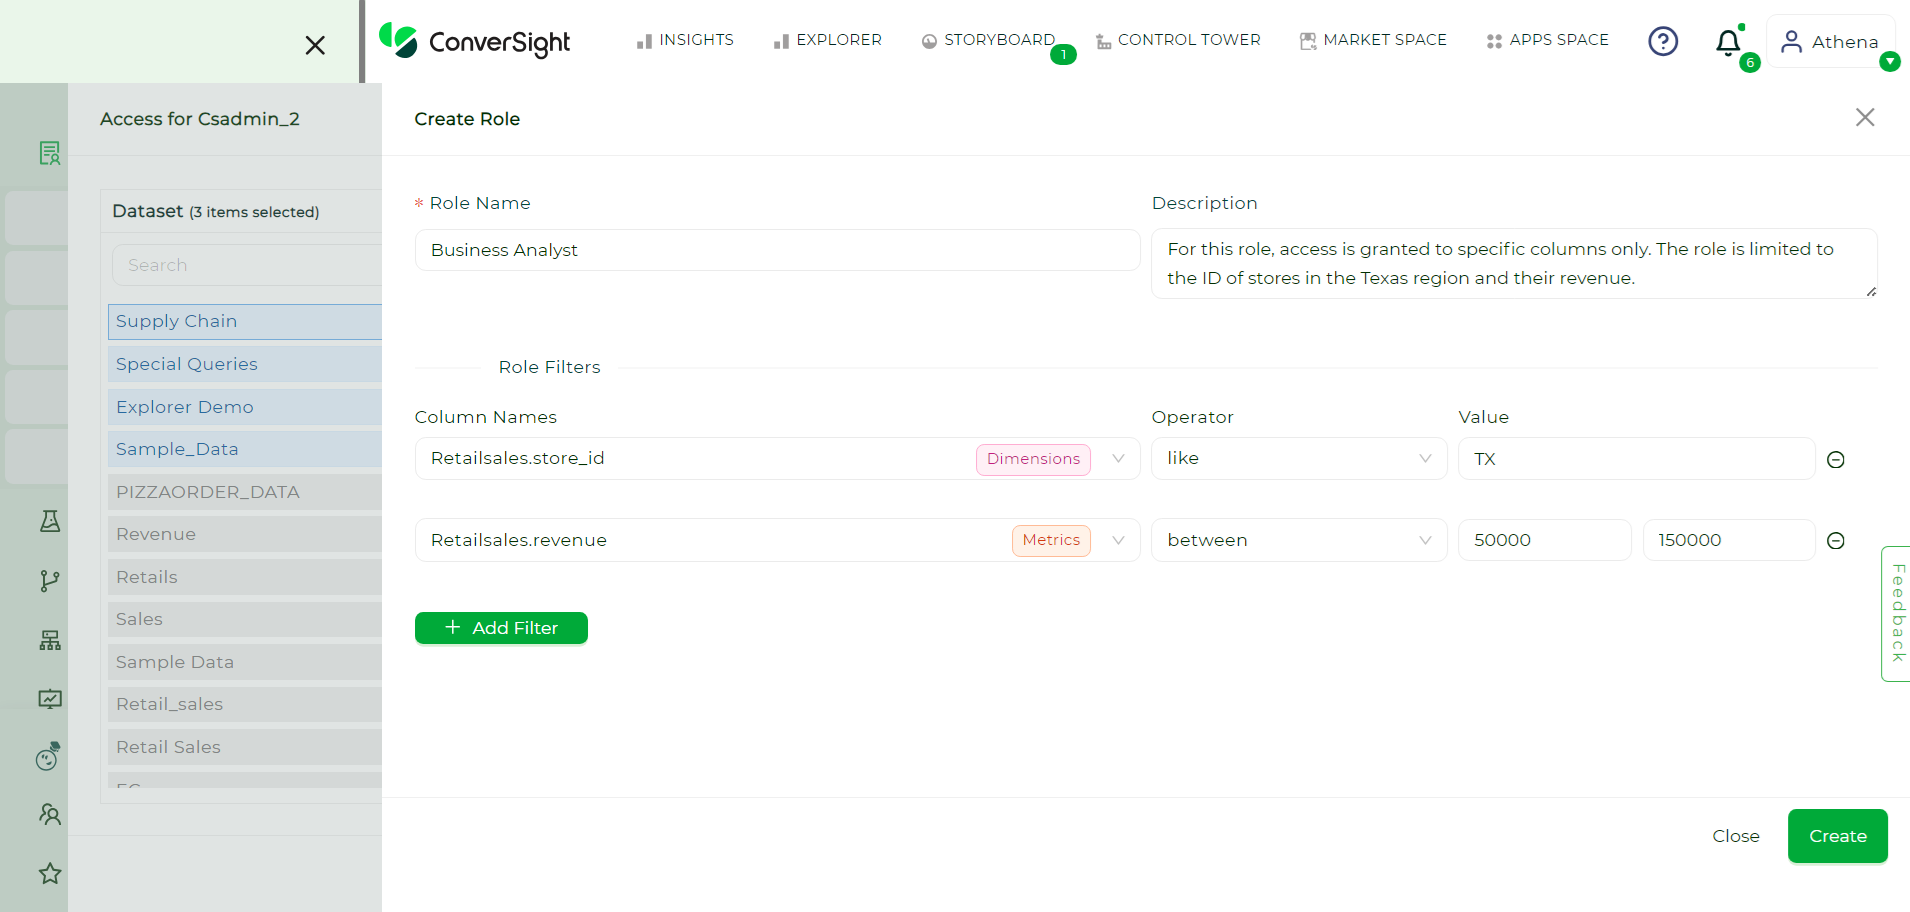
Creating Role#
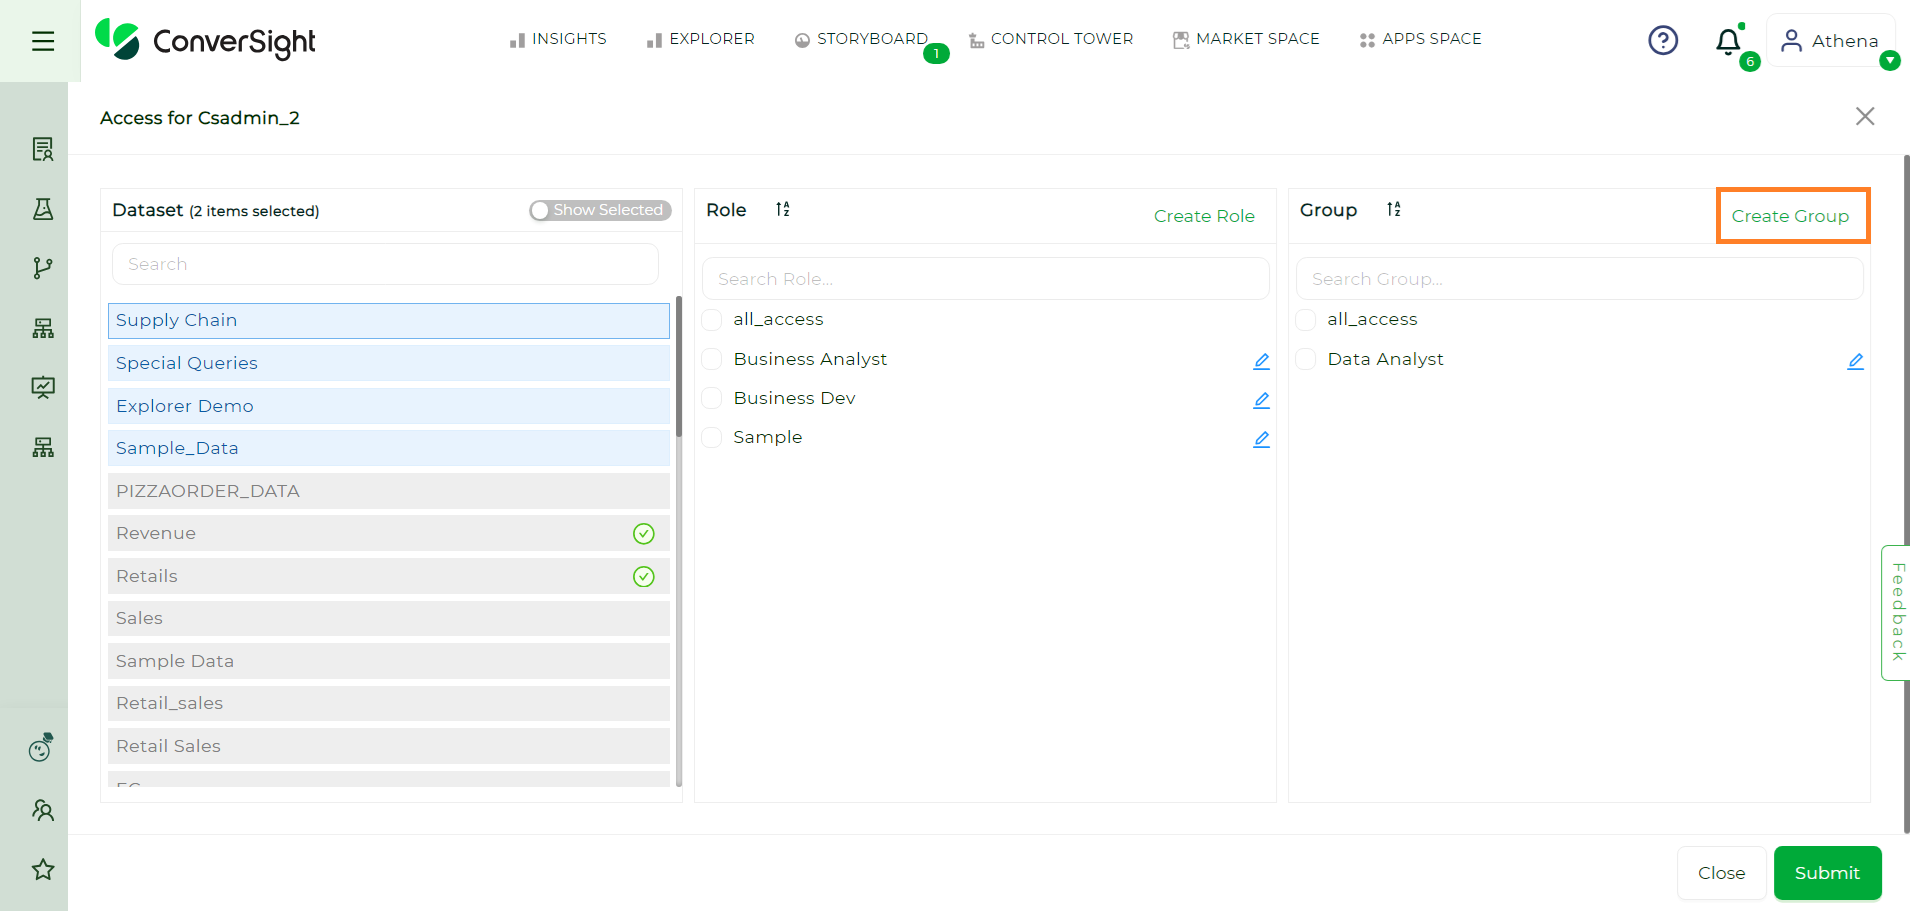
To establish a Group, navigate to the Create Group option. This feature enables the grant of data access to multiple users at once.
Select Create Group#
Choose the specific columns for which the group will have access and then click on Create.
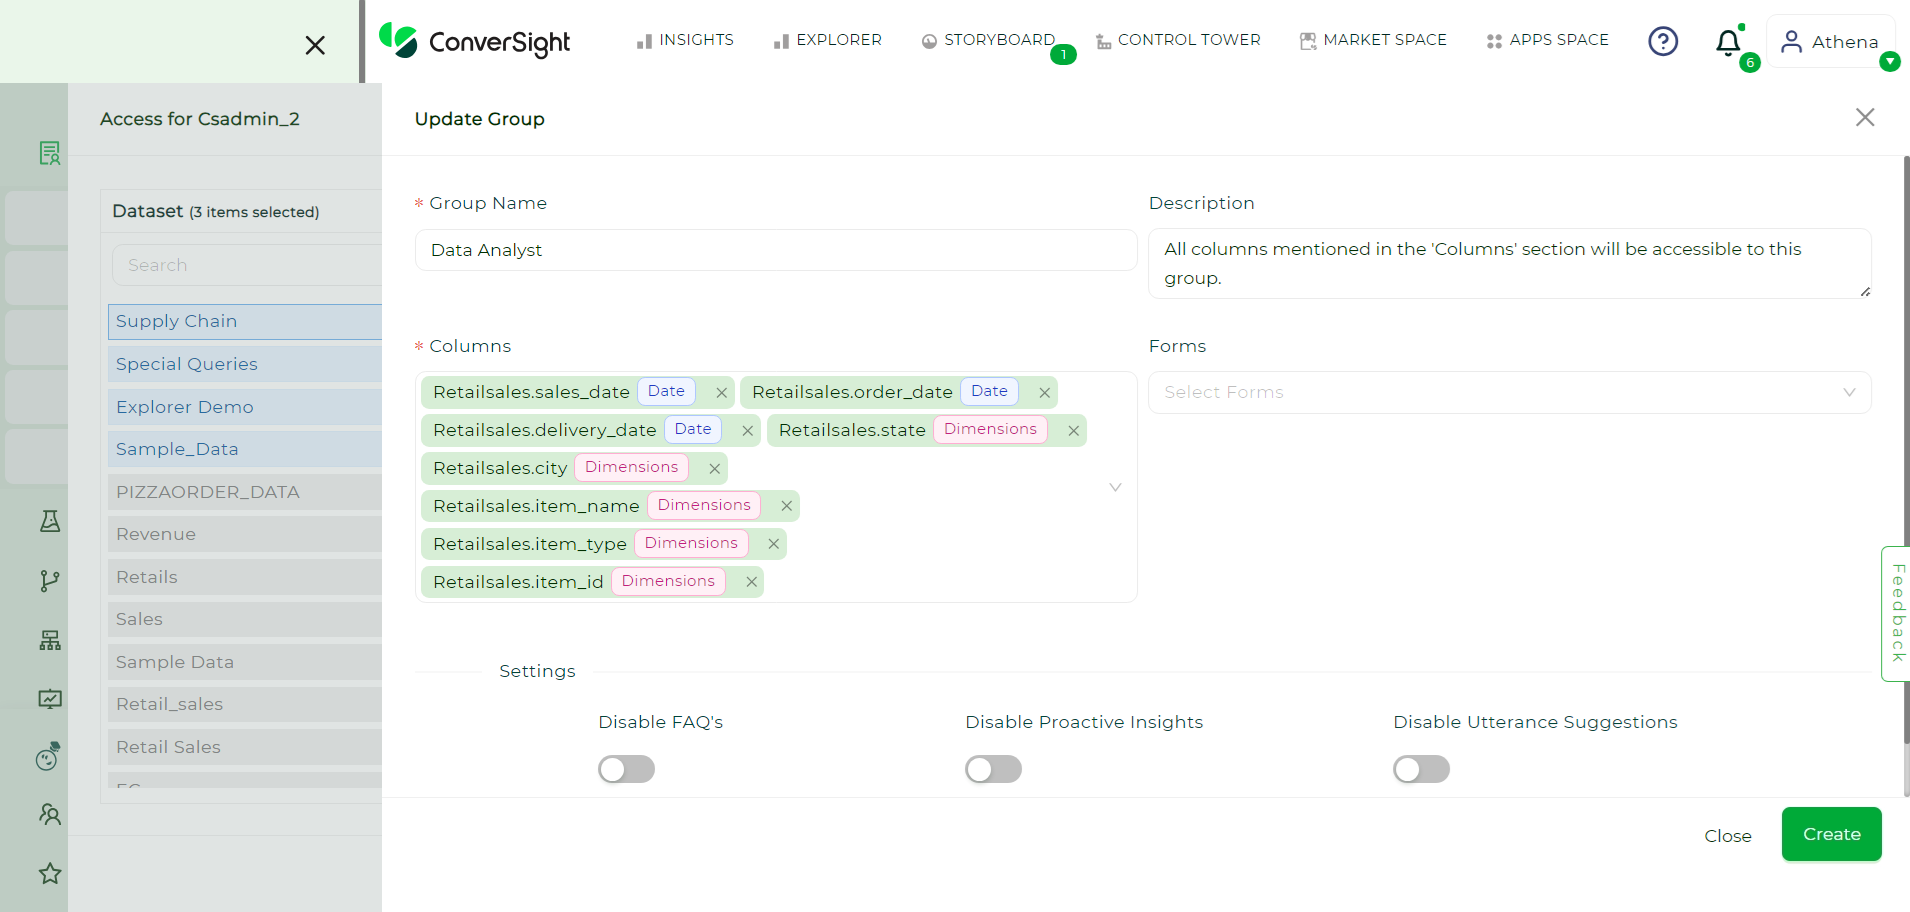
Group Creation#
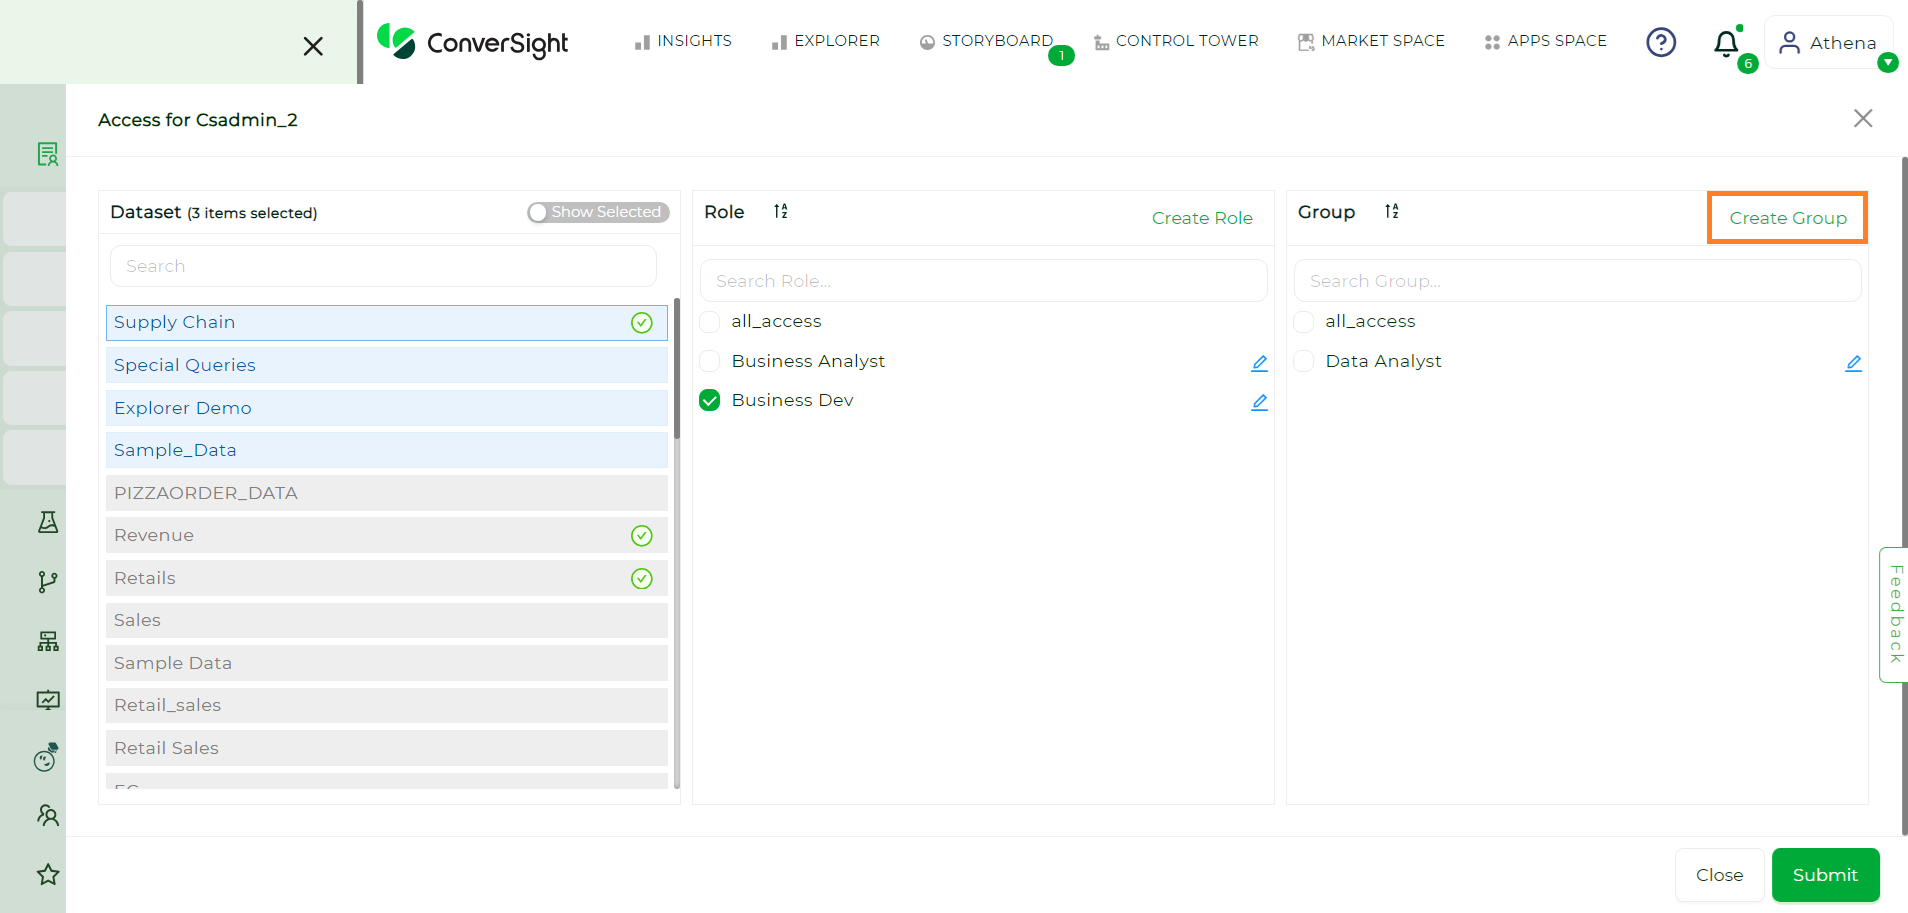
After selecting the appropriate Group and Role, proceed to finalize the changes by clicking on the Submit button.
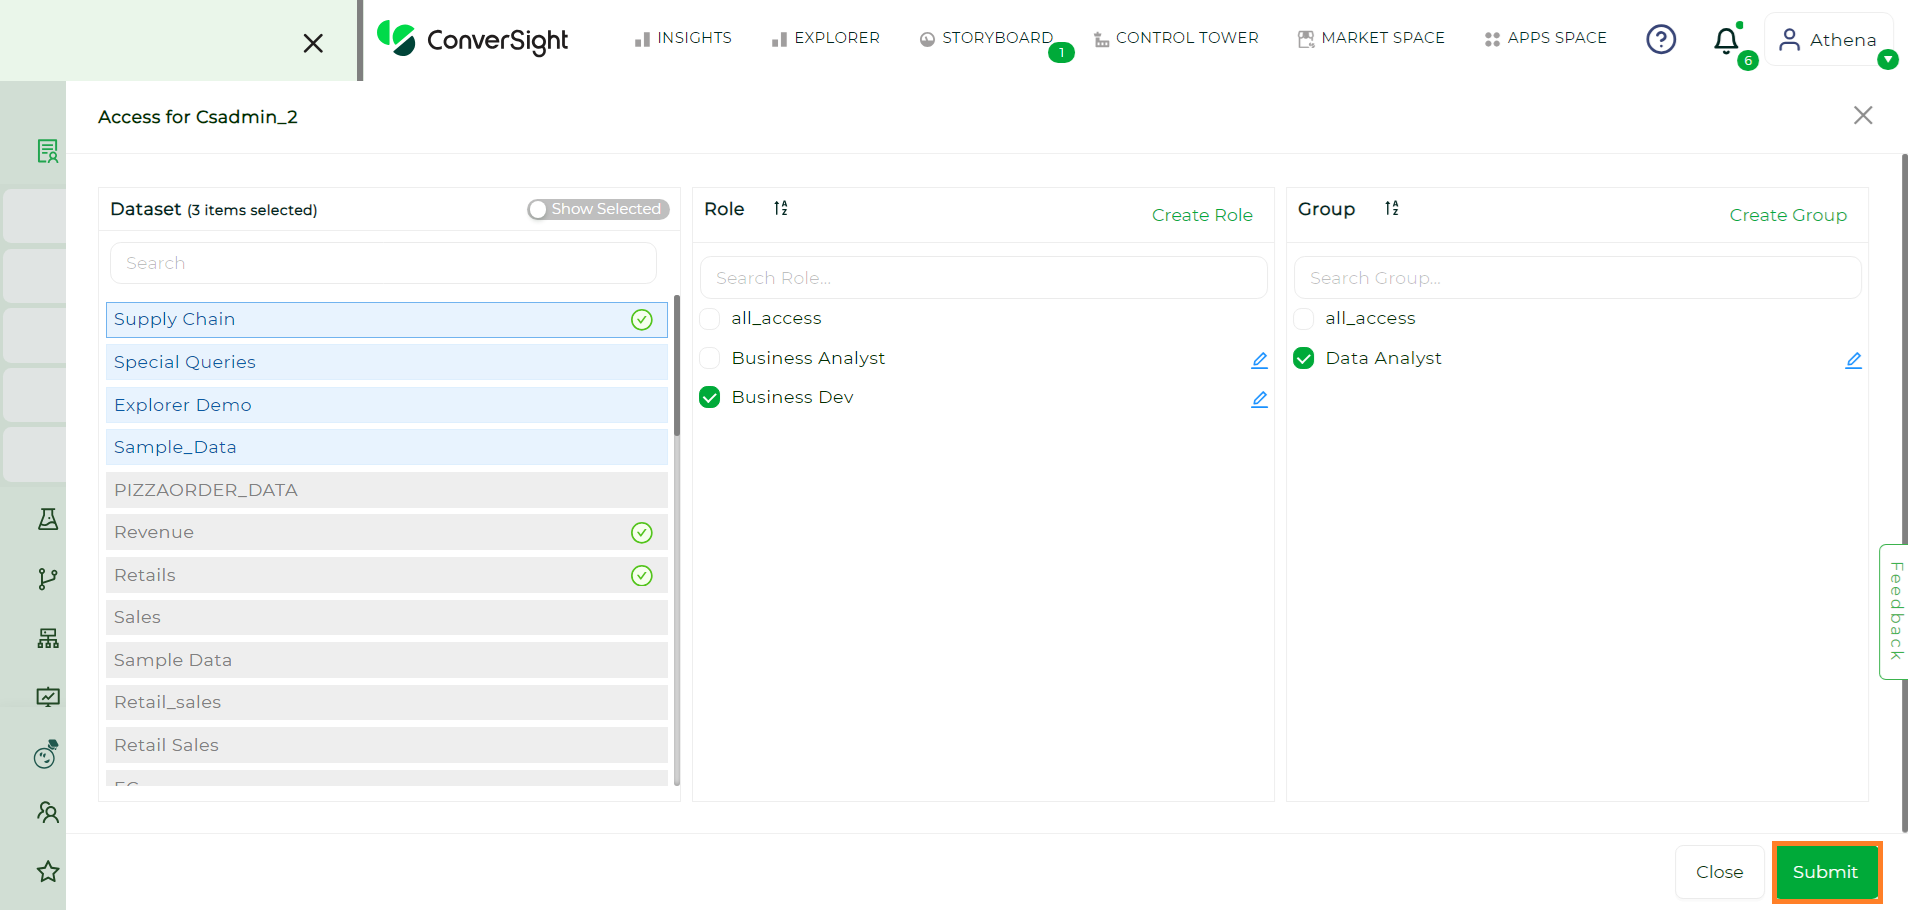
Submit#
To watch the video, click on Granting Dataset Access.
How to Re–invite a user?#
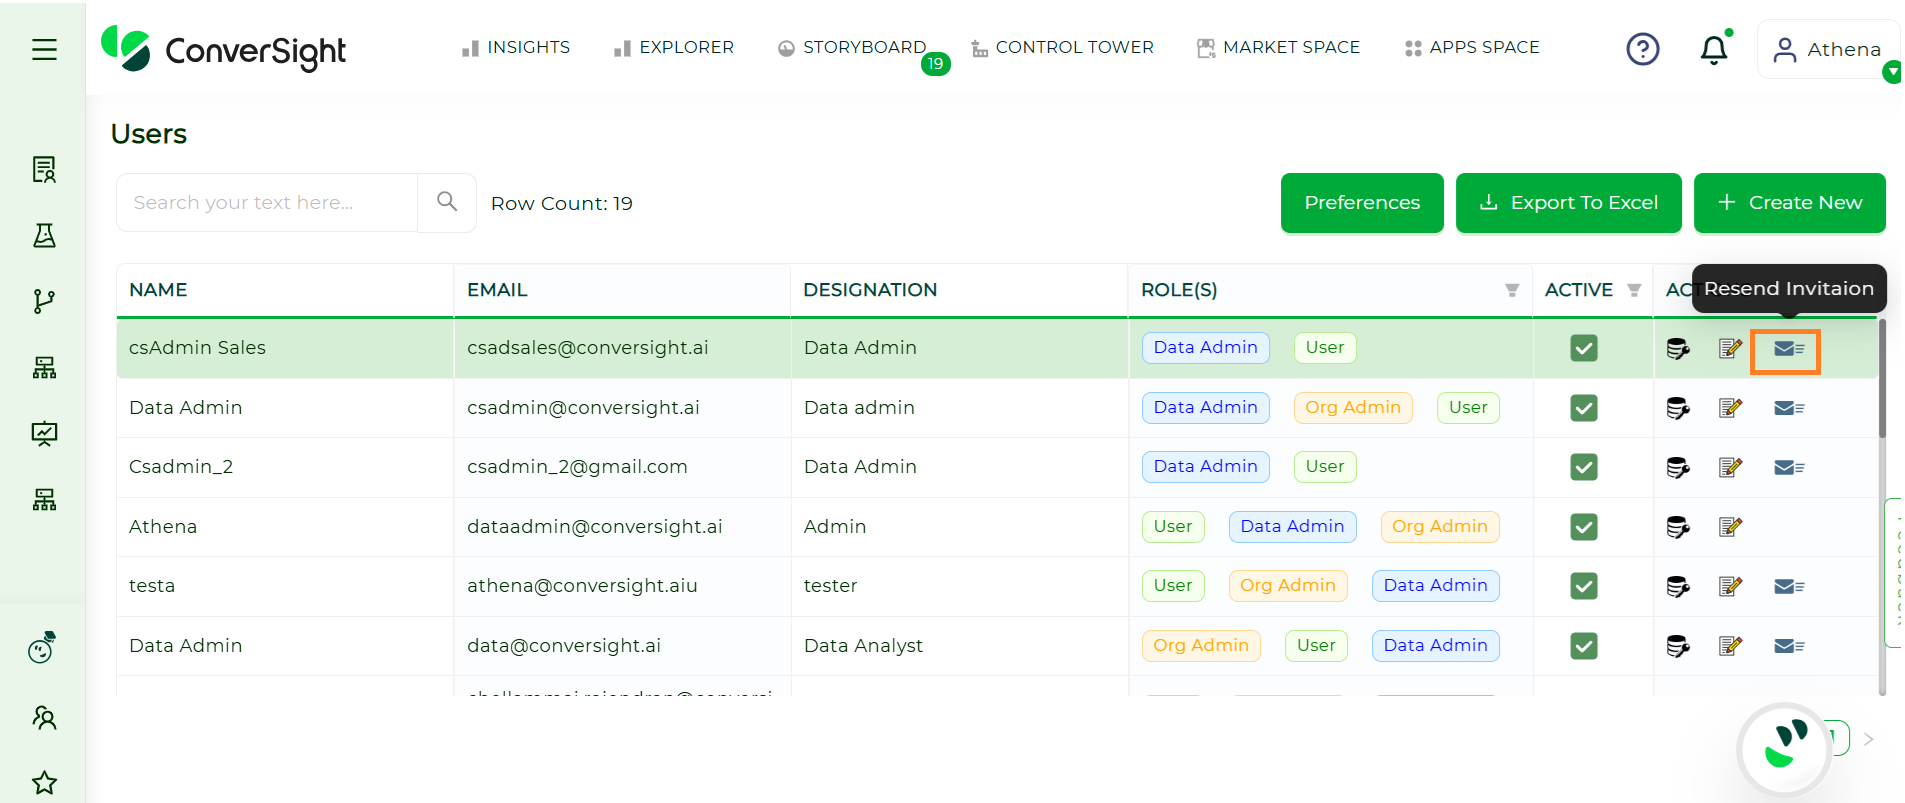
If a user has missed or not responded to the initial login invitation mail within 72 hours, you can easily resend the invitation to that user again. This ensures the user receives another opportunity to access the platform without requiring any additional setup and only users with Organization Admin privileges can resend invitations.
Steps to Re-invite a User:
Resending the invitation is a quick and effective way to keep the onboarding process smooth, minimizing delays caused by missed communications. Follow these steps to Re-invite a user:Step 1: Access the Data Workbench and select Data Governance from the menu.
Data Governance#
Step 2: A list of users will be displayed along with their details.
Data Governance#
Step 3: In the Action column, find the user you want to re-invite and click the ‘Mail’ icon to resend the invitation.
Re-Invite#
NOTE
If a user doesn’t have a resend invitation icon in the action this means that they are already logged in.
How to update User Roles?#
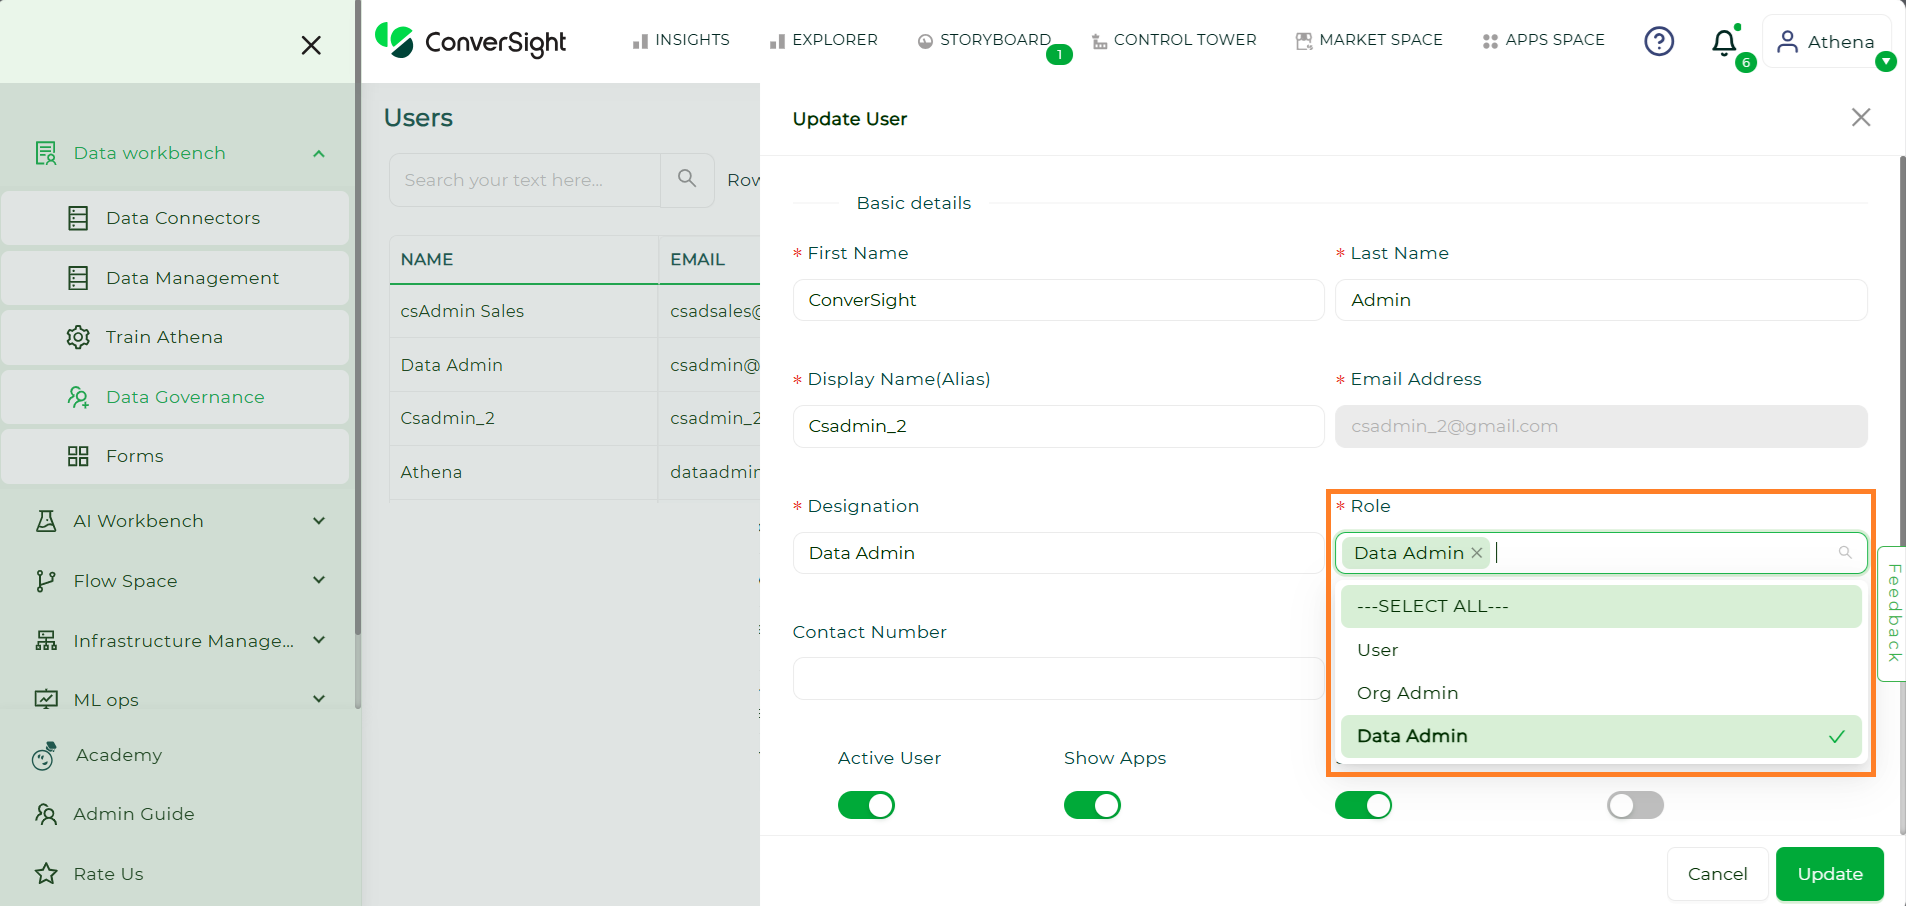
Updating user roles ensures that individuals have the appropriate permissions and access levels within the platform. This process is essential for maintaining effective data governance and security. Follow these steps to update a user’s role:
Open the configuration bar and select Data Governance under the Data Workbench section.
Data Governance#
Select a user and click on the Edit icon in the Action column.

Edit Option#
On the Update User page, find the Role option. Here, you can update the user’s role as needed.
User Role Update#
To remove user roles, hover over the roles and click the x to eliminate them.
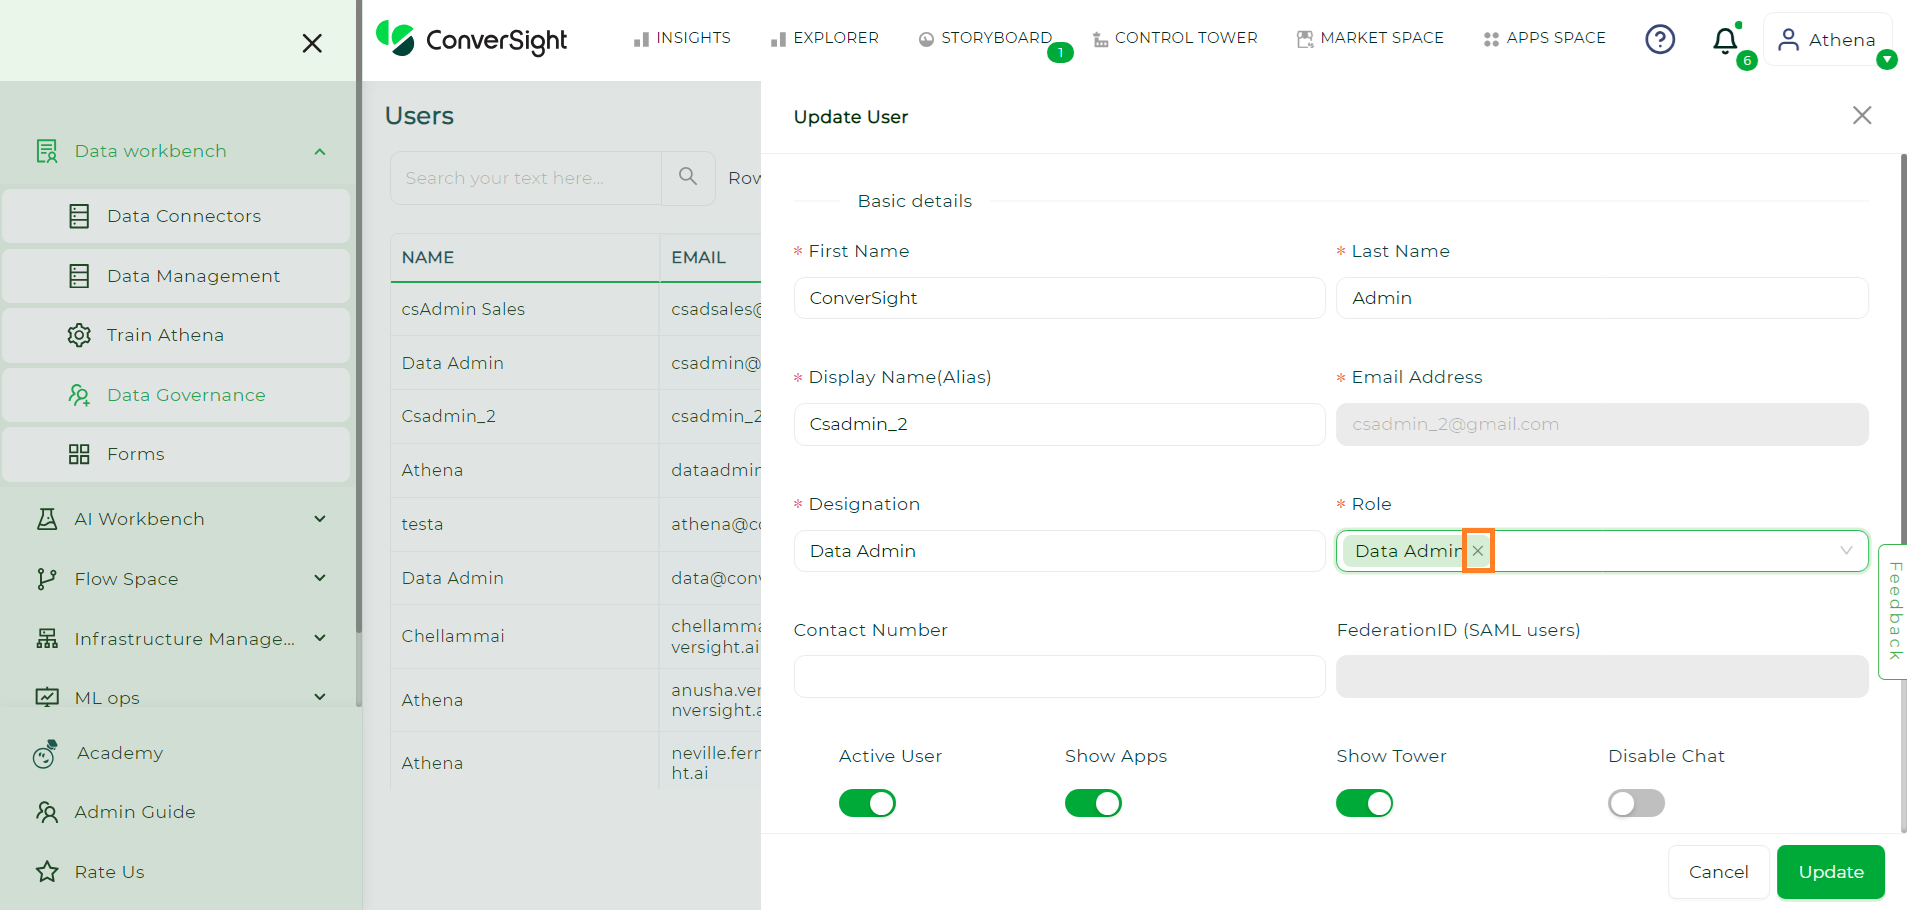
Remove User Roles#
After making the necessary changes, click the Update button to apply the new role.

Updating User Permissions#
After clicking the Update button, a notification reading ‘User details successfully updated’ will appear.
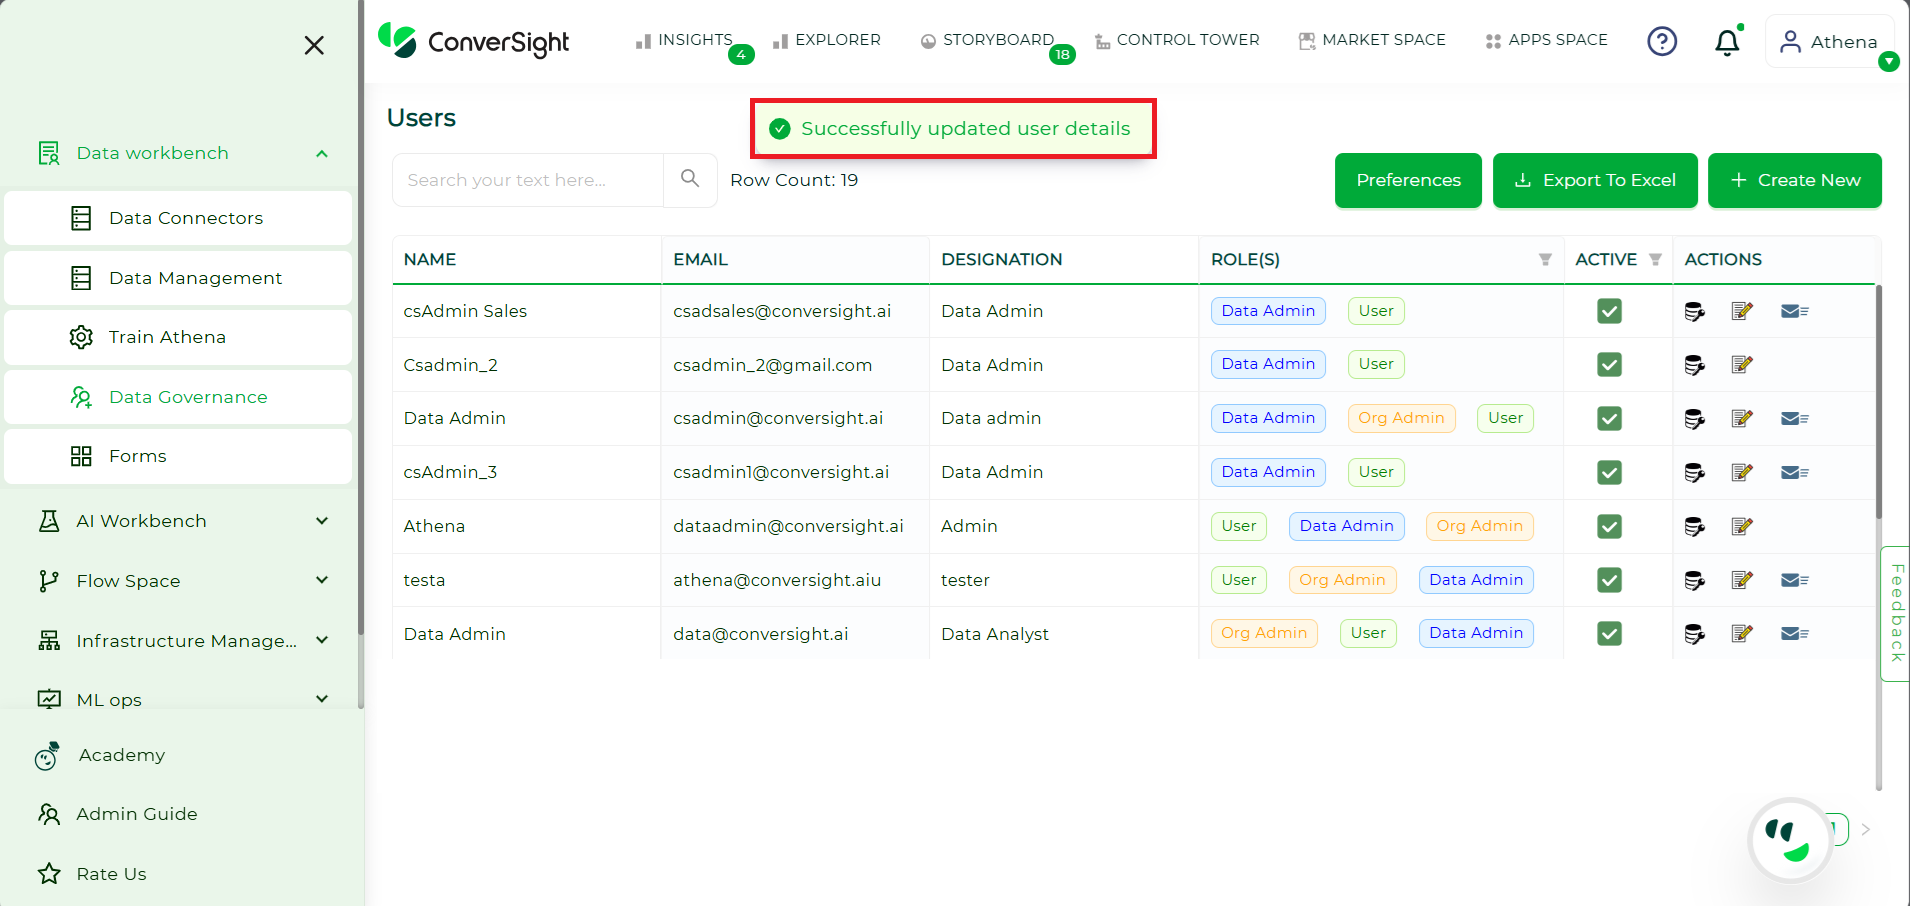
Updating User Permissions#
NOTE
Only the Org Administrator can update user roles.
Roles and Groups#
Roles
Roles regulate dataset access based on specified filters, determining the criteria data records must meet for assigned users to access the data.
Groups
Groups serve the purpose of granting access to a collection of columns within a dataset. They enable users to define sets of columns and provide access to those group of columns to designated individual users or Roles.
In the platform users can create Roles and Group through two ways, they are through:
Data Governance
Dataset Management
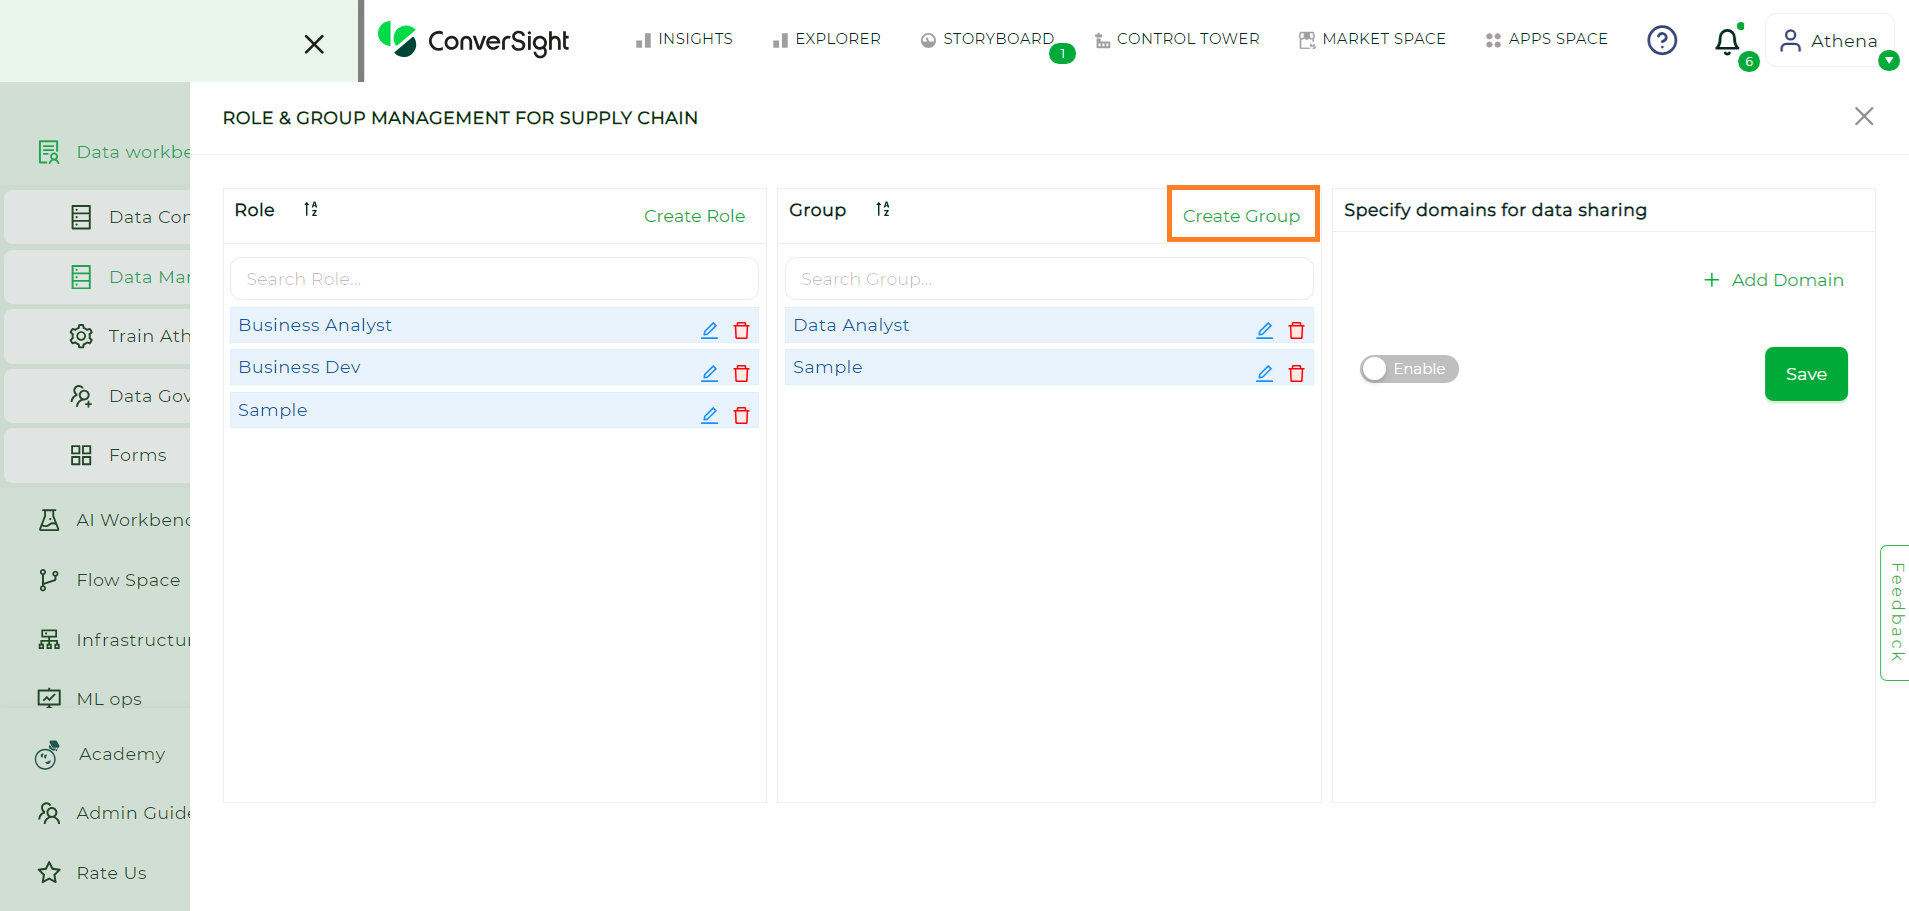
Roles and Groups through Data Governance#
Creating Roles#
Select the Data Governance option in the Data Workbench menu.

Data Governance#
In the Users page, click on the Dataset Access icon in the Action column.
Dataset Access#
All datasets in the organization will be listed, but you can only create roles for datasets that you have either created yourself or have full access to. Choose the dataset for which you wish to create Roles.
Dataset#
NOTE
Each dataset includes a default all_access role and all_access group, granting complete access to the entire dataset.
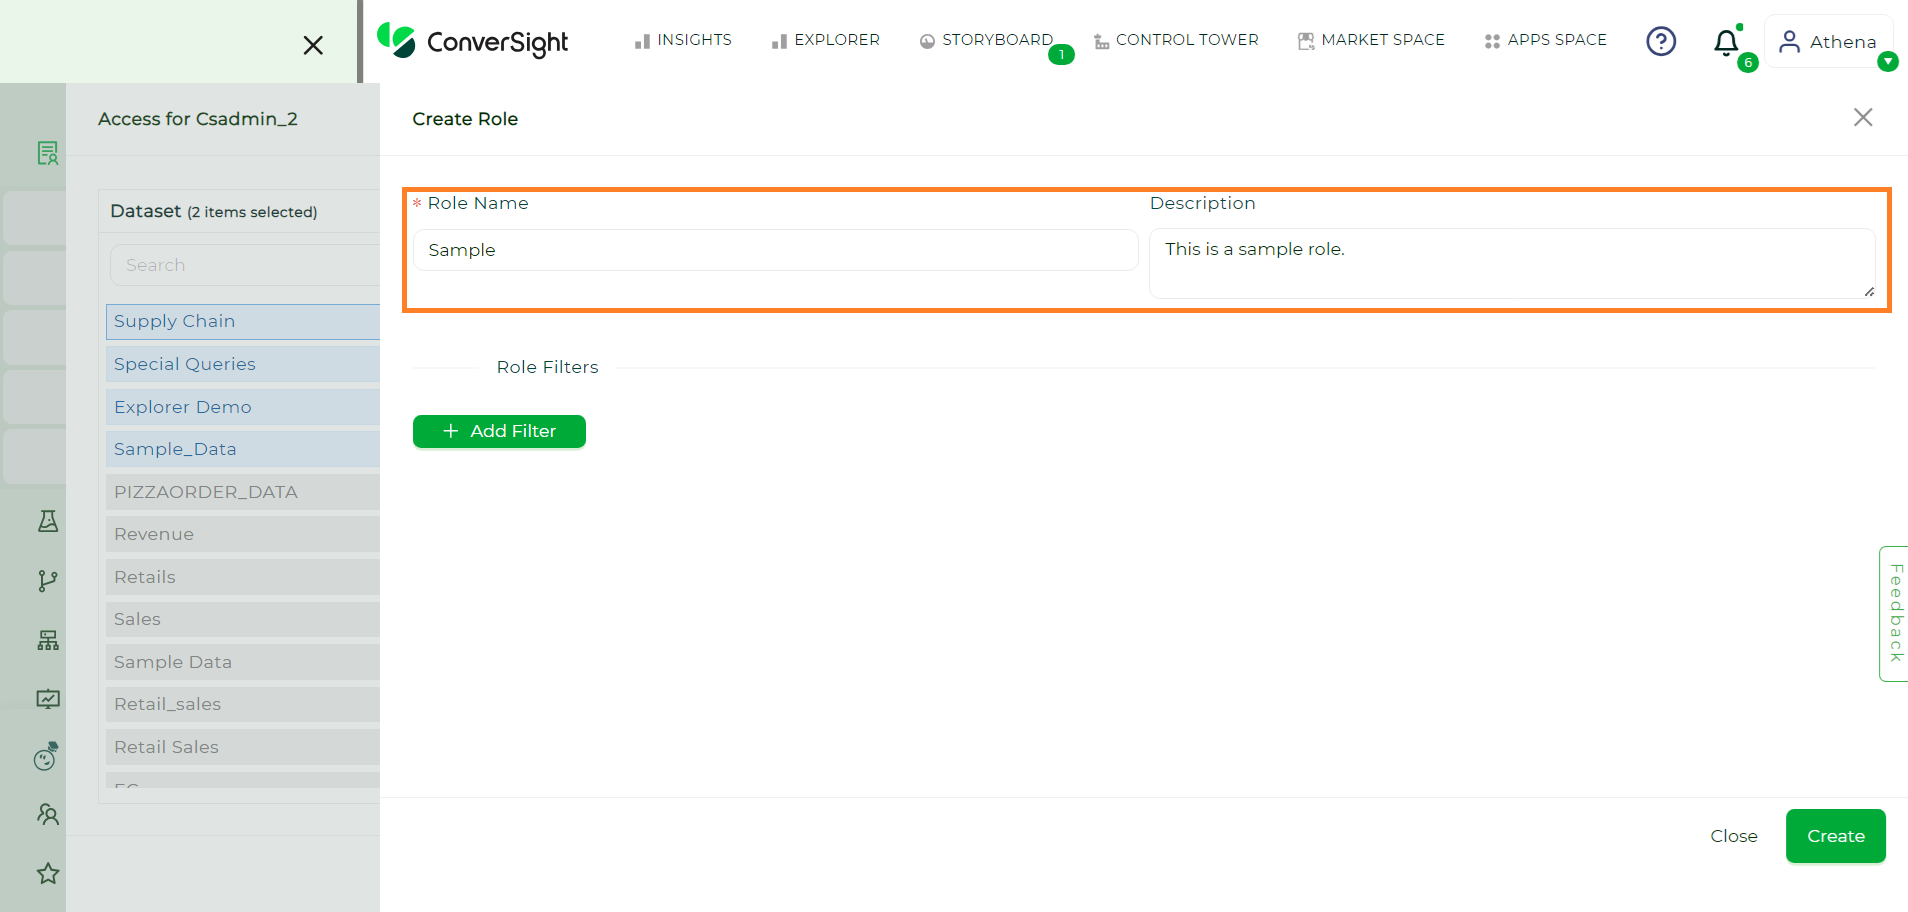
Click on Create Role and provide the name and description of the Role.

Create Role#
Name and Description#
Once done, click on the Add Filter button to include Role filters to your Role.
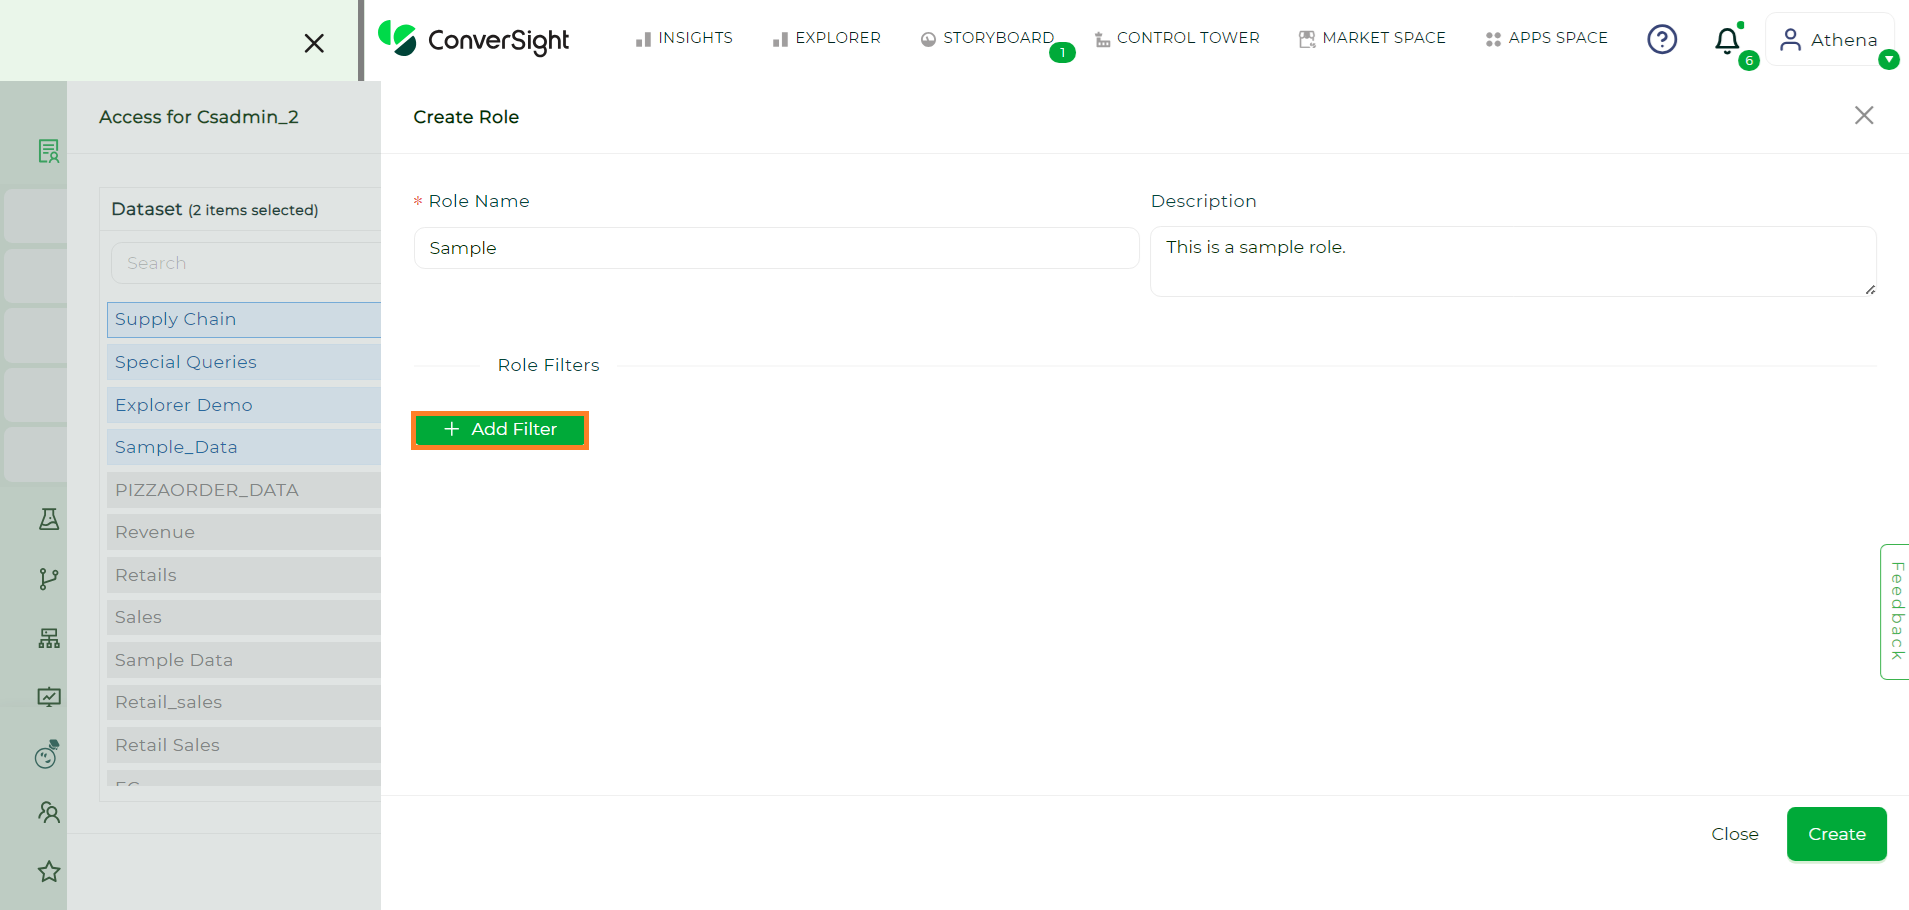
Add Filter#
NOTE
It is mandatory to provide at least one filter to create a Role.
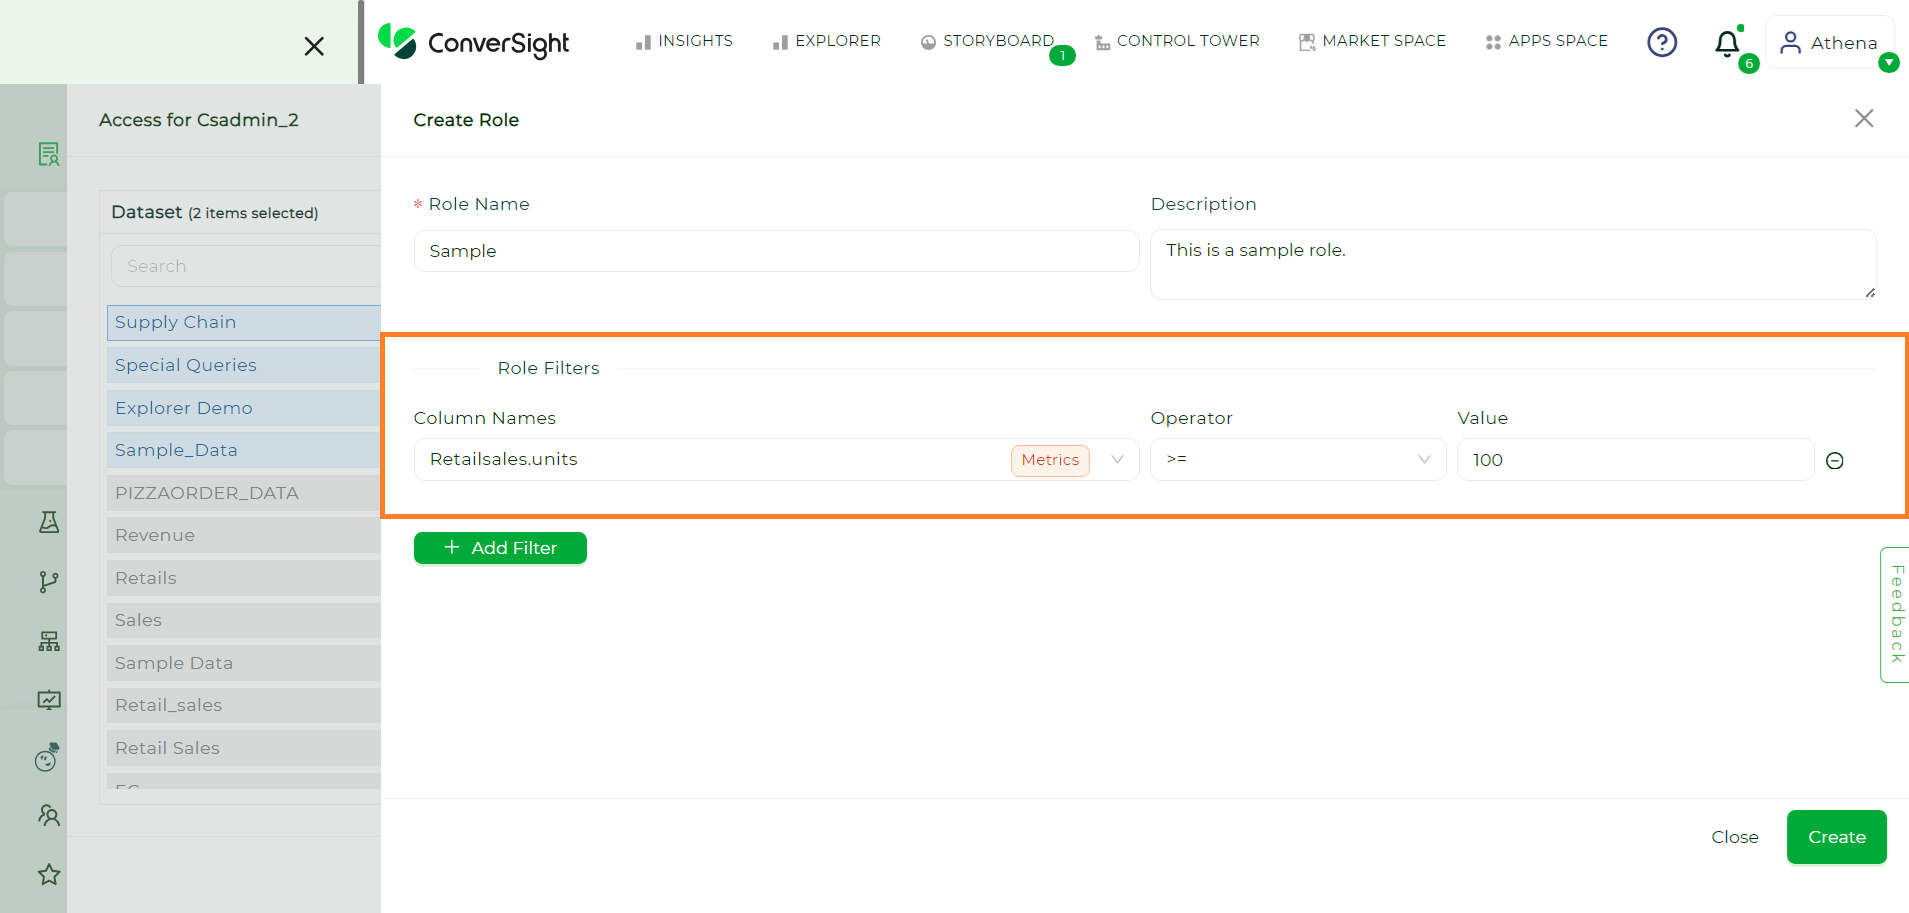
Select a column from the Column Name dropdown and provide the Operator and Value. The options available on the Operator dropdown is based on the category of the selected column.
Column Name#
Category |
Available Operators |
|---|---|
Dimension |
is, like, !=, not like |
Metric |
==, >, >=, <, <=, !=, between |
Date |
is, between |
Calculated Dimension |
is, like, !=, not like |
Calculated Metric |
==, >, >=, <, <=, !=, between |
Calculated Date |
is, between |
Smart Column |
is |
NOTE
Role filters cannot be created using the entire Smart Query, but they can be defined using the columns within the Smart Query.
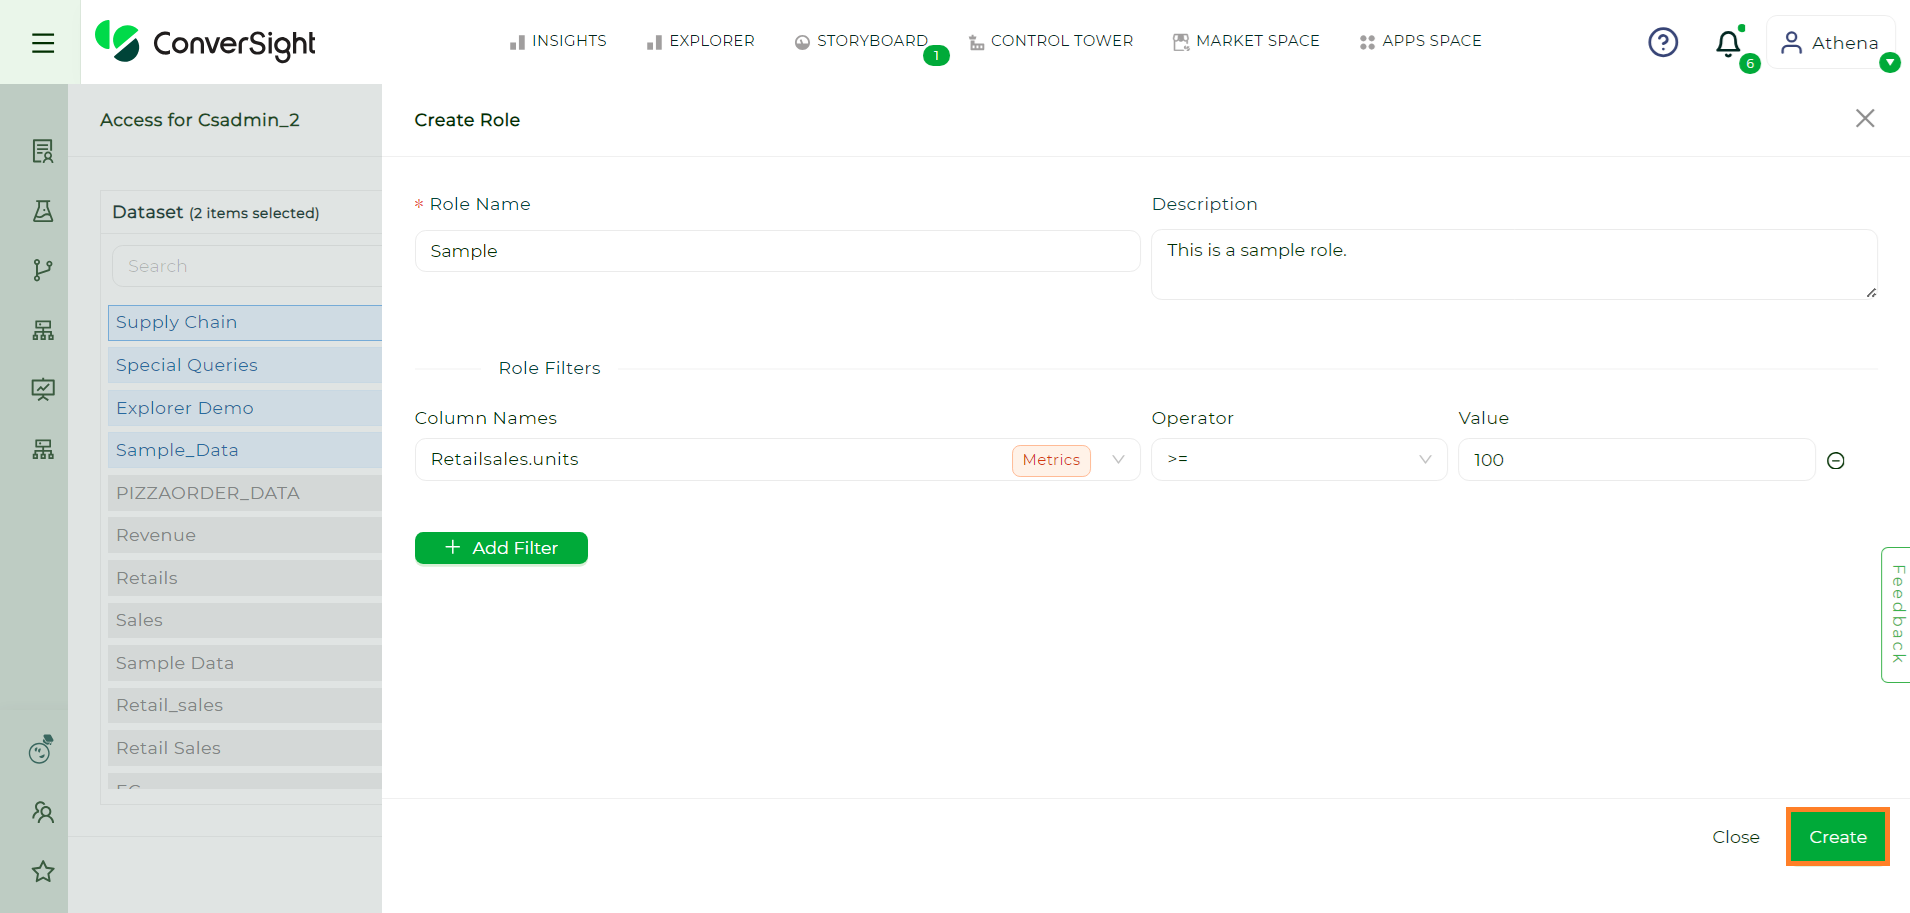
After adding the desired filters, click on the Create button to create your Role for the dataset.
Create Button#
You can set this role’s access for any user within the organization for the dataset.
NOTE
If no role is specified during user creation, the system automatically assigns the User role by default.
Edit Roles#
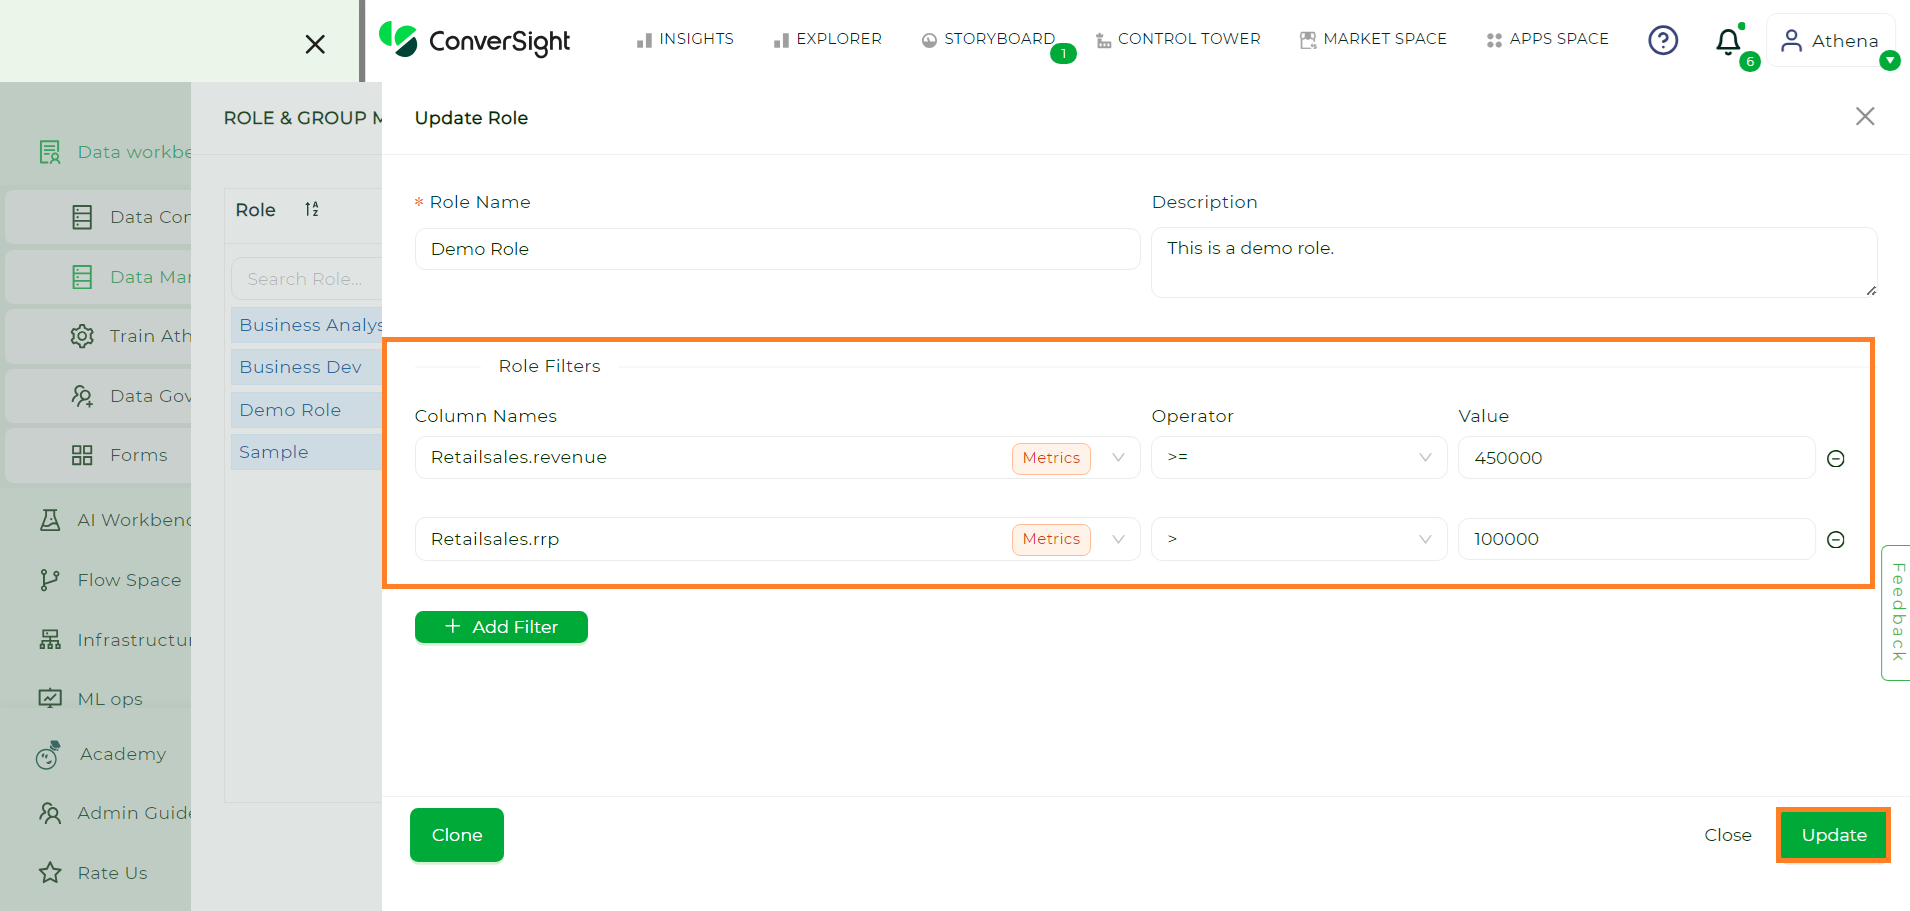
To edit the a Role click on the Edit icon. After making the desired Modifications click on the Update button.

Edit Role#
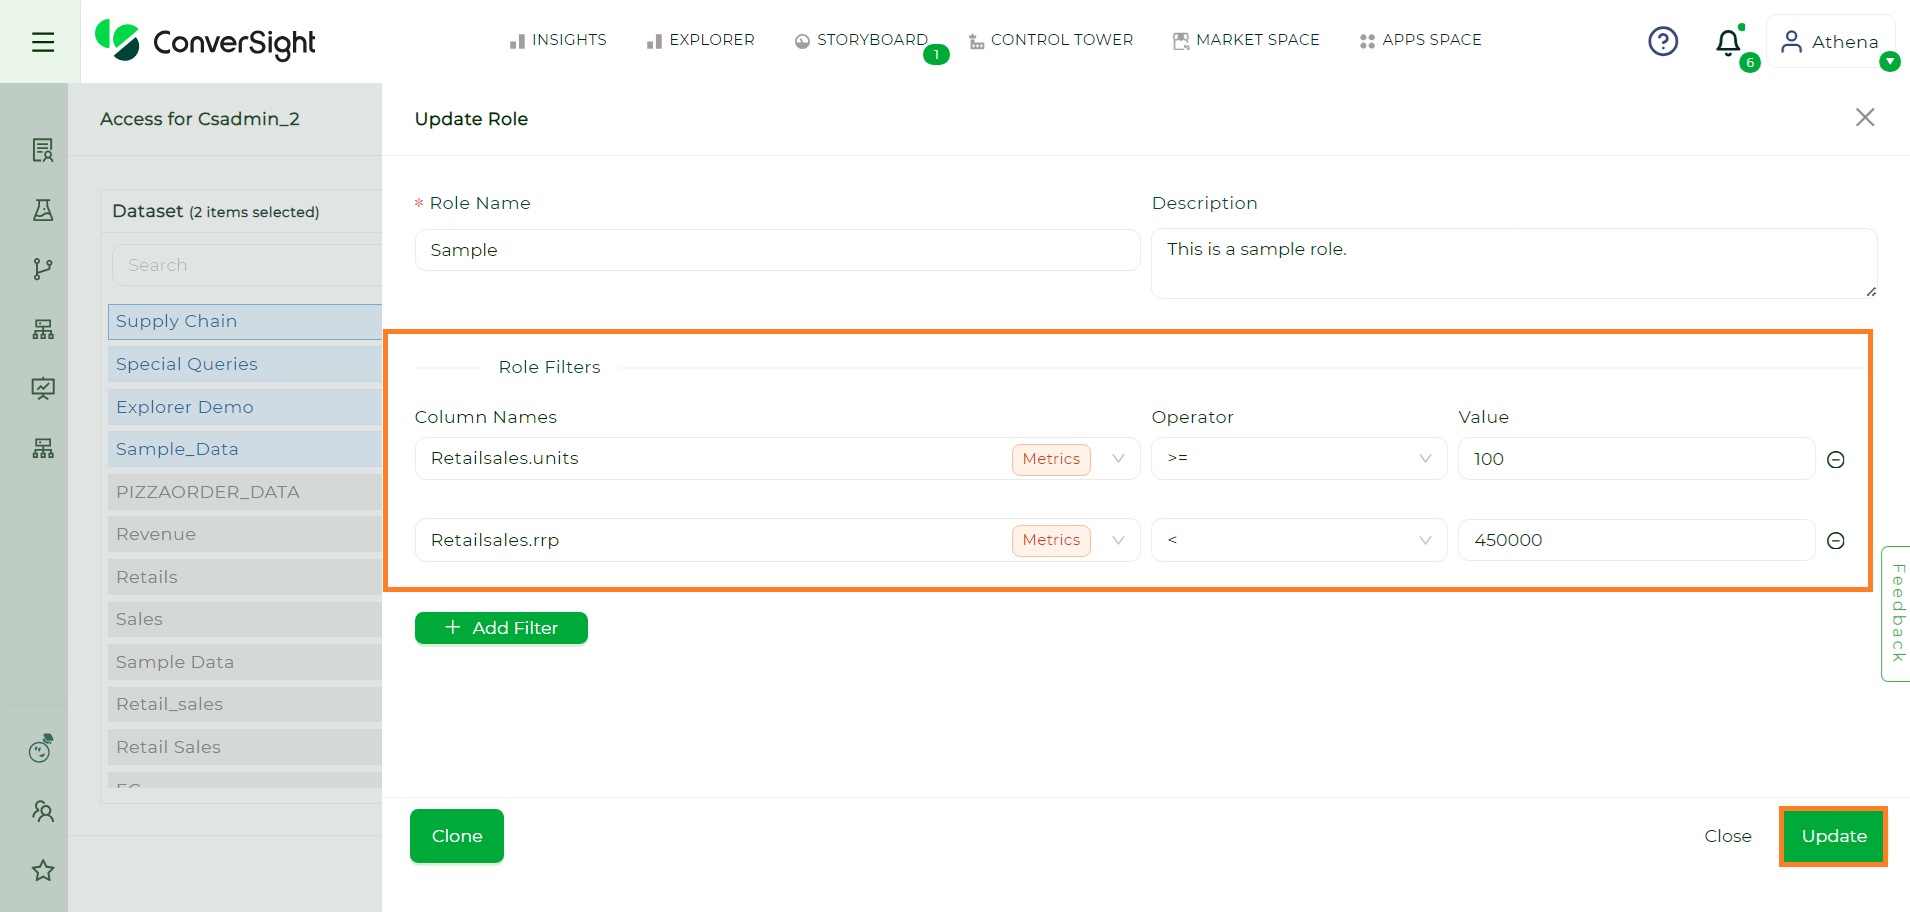
Update#
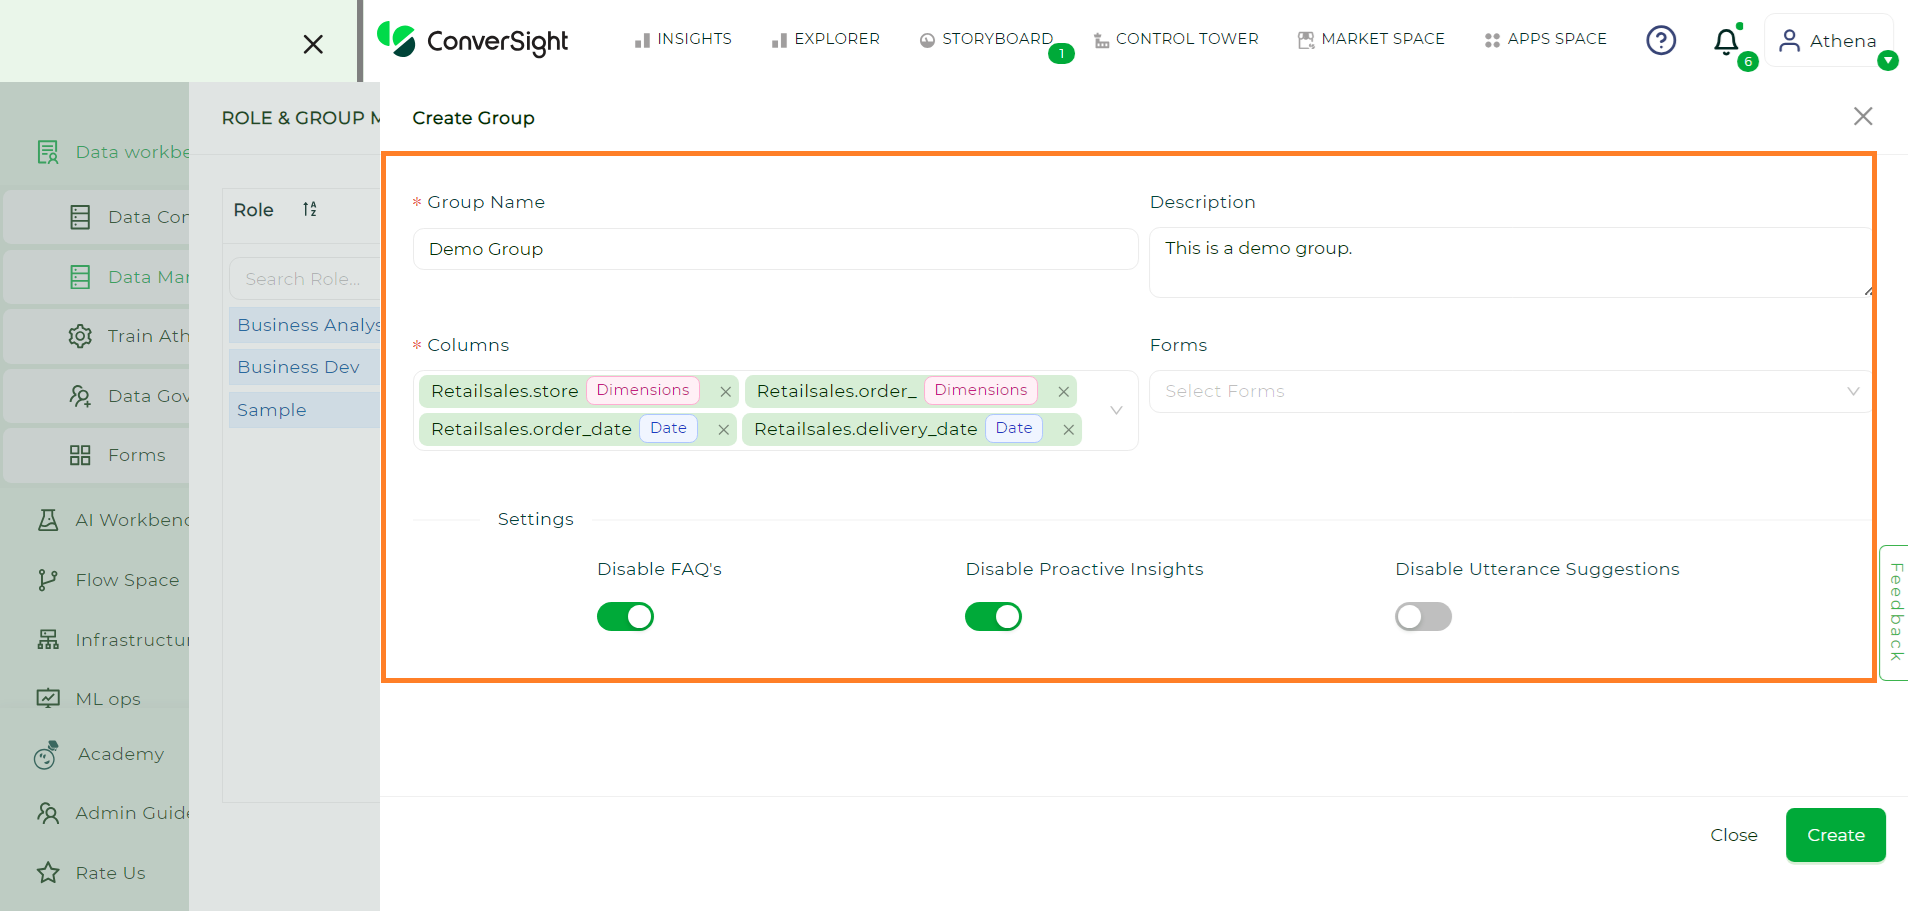
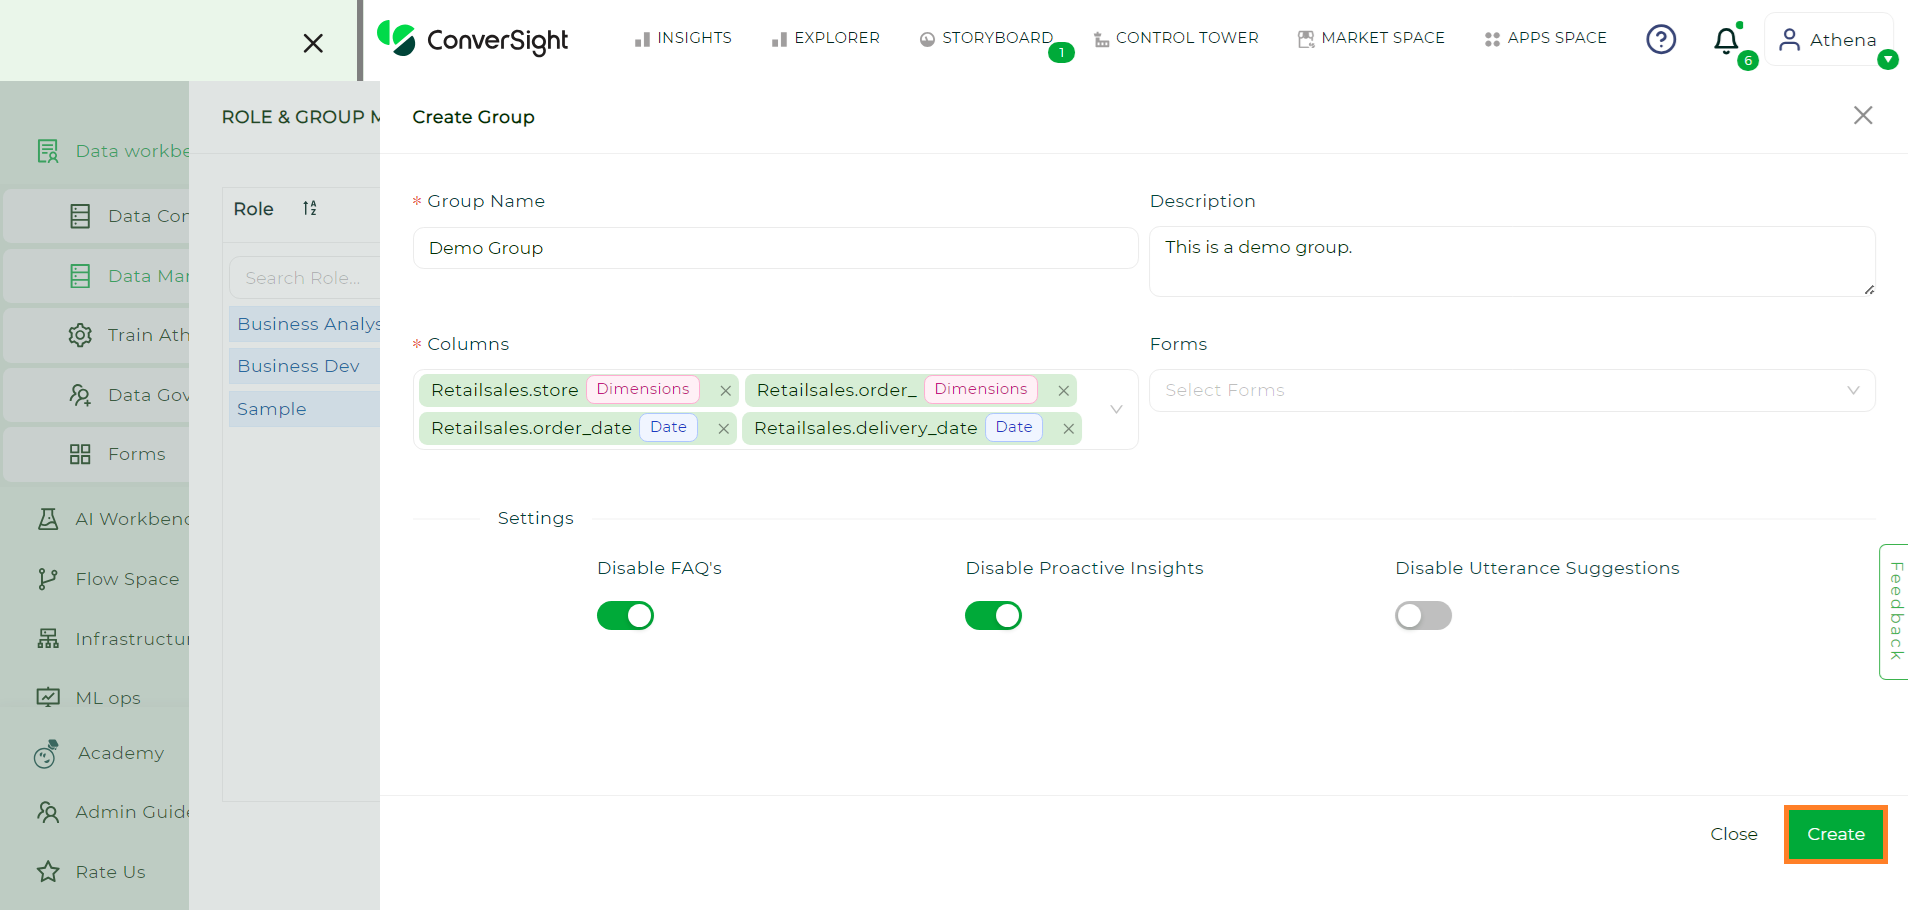
Creating Groups#
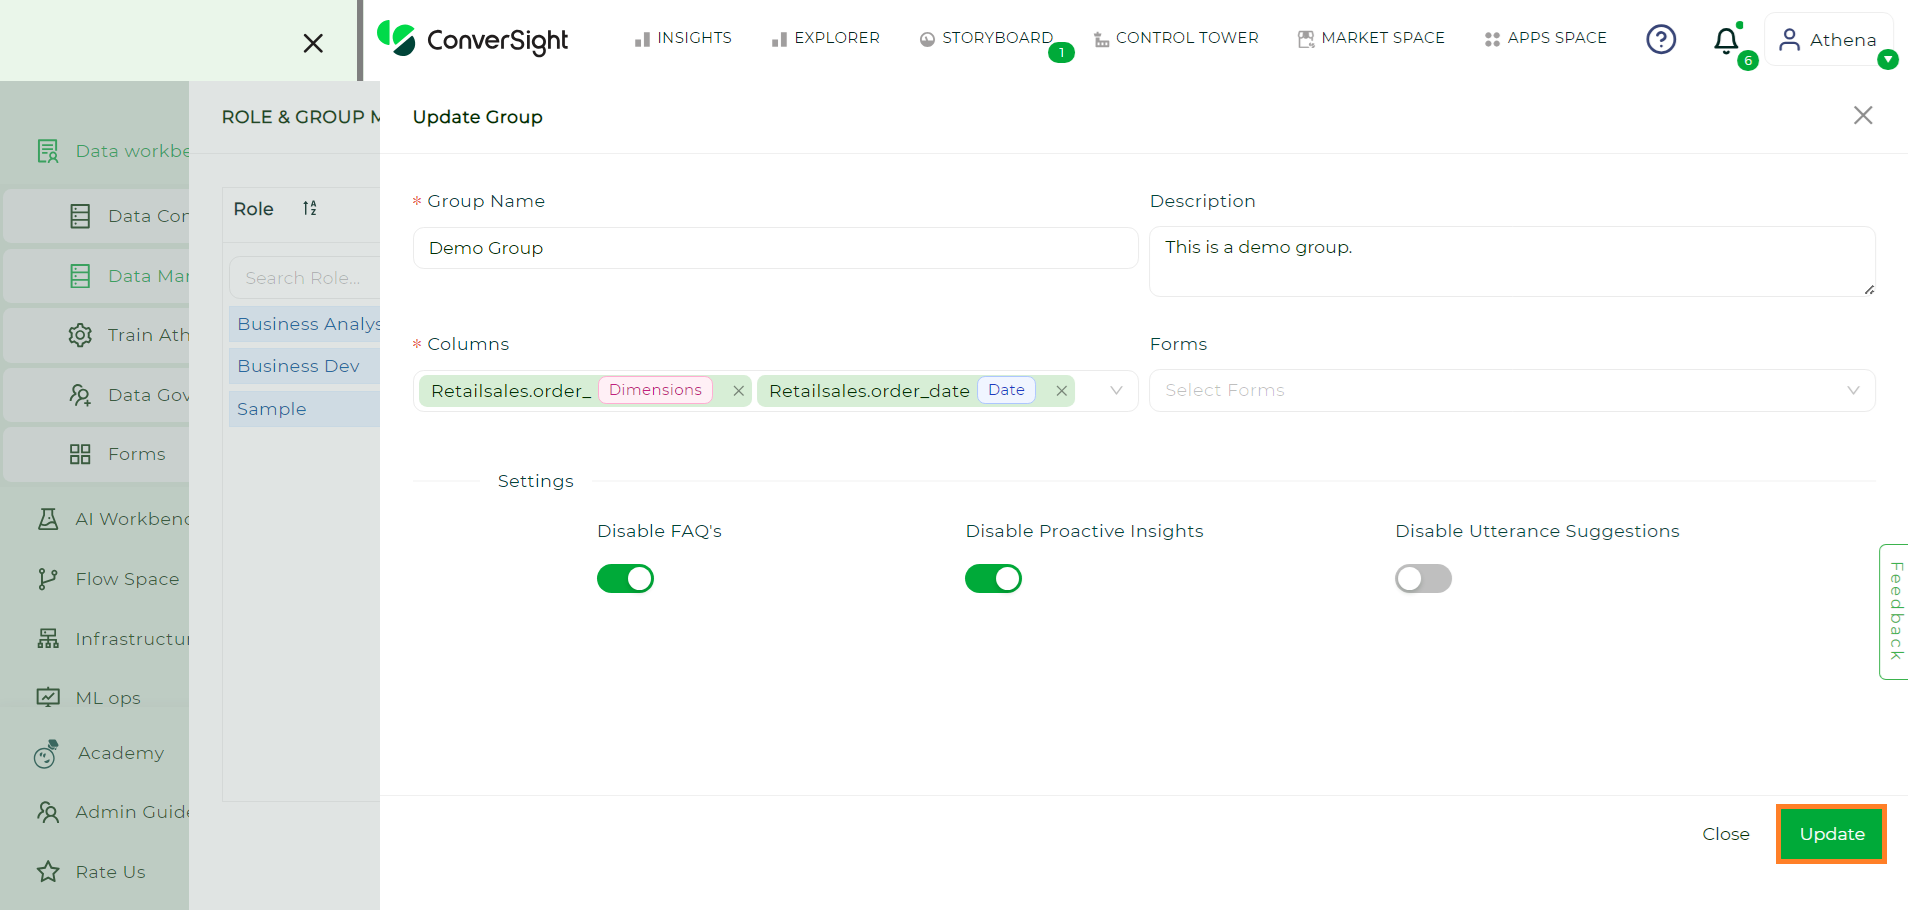
To create a Group, click on Create Group and provide the name and description of the Group.
Create Group#
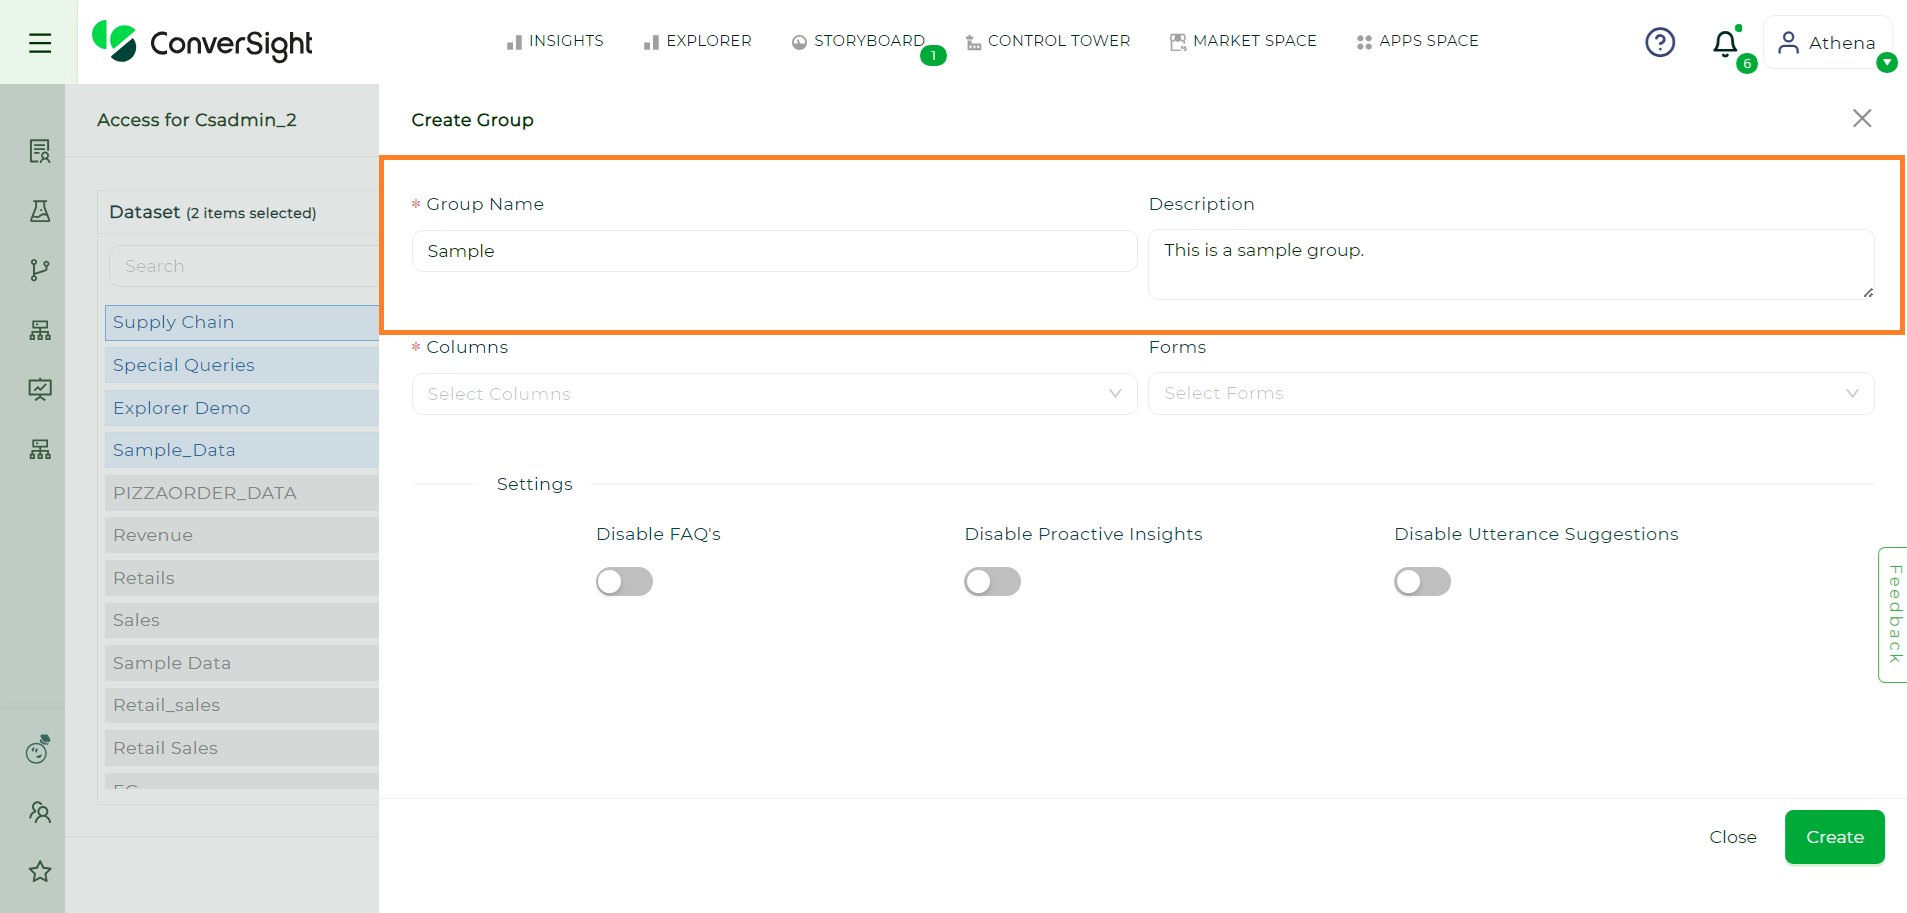
Name and Description#
Choose the columns for your group from the Columns dropdown.
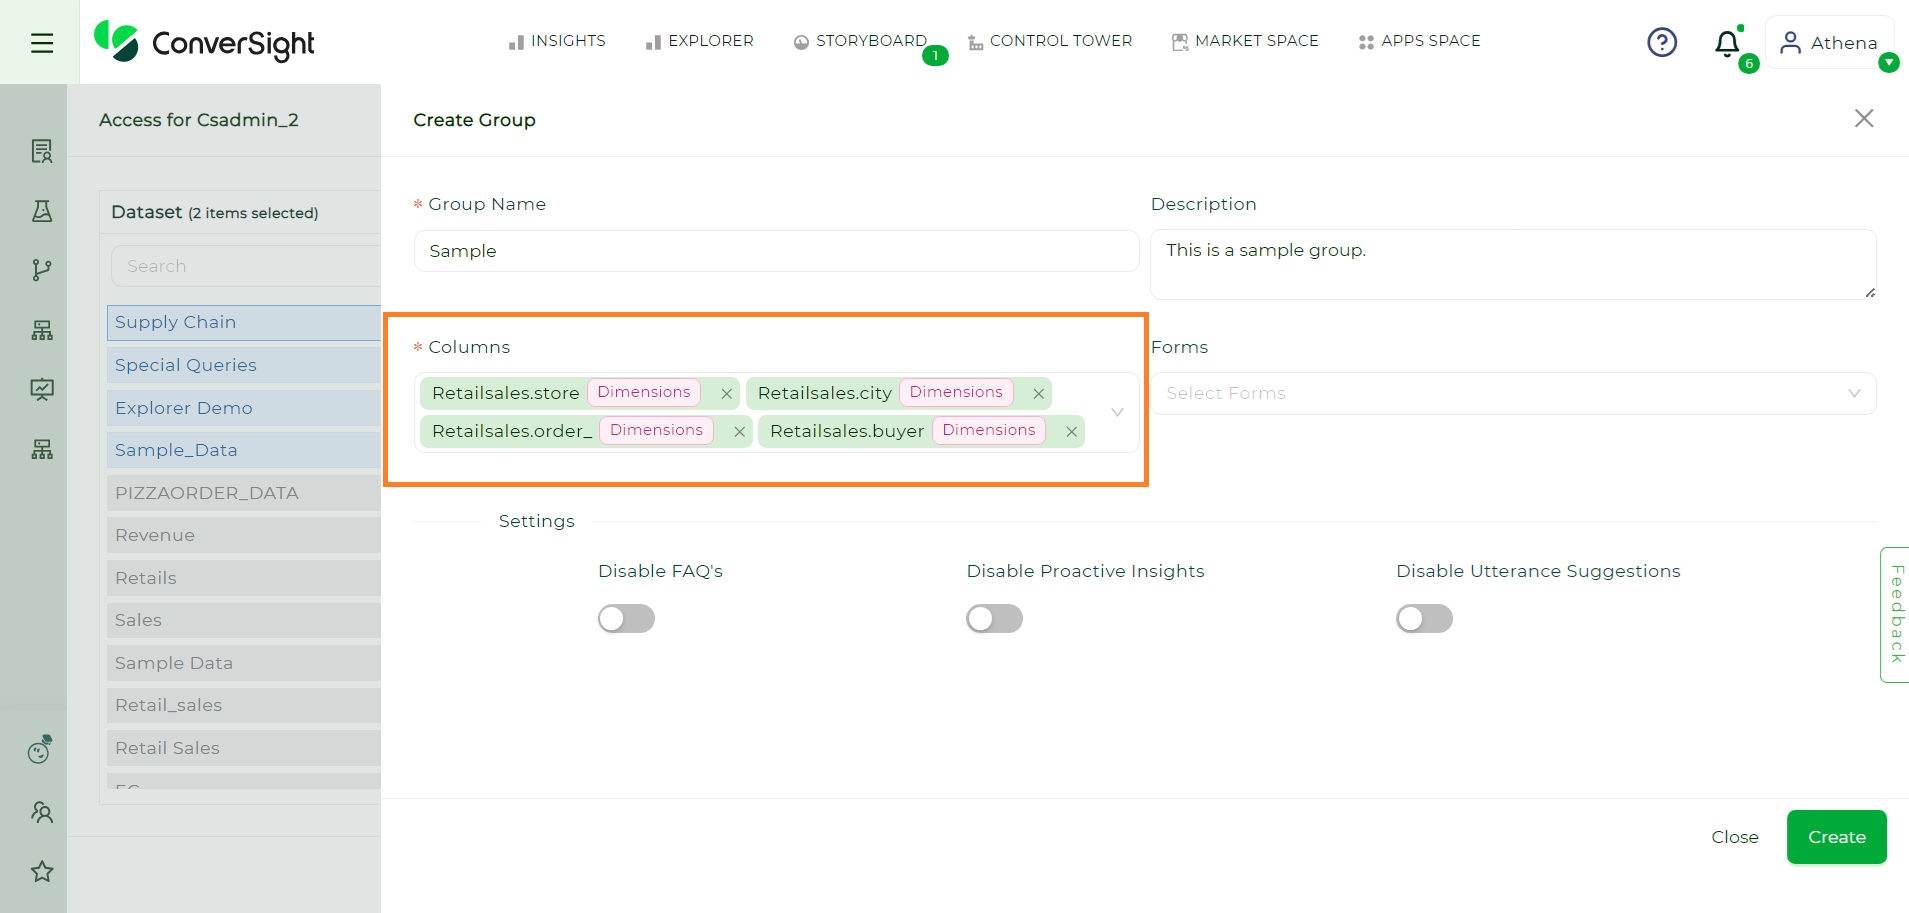
Columns#
Furthermore, users can control access to FAQs, Proactive Insights, and utterance suggestions by toggling the appropriate settings.
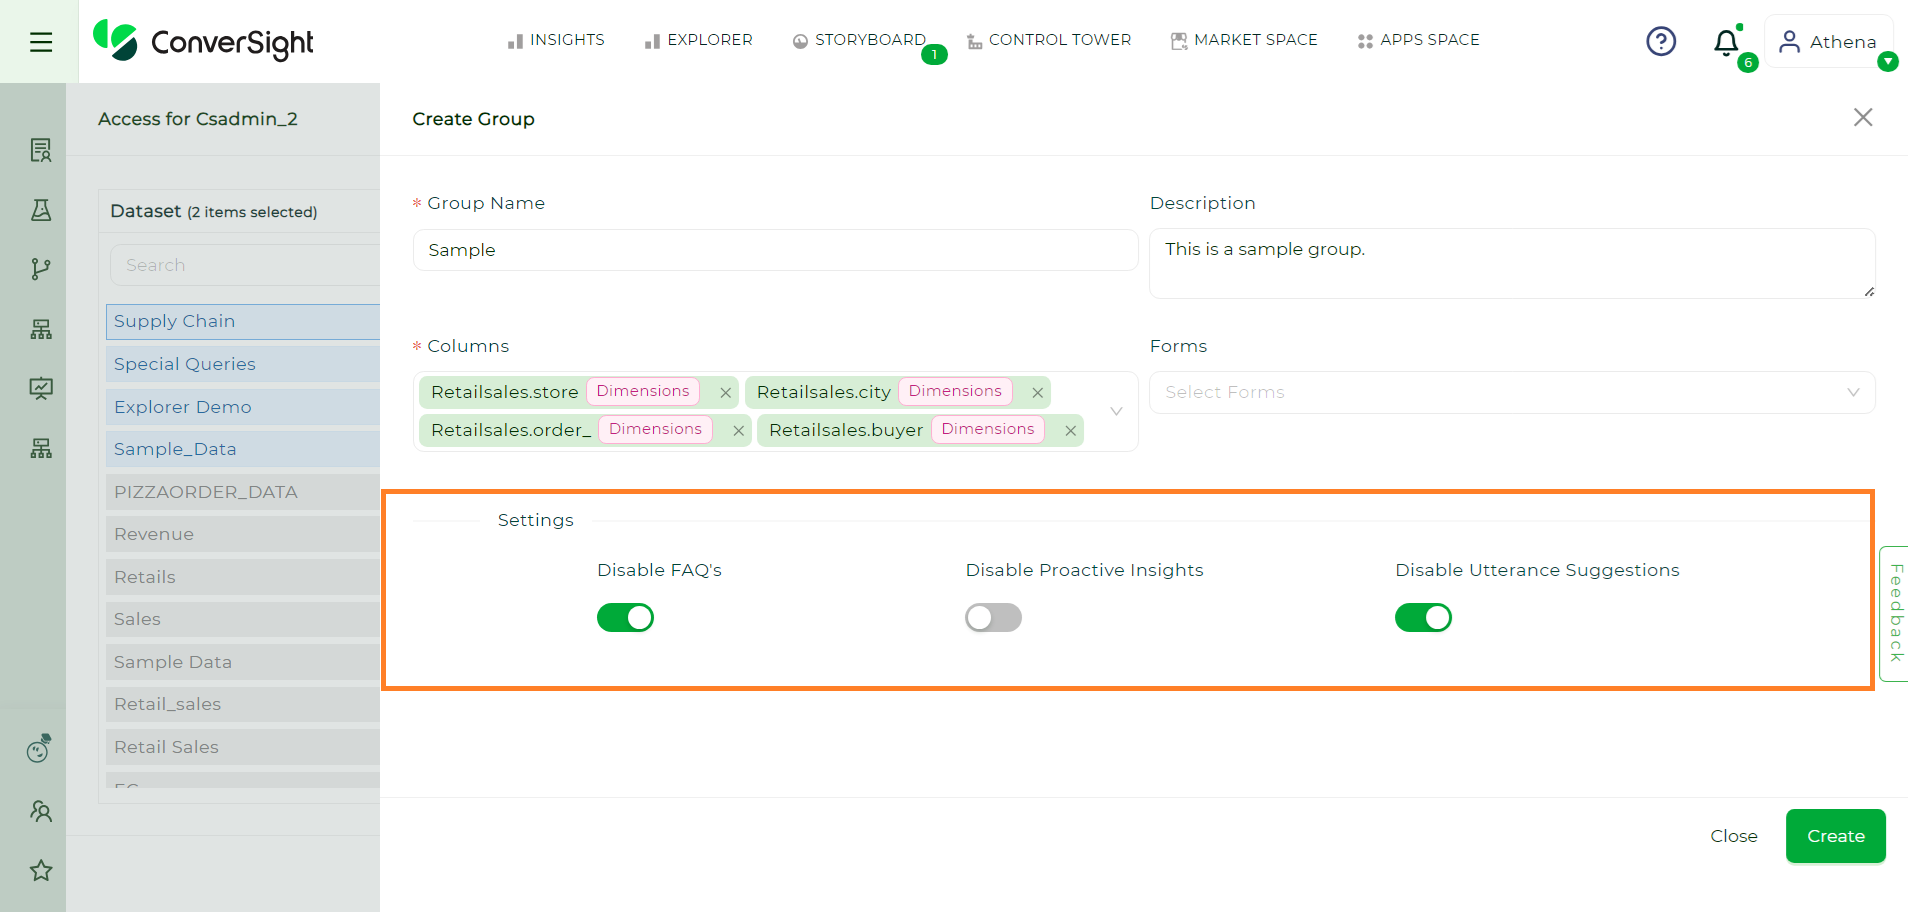
Access control#
After making the desired configurations, click on the Create button to create your group.
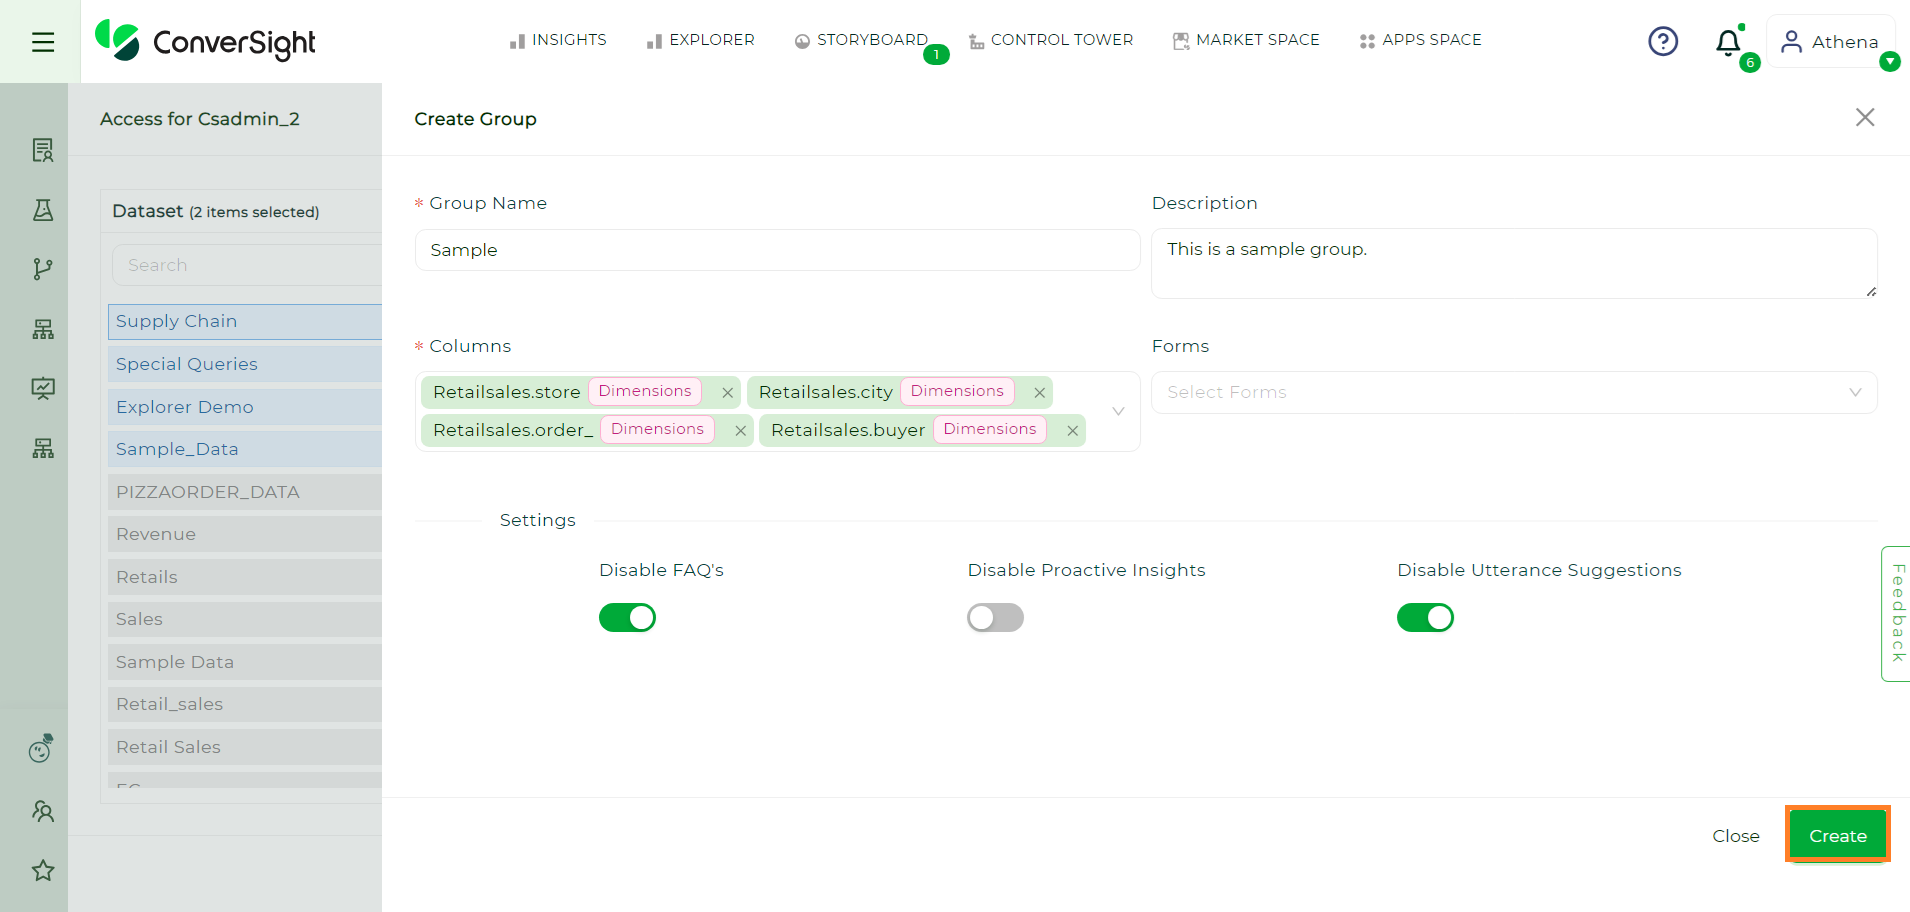
Create Button#
Edit Groups#
To edit the a Group click on the Edit icon. After making the desired Modifications click on the Update button.
Edit#
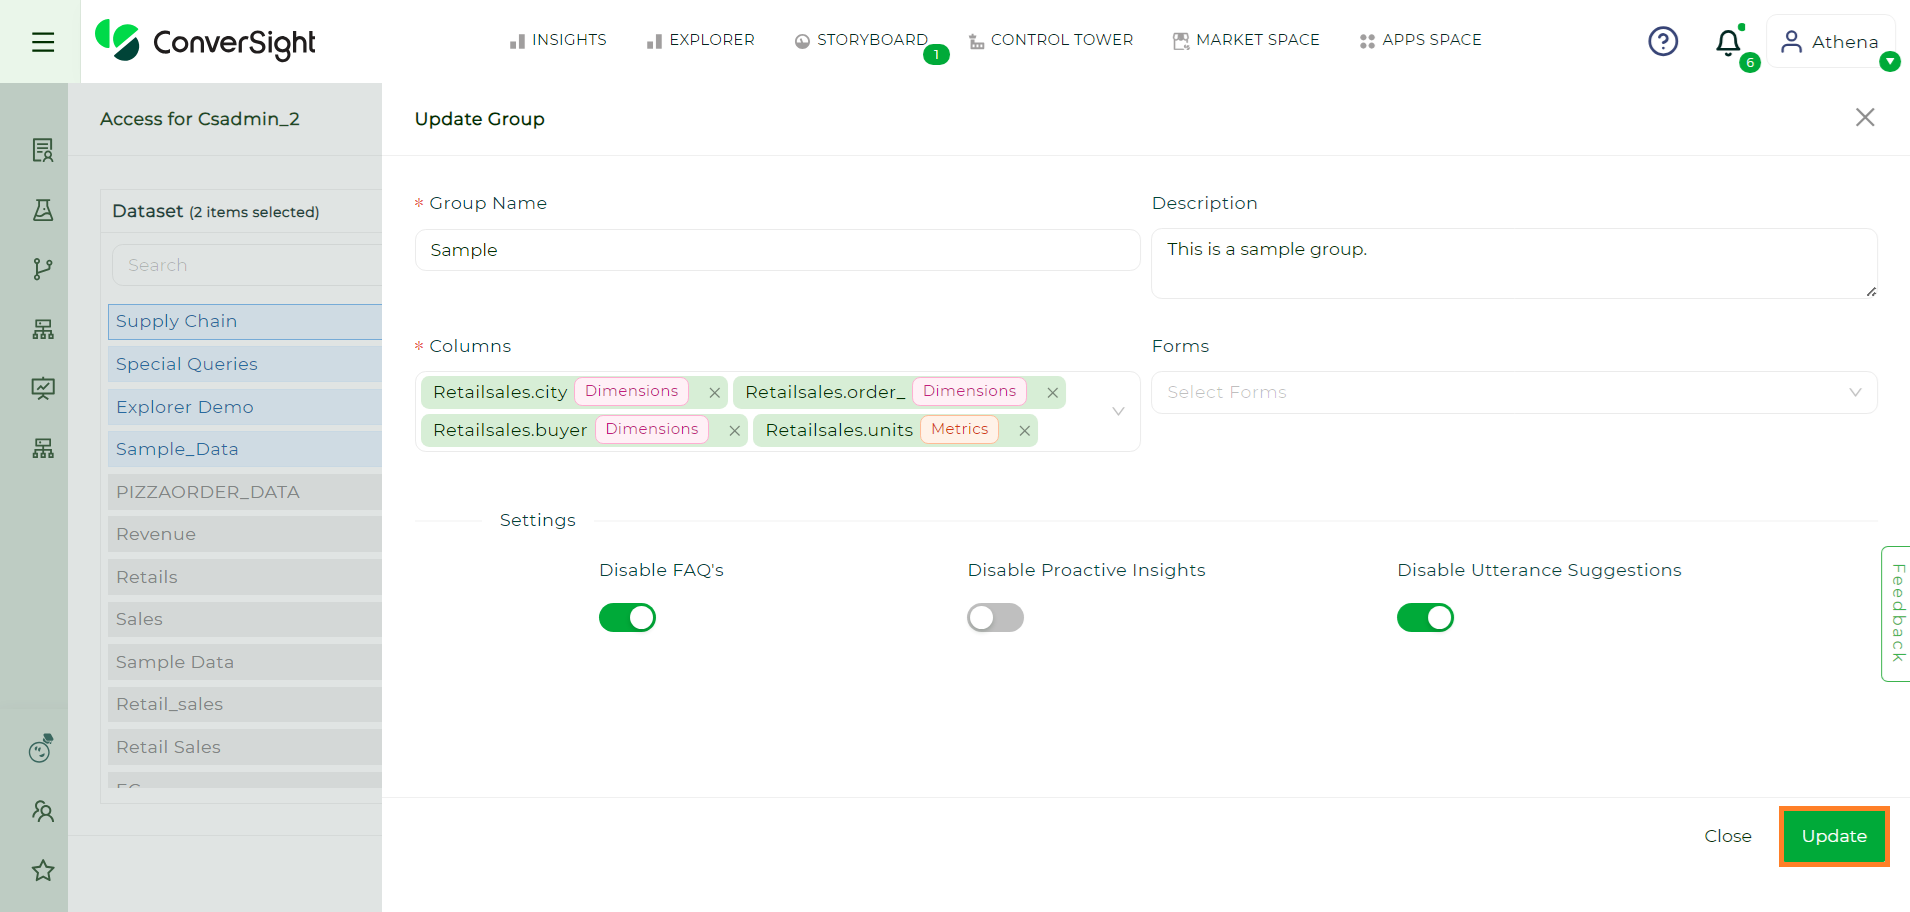
Update#
Roles and Groups through Data Management#
Creating Roles#
To create a Role, navigate to the dataset within the Data Management option under the Data Workbench menu.
Data Management#
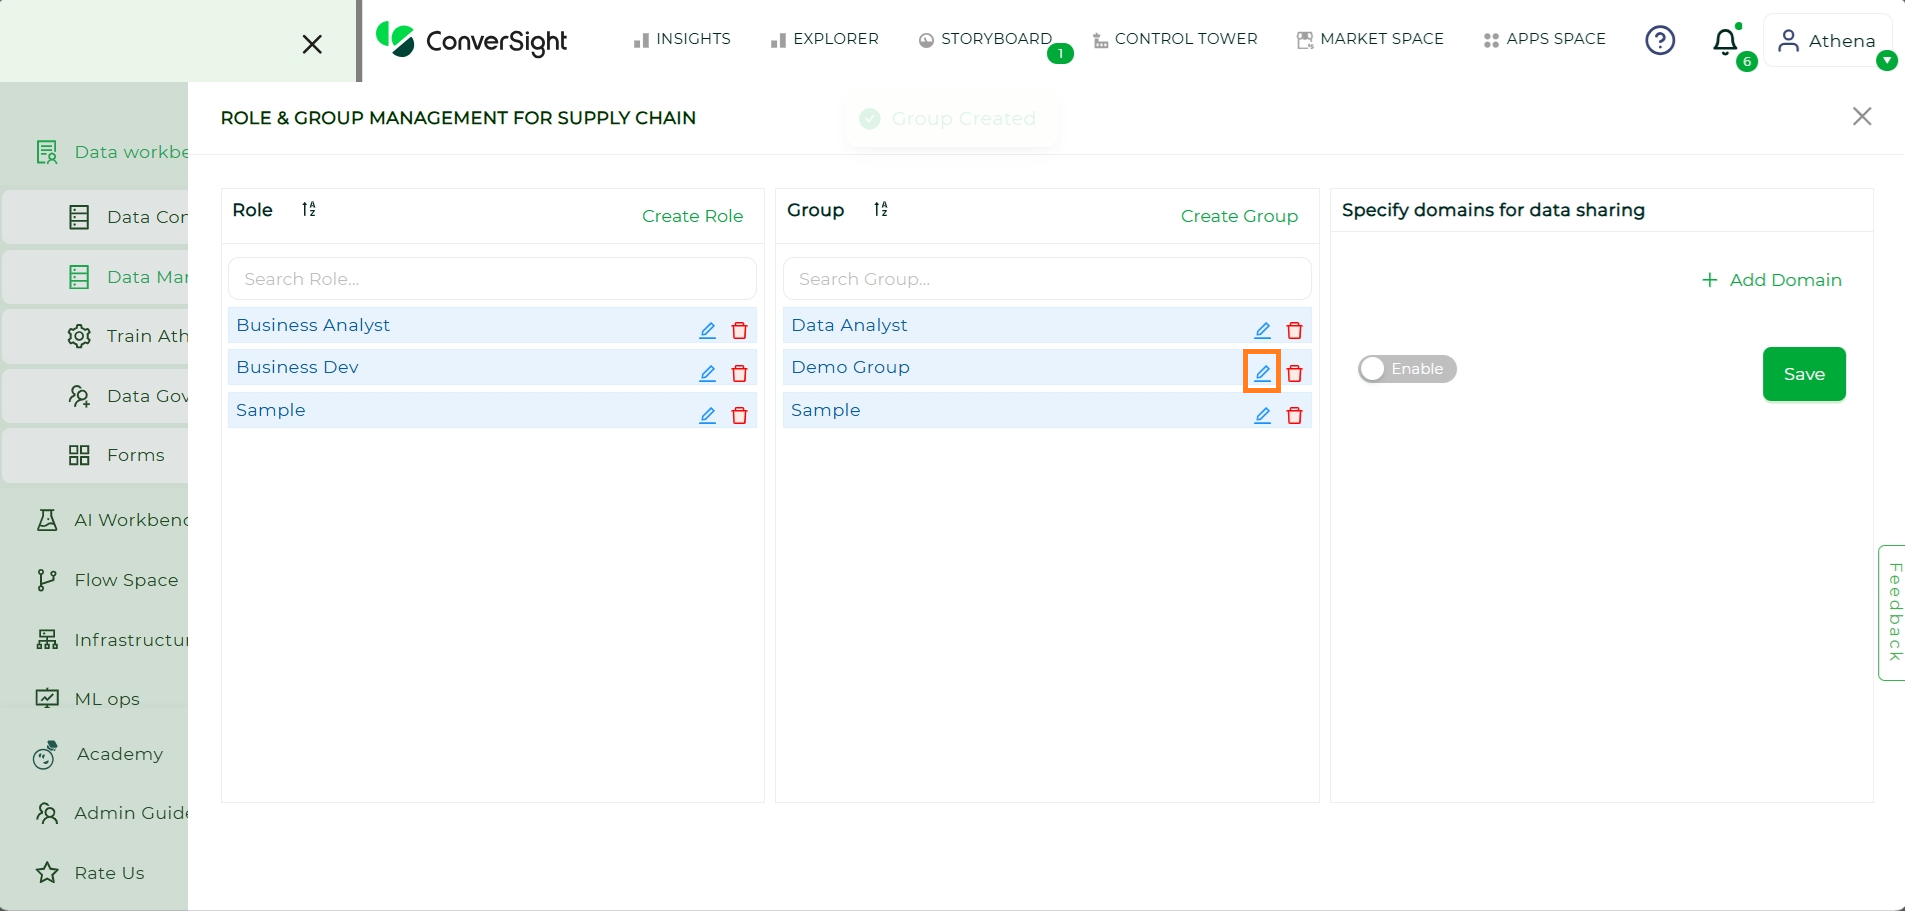
Select the Settings icon associated with the dataset containing the role you want to delete and then click on the Roles & Groups Management option.
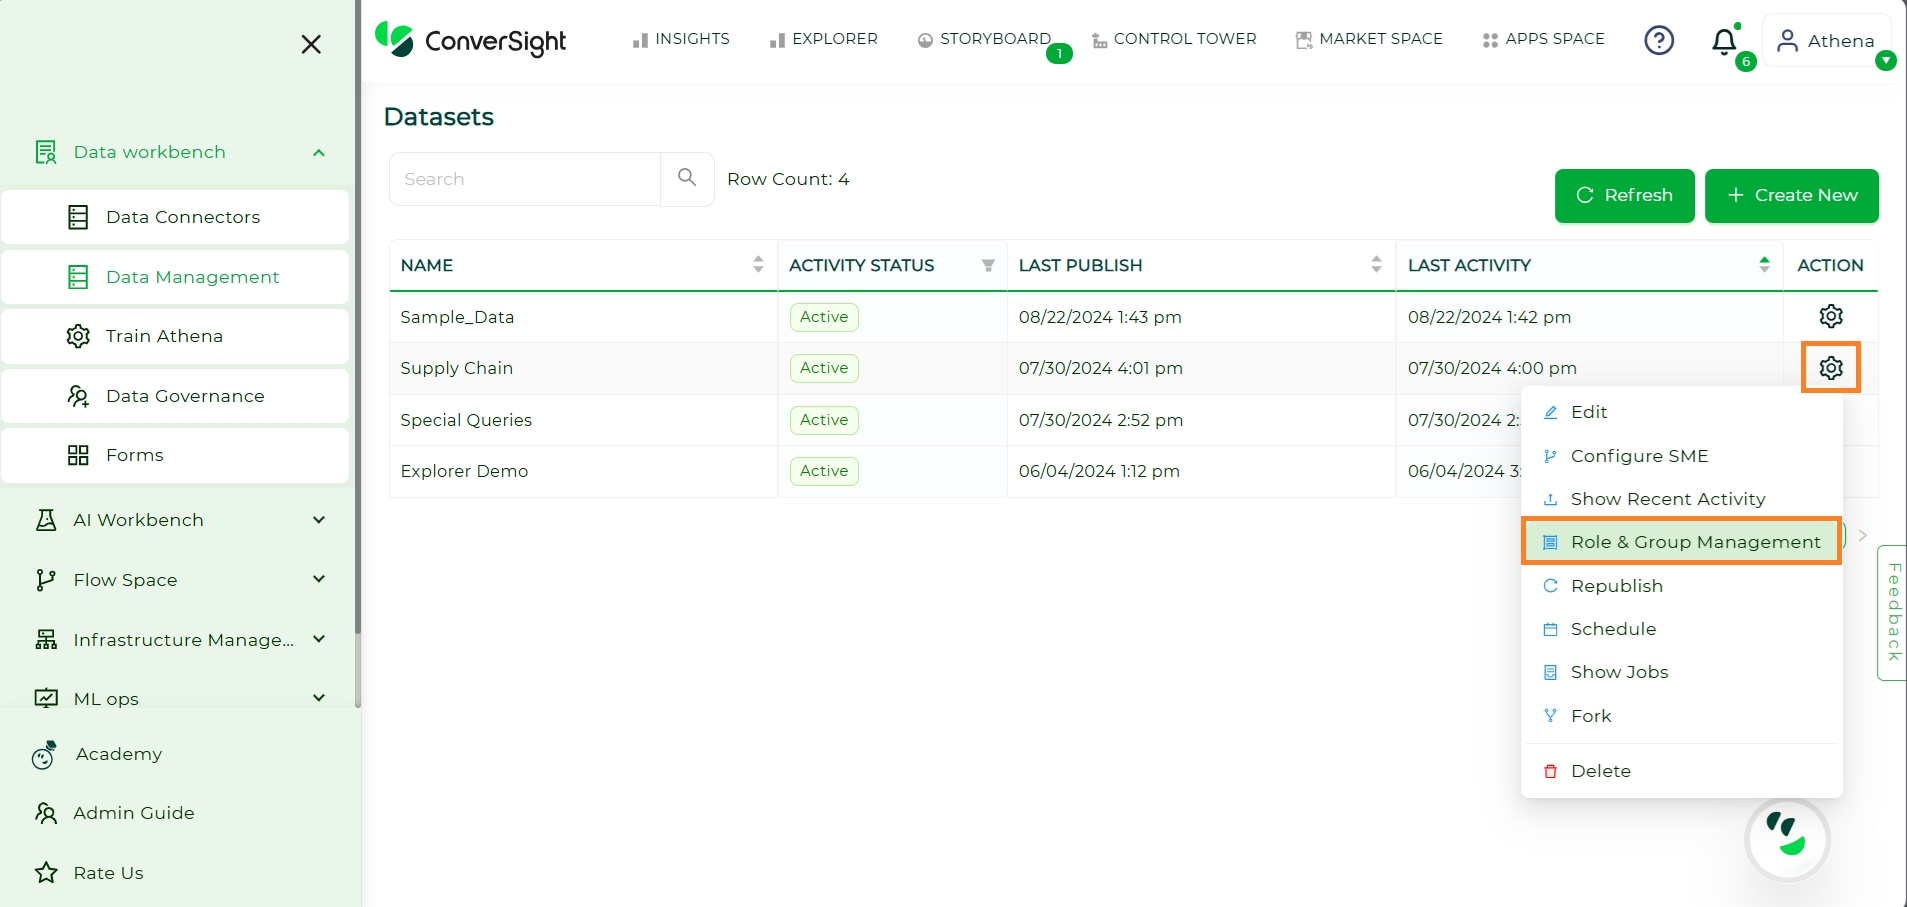
Roles & Management#
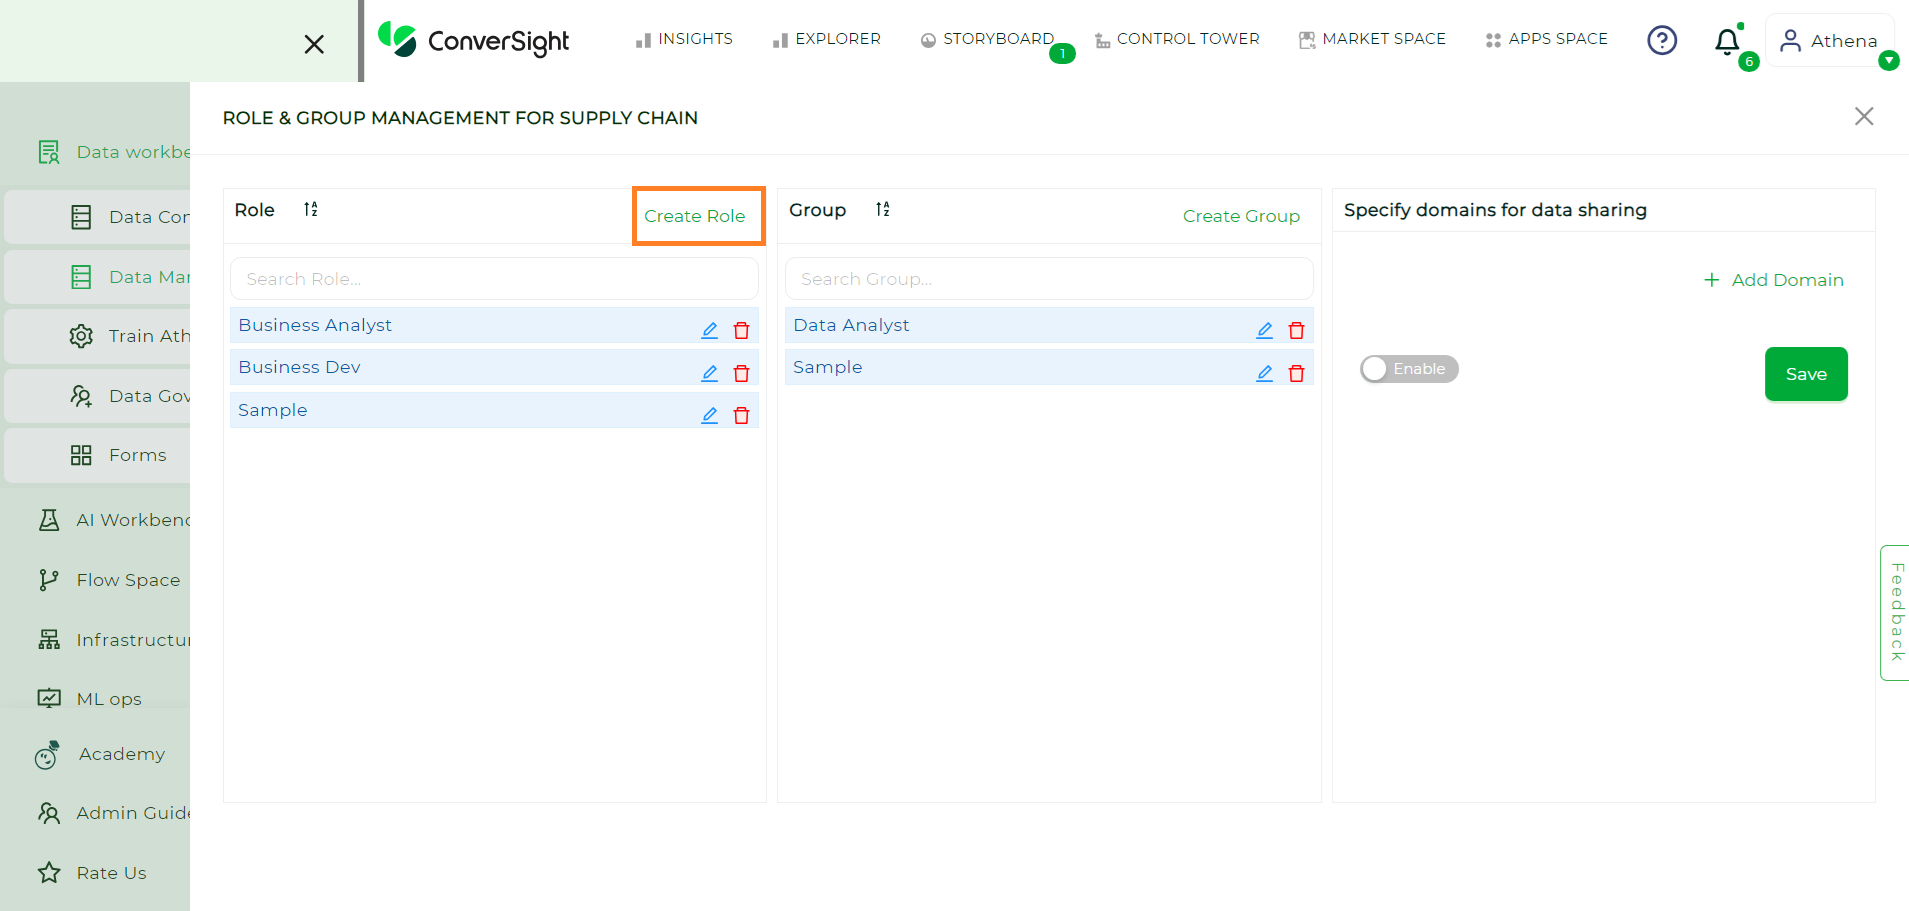
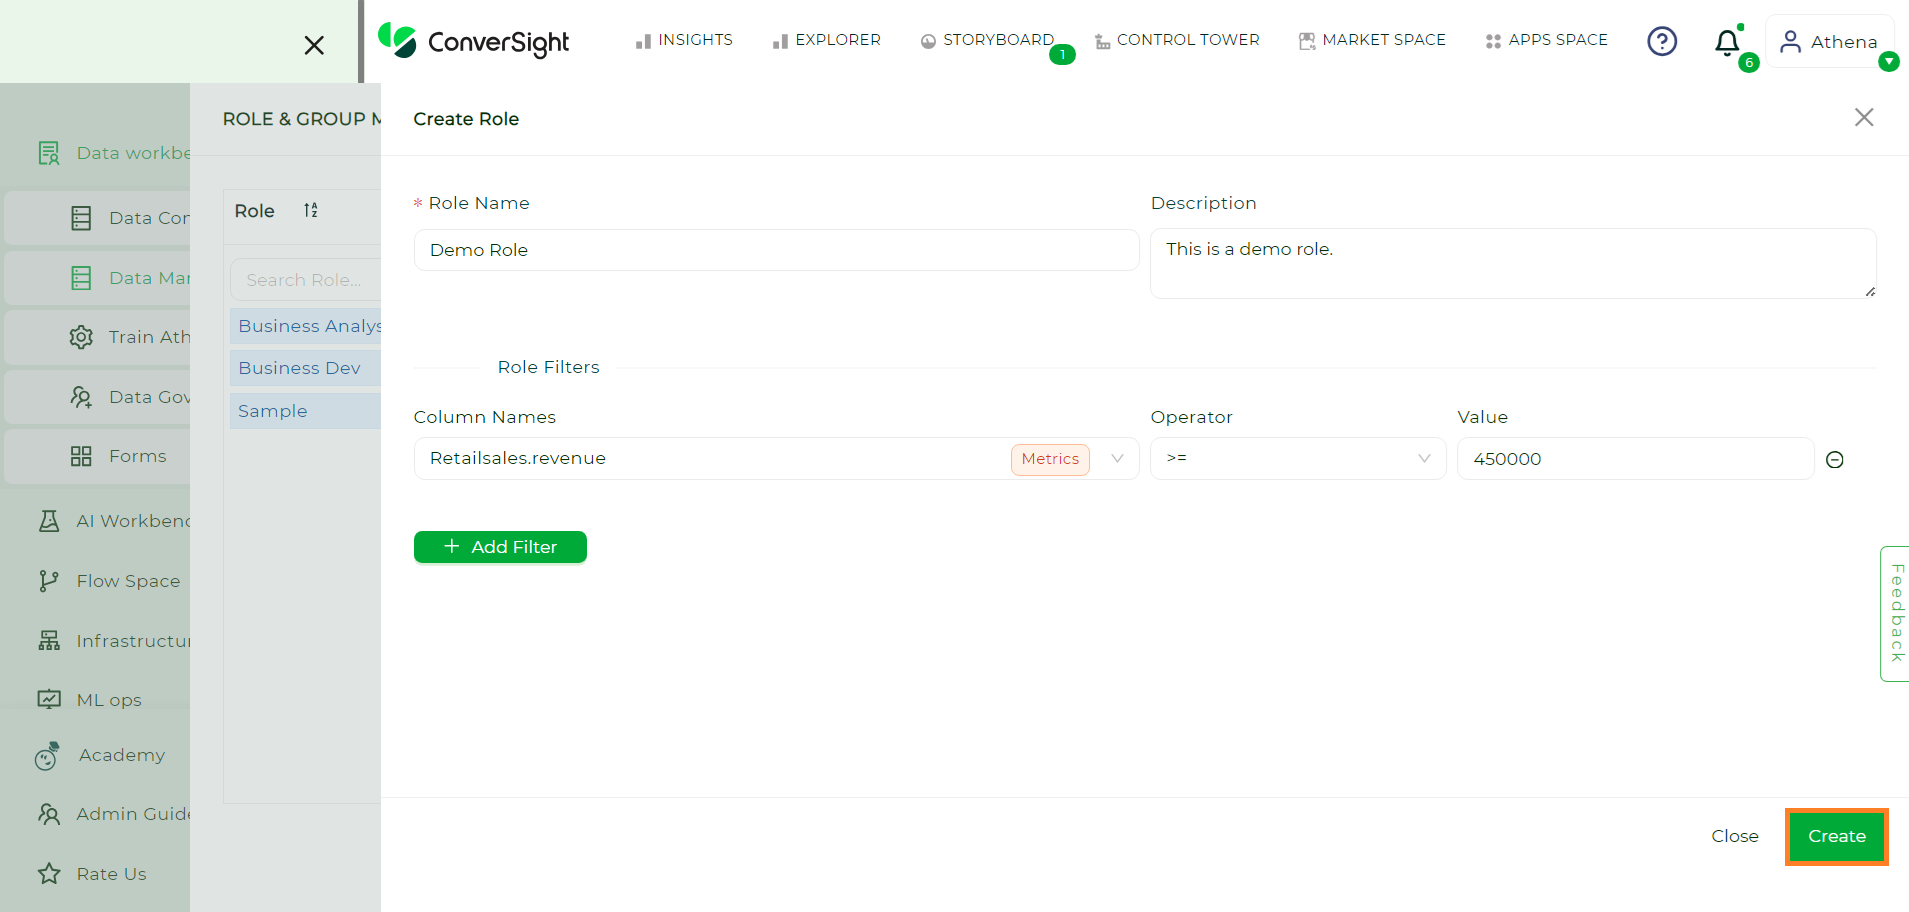
Click on Create Role and then provide the details of the Roles along with your desired filters.
Create Role#
Enter the role details and filters, proceed by clicking on the Create button.
Create Button#
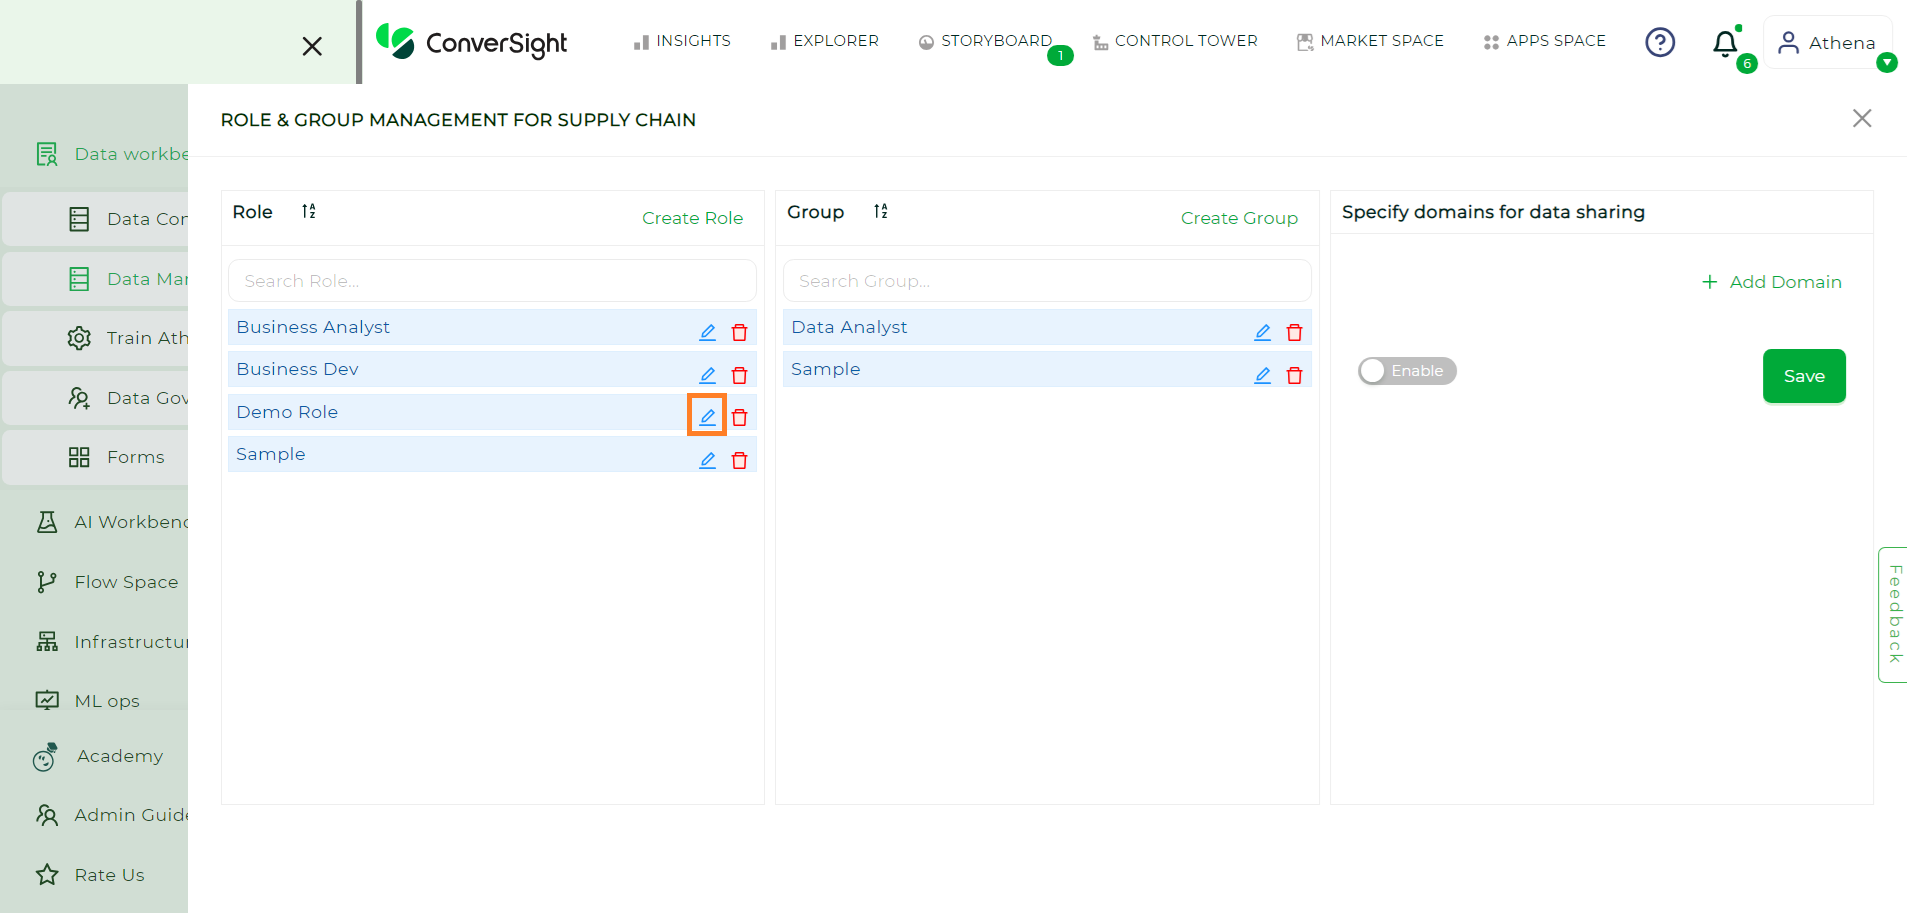
Edit Roles#
To edit a Role click on the Edit icon. After making the desired modifications click on the Update button.
Edit Role#
Update Button#
Delete Roles#
Click on the Delete icon of the associated Role.

Delete Role#
Create Groups#
To create a Group, select Create Group to input the group name and description. Customize your group’s columns from the dropdown menu.
Create Group#
Additionally, manage access to FAQs, Proactive Insights and utterance suggestions through the toggle settings.
Create Group#
After making the desired configurations, click on the Create button to create your group.
Create Button#
Edit Group#
To edit the a Group click on the Edit icon. After making the desired Modifications click on the Update button.
Edit#
Update#
Delete Group#
Click on the Delete icon of the associated Group.

Delete#